
Thinking out loud
Where we share the insights, questions, and observations that shape our approach.
Getting up to speed with Android Automotive OS development on Mac
Similar to how they did for the exploding smartphone market over ten years ago, customized infotainment operating systems and open-source software appear to be sweeping the car industry. The Android Automotive OS has been making headway in many market niches, starting with full-electric vehicles like Polestar a few years ago. It’s only a matter of time until the community and ecosystem mature enough to become a serious force for enabling mobile development on yet another front: the cars.
While Android Auto (a name easily confused with the topic I will be going over today) and Apple CarPlay have had a long-standing in the field, they came with several caveats and restrictions. Those largely pertain to the fact that many features-to-be would rely on low-level access to the hardware of the car itself. This proved to be difficult, with both solutions offering a limited set of human-machine interaction capabilities, such as a heads-up display (where available) and radio. With that in mind, the use case for providing apps for the actual OS running the car was clearly needed.
The community and documentation are still in their infancy and don’t yet provide a deep dive into Android Automotive OS. Moreover, the learning curve remains steep, but it’s definitely possible to piece together bits of information related to development and deployment. In this article, I attempt to do just that, all while emphasizing the MacOS side of things.
Prerequisites
As a general principle, Android development can either be done on a real device or a corresponding emulator. Given the sensitive nature of granting applications access to the actual car hardware, the app has to go the whole nine yards with Google Play Store eligibility. On top of that, it has to conform to one of several categories, e.g. a media app to be allowed in the AAOS system. The good news is that there’s a possibility for an app to mix and match categories.
Thus, vendors supporting the new ecosystem (as of now, among others, Volvo and Polestar) opted for creating a custom automotive device emulator that closely matches the specifications of the infotainment systems contained within their cars. Regrettably, Polestar and Volvo emulators contain proprietary code, are based on older Android releases, and do not yet support the ARM architecture, which is of special interest to developers working with ARM-based Macs.
While official AAOS emulators are available in Preview releases of Android Studio (from the Electric Eel version onwards), often the task at hand calls for customized hardware and parameters. In this case, a custom Android version would need to be built from source.
Building from source
Building from source code is a time-consuming enterprise that’s not officially supported outside 64-bit Linux platforms (regardless of the target architecture). With that in mind, choosing a dedicated AWS EC2 instance or a bare metal server for building the ARM versions of the emulator seems to be the best overall solution for Mac developers.
A requirement for unofficial builds on Mac devices seems to be having a disk partition with a case-sensitive file system and otherwise following some extra steps. I chose a dedicated build system because, in my opinion, it wasn't worth the trouble to set up an additional partition (for which I didn't really have the disk capacity).
The choice of the base Android release is largely dependent on the target device support, however, for ease of development, I would recommend choosing a recent one, e.g., 12.1 (aka 12L or Sv2). Mileage may vary in regards to actually supported versions, as vendors tend to use older and more stable releases.
After getting their hands on a development machine, one should prepare the build environment and follow instructions for building an AVD for Android Auto. The general workflow for building should include:
- downloading the source code – this may take up to an hour or two, even with decent connection and branch filtering,
- applying required modifications to the source, e.g., altering the default VHAL values or XML configuration,
- running the build – again, may take up to several hours; the more threads and memory available, the better,
- packing up the artifacts,
- downloading the AVD package.
Leaving out the usage specifics of the lunch and repo for now, let’s take a look at how we can make the default AAOS distribution fit our needs a little better.
Tailoring a device
VHAL (Vehicle Hardware Abstraction Layer) is an interface that defines the properties for OEMs to eventually implement. These properties may, for example, include telemetry data or perhaps some info that could be used to identify a particular vehicle.
In this example, we’re going to add a custom VIN entry to the VHAL. This will enable app developers to read VIN information from a supposed vehicle platform.
First off, let’s start with downloading the actual source code. As mentioned above, Android 12.1 (Sv2) is the release we’re going to go with. It supports version 32 of the API, which is more than enough to get us started.
In order to get sources, run the following command, having installed the source control tools :
<p>> repo init -u https://android.googlesource.com/platform/manifest -b android-12.1.0_r27 --partial-clone --clone-filter=blob:limit=10M</p>


<p>> repo sync -c -j16</p>
Partial clone capability and choice of a single branch make sure that the download takes as little time as possible.
After downloading the source, locate the DefaultConfig.h file and add the following entry to kVehicleProperties:
{.config =

     	{

             	.prop = toInt(VehicleProperty::INFO_VIN),

             	.access = VehiclePropertyAccess::READ,

             	.changeMode = VehiclePropertyChangeMode::STATIC,

     	},

 .initialValue = {.stringValue = "1GCARVIN123456789"}},
An overview of HAL properties can be found in the reference documentation .
Build
Having modified the default HAL implementation, we’re now free to run the build for an ARM target. Run the following instructions inside the AAOS source directory – using a screen is highly recommended if connecting through SSH:
screen

. build/envsetup.sh


lunch sdk_car_arm64-userdebug


m -j16      	                # build the requisite partitions


m emu_img_zip                   # pack emulator artifacts into a downloadable .zip
Note the sdk_car_arm64-userdebug target needed for emulation on ARM-powered Macs. A car_arm64-userdebug variant also exists. Make sure not to confuse the two – only the former has emulation capabilities! Try running lunch without parameters to see a full list of targets.
The -jXX parameter specifies the number of threads to use while building the Android. If the thread count is not provided, the build system will try and optimize the number of threads automatically. Patience is advised, as even with decent hardware resources, the compilation is bound to take a while.
The resulting emulator artifact should be available in the out/ directory under sdk-repo-linux-system-images.[suffix].zip to be downloaded via scp or your file transfer client of choice.
Running a custom emulator in Android Studio
Now that we have our bespoke emulator image built, there’s a little trick involved in making it available for local development without creating a whole distribution channel, as outlined in the manual.
First, locate the ~/Library/Android/sdk/system-images/android-32 folder and unzip your emulator archive there. The directory can be given an arbitrary name, but the overall structure should follow this layout:
~/Library/Android/sdk/system-images/android-32

|_ [your name]

   |_ arm64-v8a

E.g., ~/Library/Android/sdk/system-images/android-32/custom_aaos/arm64-v8a.
Second, download the example attached package.xml file and adjust the device name to fit your needs. A package.xml is added after downloading and unpacking the emulator sources from the Internet and needs to be recreated when unzipping locally. After restarting the Android Studio, Device Manager should have an option to use your brand new ARM image with an Automotive AVD of your choice.
After successfully running the emulator, a newly created VIN property should be visible in the Vhal Properties of Car Data. Nice one!
While reading VHAL property values is out of the scope of this article, it should be easy enough with a couple of Car library calls, and Google created an example app that does the very thing.
Downloading the above example (CarGearViewerKotlin) is highly recommended – if you’re able to build and run the app on the emulator, you’re all set!
Facilitating AAOS development on M1
One of the problems I stumbled upon during the development environment setup was that the Car library was not being detected by Android Studio, while the app still builds normally from CLI. This appears to be a known issue, with no official patch yet released (as of October 2022). However, a simple workaround to include a .jar of the Android Automotive library appears to work.
In case of running into any problems, import the library from ~/Library/Android/sdk/platforms/android-32/optional/android.car.jar by copying it into libs/ directory in the project root and add the following directive to your main build.gradle file, if not present:
dependencies {

	implementation fileTree(include: ['*.jar'], dir: 'libs')

	...

}
Once the project is re-imported into the IDE, Android Studio should be able to pick up the Android Car library for import and autocomplete suggestions.
The Real Deal
Emulators are sufficient for testing purposes, but what about real devices, such as branded infotainment centers? As mentioned before, at least two major vendors (Volvo and Polestar) offer the integrated Android Automotive experience out-of-the-box in their vehicles. System images and implementation details, however, are proprietary and require enrollment into their respective developer partnership programs. Polestar offers a free AV D that emulates Polestar 2 behavior, along with the screen size, frame and hardware controls – alas, currently only available for x86-64 platforms.
One of the alternatives worth considering is the installation of Android Automotive on a real device – be it a tablet or even a Raspberry Pi platform . Some modules will still require virtualization, but switching to a physical device could be a major step in the direction of better hardware compatibility.
All the above concerns raise the question – how to get the app to work on a real AAOS inside a car? I haven’t found a conclusive answer to that question, at least one that won’t involve third parties holding the actual documentation resources for their devices. It makes sense that some doors will stay closed to the general programming audience due to the security implications of creating apps for cars. No one, after all, would want their vehicle to be taken control of by a rogue party, would they?
Final thoughts
Programming for Android Automotive is still an adventurous endeavor. Even though the system has been around since 2017 (with APIs open to public in mid-2019), official documentation can still feel somewhat inaccessible to newcomers, and the developer community is still in its budding phase. This requires one to piece together various bits of official guides and general Stack Overflow knowledge.
Bottom line: AAOS is still behind the degree of engagement that the regular Android operating system has been enjoying so far. The future is looking bright, however, with vendors such as GM, Honda, BMW, and Ford eager to jump on the automotive development bandwagon in years to come. If that’s the case, the ecosystem will inevitably expand – and so will the community and the support it provides.

gRPC streaming
Previous articles presented what Protobuf is and how it can be combined with gRPC to implement simple synchronous API. However, it didn’t present the true power of gRPC, which is streaming, fully utilizing the capabilities of HTTP/2.0.
Contract definition
We must define the method with input and output parameters like the previous service. To follow the separation of concerns, let’s create a dedicated service for GPS tracking purposes. Our existing proto should be extended with the following snippet.
message SubscribeRequest {
string vin = 1;
}
service GpsTracker {
rpc Subscribe(SubscribeRequest) returns (stream Geolocation);
}
The most crucial part here of enabling streaming is specifying it in input or output type. To do that, a keyword stream is used. It indicates that the server will keep the connection open, and we can expect Geolocation messages to be sent by it.
Implementation
@Override
public void subscribe(SubscribeRequest request, StreamObserver<Geolocation> responseObserver) {
responseObserver.onNext(
Geolocation.newBuilder()
.setVin(request.getVin())
.setOccurredOn(TimestampMapper.convertInstantToTimestamp(Instant.now()))
.setCoordinates(LatLng.newBuilder()
.setLatitude(78.2303792628867)
.setLongitude(15.479358124673292)
.build())
.build());
}
The simple implementation of the method doesn’t differ from the implementation of a unary call. The only difference is in how onNext the method behaves; in regular synchronous implementation, the method can’t be invoked more than once. However, for method operating on stream, onNext may be invoked as many times as you want.
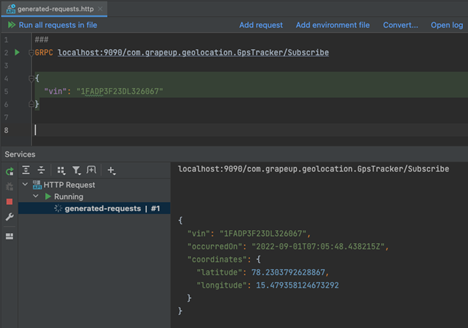
As you may notice on the attached screenshot, the geolocation position was returned but the connection is still established and the client awaits more data to be sent in the stream. If the server wants to inform the client that there is no more data, it should invoke: the onCompleted method; however, sending single messages is not why we want to use stream.
Use cases for streaming capabilities are mainly transferring significant responses as streams of data chunks or real-time events. I’ll try to demonstrate the second use case with this service. Implementation will be based on the reactor ( https://projectreactor.io / ) as it works well for the presented use case.
Let’s prepare a simple implementation of the service. To make it work, web flux dependency will be required.
implementation 'org.springframework.boot:spring-boot-starter-webflux'
We must prepare a service for publishing geolocation events for a specific vehicle.
InMemoryGeolocationService.java
import com.grapeup.grpc.example.model.GeolocationEvent;
import org.springframework.stereotype.Service;
import reactor.core.publisher.Flux;
import reactor.core.publisher.Sinks;
@Service
public class InMemoryGeolocationService implements GeolocationService {
private final Sinks.Many<GeolocationEvent> sink = Sinks.many().multicast().directAllOrNothing();
@Override
public void publish(GeolocationEvent event) {
sink.tryEmitNext(event);
}
@Override
public Flux<GeolocationEvent> getRealTimeEvents(String vin) {
return sink.asFlux().filter(event -> event.vin().equals(vin));
}
}
Let’s modify the GRPC service prepared in the previous article to insert the method and use our new service to publish events.
@Override
public void insert(Geolocation request, StreamObserver<Empty> responseObserver) {
GeolocationEvent geolocationEvent = convertToGeolocationEvent(request);
geolocationRepository.save(geolocationEvent);
geolocationService.publish(geolocationEvent);
responseObserver.onNext(Empty.newBuilder().build());
responseObserver.onCompleted();
}
Finally, let’s move to our GPS tracker implementation; we can replace the previous dummy implementation with the following one:
@Override
public void subscribe(SubscribeRequest request, StreamObserver<Geolocation> responseObserver) {
geolocationService.getRealTimeEvents(request.getVin())
.subscribe(event -> responseObserver.onNext(toProto(event)),
responseObserver::onError,
responseObserver::onCompleted);
}
Here we take advantage of using Reactor, as we not only can subscribe for incoming events but also handle errors and completion of stream in the same way.
To map our internal model to response, the following helper method is used:
private static Geolocation toProto(GeolocationEvent event) {
return Geolocation.newBuilder()
.setVin(event.vin())
.setOccurredOn(TimestampMapper.convertInstantToTimestamp(event.occurredOn()))
.setSpeed(Int32Value.of(event.speed()))
.setCoordinates(LatLng.newBuilder()
.setLatitude(event.coordinates().latitude())
.setLongitude(event.coordinates().longitude())
.build())
.build();
}
Action!
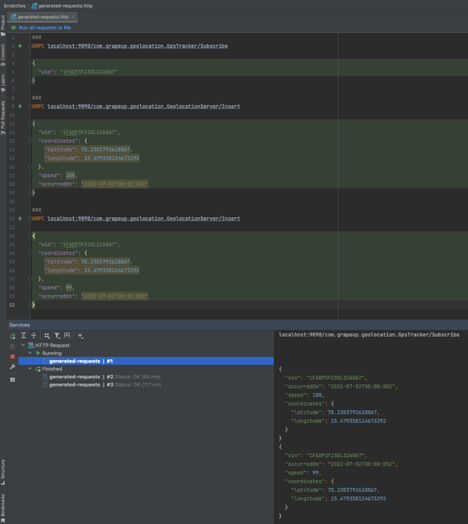
As you may be noticed, we sent the following requests with GPS position and received them in real-time from our open stream connection. Streaming data using gRPC or another tool like Kafka is widely used in many IoT systems, including Automotive .
Bidirectional stream
What if our client would like to receive data for multiple vehicles but without initial knowledge about all vehicles they are interested in? Creating new connections for each vehicle isn’t the best approach. But worry no more! While using gRPC, the client may reuse the same connection as it supports bidirectional streaming, which means that both client and server may send messages using open channels.
rpc SubscribeMany(stream SubscribeRequest) returns (stream Geolocation);
Unfortunately, IntelliJ doesn’t allow us to test this functionality with their built-in client, so we have to develop one ourselves.
localhost:9090/com. grapeup.geolocation.GpsTracker/SubscribeMany
com.intellij.grpc.requests.RejectedRPCException: Unsupported method is called
Our dummy client could look something like that, based on generated classes from the protobuf contract:
var channel = ManagedChannelBuilder.forTarget("localhost:9090")
.usePlaintext()
.build();
var observer = GpsTrackerGrpc.newStub(channel)
.subscribeMany(new StreamObserver<>() {
@Override
public void onNext(Geolocation value) {
System.out.println(value);
}
@Override
public void onError(Throwable t) {
System.err.println("Error " + t.getMessage());
}
@Override
public void onCompleted() {
System.out.println("Completed.");
}
});
observer.onNext(SubscribeRequest.newBuilder().setVin("JF2SJAAC1EH511148").build());
observer.onNext(SubscribeRequest.newBuilder().setVin("1YVGF22C3Y5152251").build());
while (true) {} // to keep client subscribing for demo purposes :)
If you send the updates for the following random VINs: JF2SJAAC1EH511148 , 1YVGF22C3Y5152251 , you should be able to see the output in the console. Check it out!
Tip of the iceberg
Presented examples are just gRPC basics; there is much more to it, like disconnecting from the channel from both ends and reconnecting to the server in case of network failure. The following articles were intended to share with YOU that gRPC architecture has so much to offer, and there are plenty of possibilities for how it can be used in systems. Especially in systems requiring low latency or the ability to provide client code with strict contract validation.

Dependency injection in Cucumber-JVM: Sharing state between step definition classes
It's an obvious fact for anyone who's been using Cucumber for Java in test automation that steps need to be defined inside a class. Passing test state from one step definition to another can be easily achieved using instance variables, but that only works for elementary and small projects. In any situation where writing cucumber scenarios is part of a non-trivial software delivery endeavor, Dependency Injection (DI) is the preferred (and usually necessary!) solution. After reading the article below, you'll learn why that's the case and how to implement DI in your Cucumber-JVM tests quickly.
Preface
Let's have a look at the following scenario written in Gherkin:
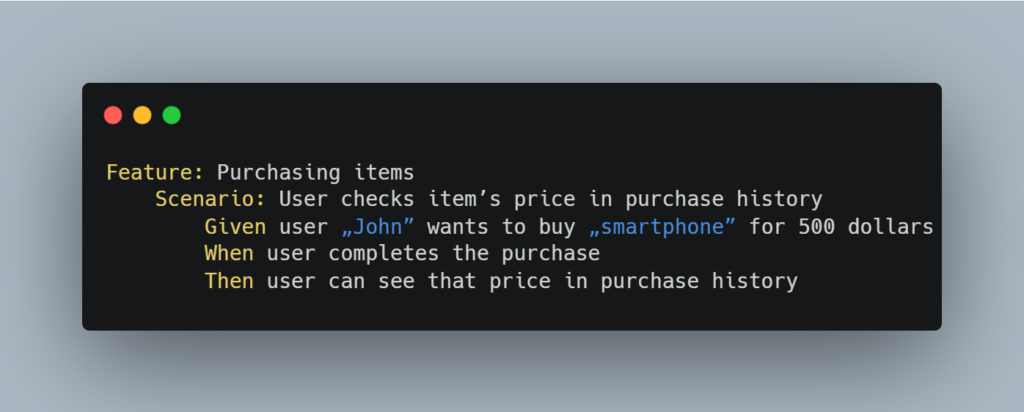
If we assume that it's part of a small test suite, then its implementation using step definitions within the Cucumber-JVM framework could look like this:
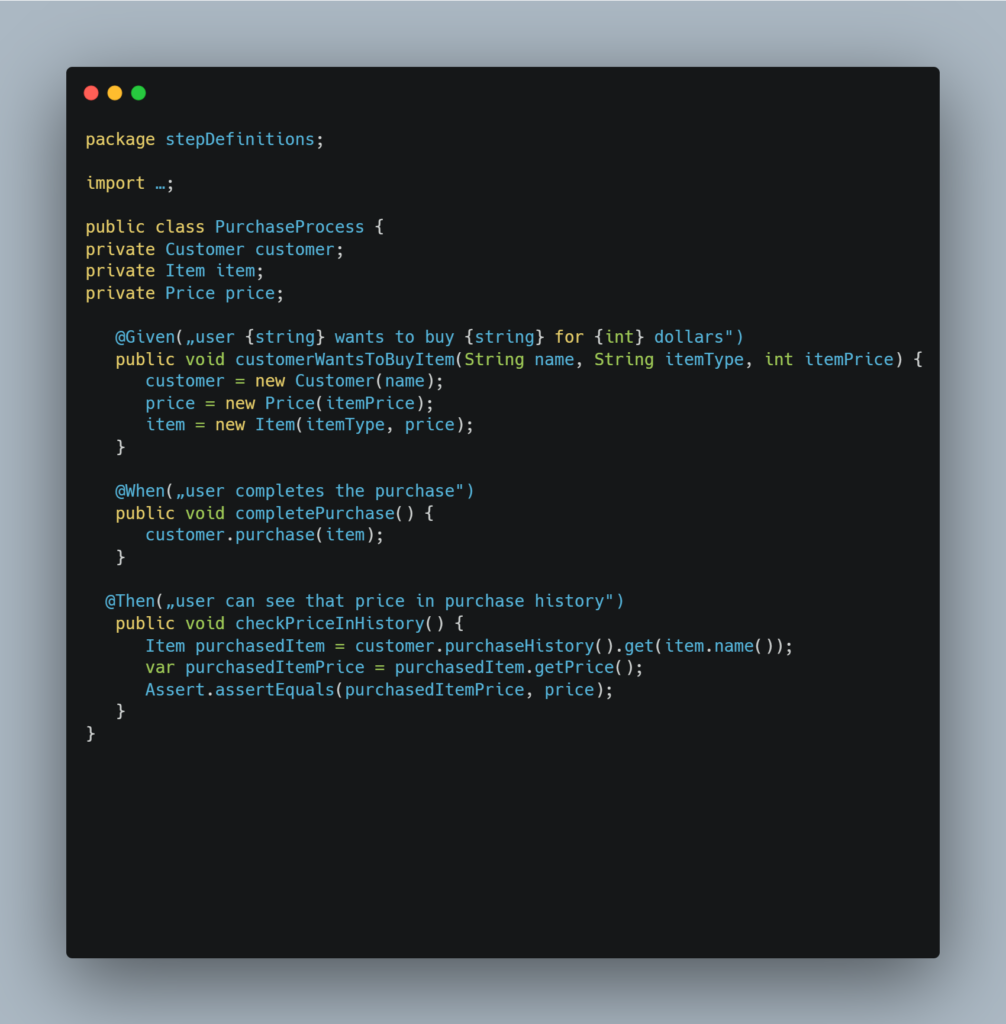
In the example above, the data is passed between step definitions (methods) through instance variables. This works because the methods are in the same class – PurchaseProcess, since instance variables are generally accessible only inside the same class that declares them.
Problem
The number of step definitions grows when the number of Cucumber scenarios grows. Sooner or later, this forces us to split our steps into multiple classes - to maintain code readability and maintainability, among other reasons. Applying this truism to the previous example might result in something like this:
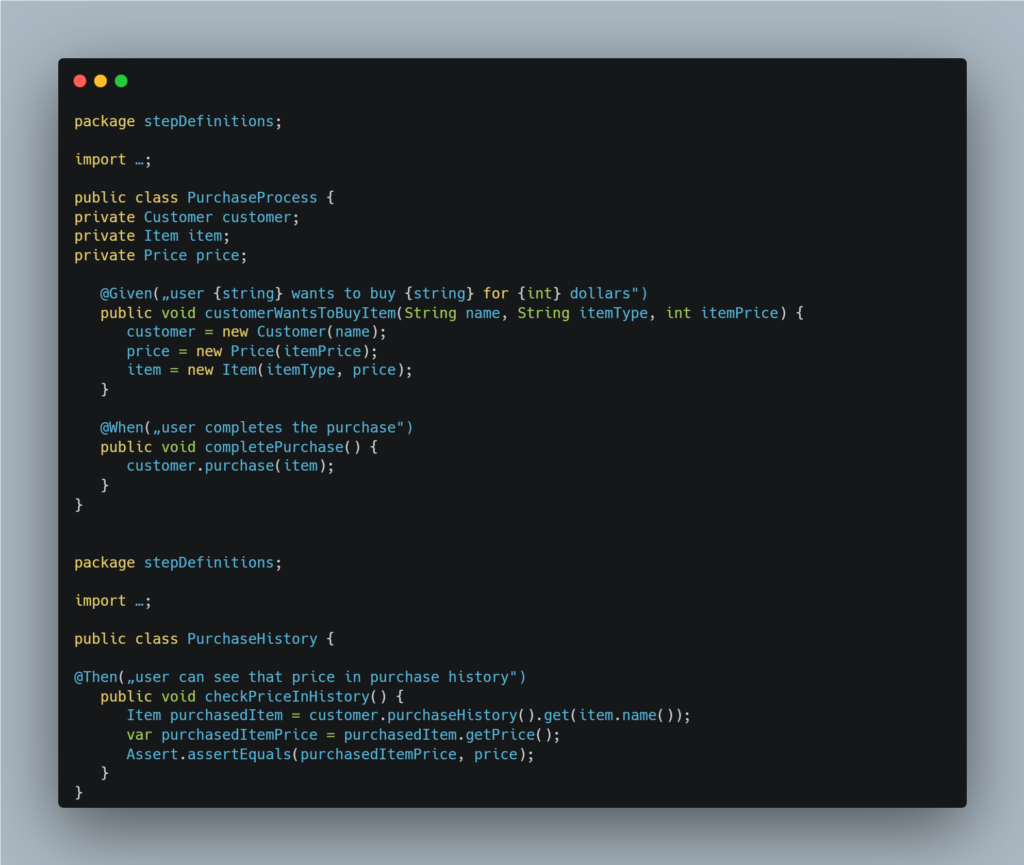
But now we face a problem: the checkPriceInHistory method moved into the newly created PurchaseHistory class can't freely access data stored in instance variables of its original PurchaseProcess class.
Solution
So how do we go about solving this pickle? The answer is Dependency Injection (DI) – the recommended way of sharing the state between steps in Cucumber-JVM.
If you're unfamiliar with this concept, then go by Wikipedia's definition:
"In software engineering , dependency injection is a design pattern in which an object or function receives other objects or functions that it depends on. A form of inversion of control , dependency injection aims to separate the concerns of constructing and using objects, leading to loosely coupled programs. [1] [2] [3] The pattern ensures that an object or function which wants to use a given service should not have to know how to construct those services. Instead, the receiving ' client ' (object or function) is provided with its dependencies by external code (an 'injector'), which it is not aware of." [1]
In the context of Cucumber, to use dependency injection is to "inject a common object in each class with steps. An object that is recreated every time a new scenario is executed." [2]
Thus Comes PicoContainer
JVM implementation of Cucumber supports several DI modules: PicoContainer, Spring, Guice, OpenEJB, Weld, and Needle. PicoContainer is recommended if your application doesn't already use another one. [3]
The main benefits of using PicoContainer over other DI modules steam from it being tiny and simple:
- It doesn't require any configuration
- It doesn't require your classes to use any APIs
- It only has a single feature – it instantiates objects [4]
Implementation
To use PicoContainer with Maven, add the following dependency to your pom.xml :
<dependency>
<groupId>io.cucumber</groupId>
<artifactId>cucumber-picocontainer</artifactId>
<version>7.8.1</version>
<scope>test</scope>
</dependency>
If using Gradle, add:
compile group: 'io.cucumber', name: 'cucumber-picocontainer', version: ‚7.8.1’
To your build.gradle file.
Now let's go back to our example code. The implementation of DI using PicoContainer is pretty straightforward. First, we have to create a container class that will hold the common data:
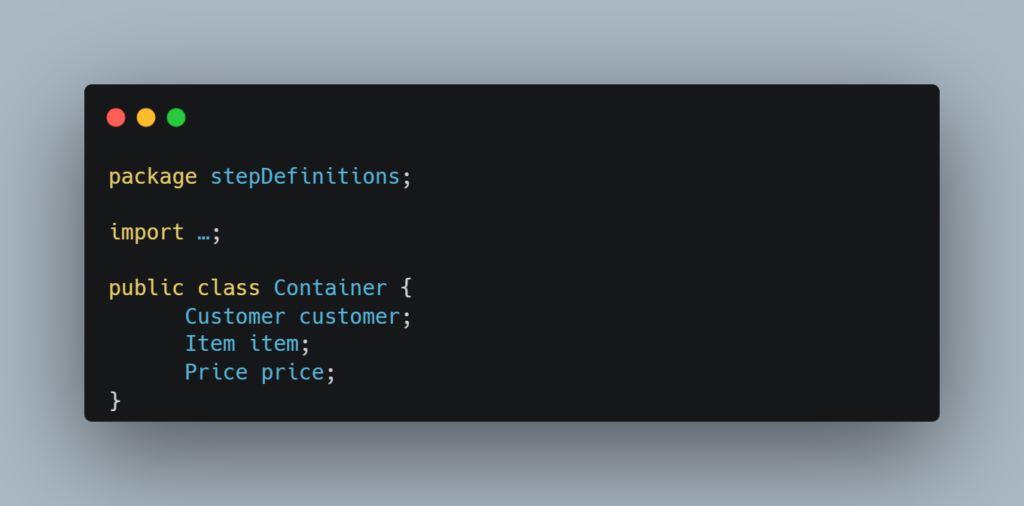
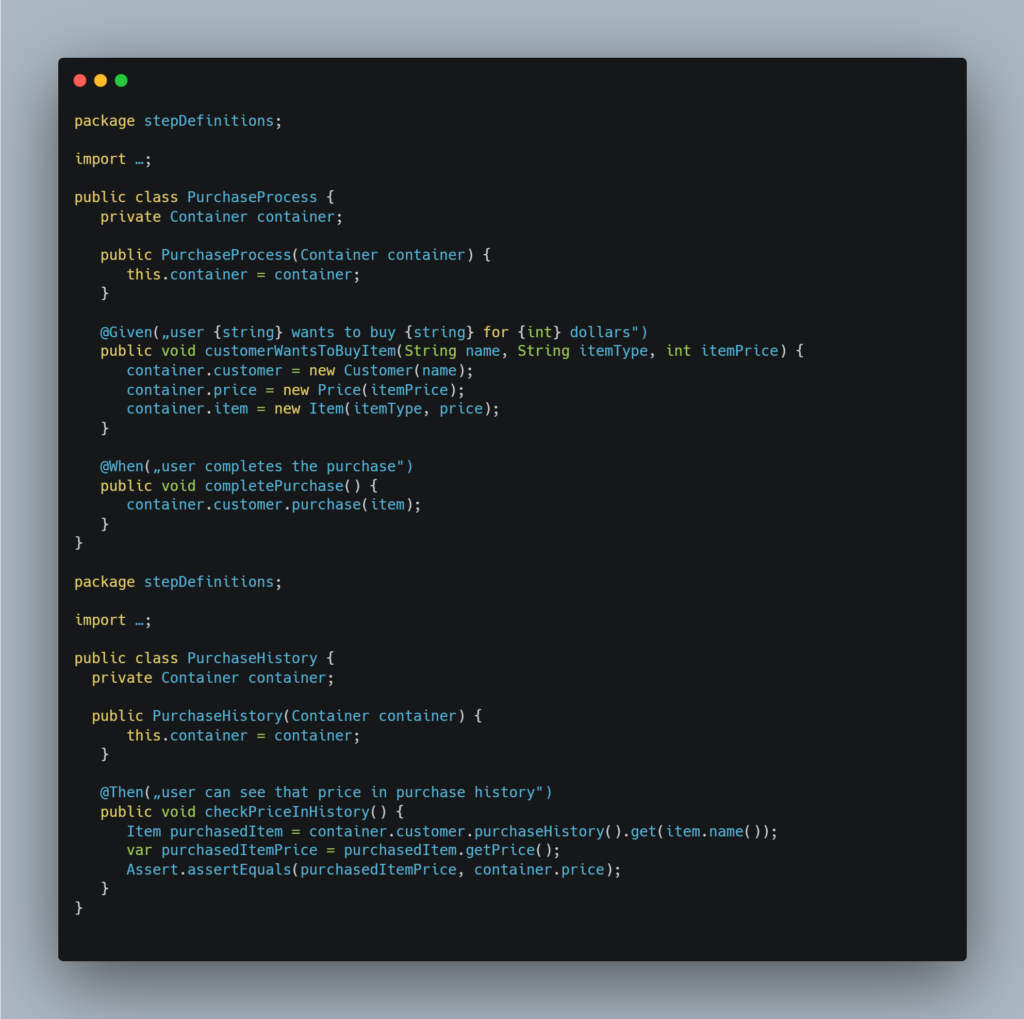
Then we need to add a constructor injection to implement the PurchaseProcess and PurchaseHistory classes. This boils down to the following:
- creating a reference variable of the Container class in the current step classes
- initializing the reference variable through a constructor
Once the changes above are applied, the example should look like this:
Conclusion
PicoContainer is lightweight and easy to implement. It also requires minimal changes to your existing code, helping to keep it lean and readable. These qualities make it a perfect fit for any Cucumber-JVM project since sharing test context between classes is a question of 'when' and not 'if' in essentially any test suite that will grow beyond a few scenarios.

Android Automotive OS 13: How to build and run the latest OS on Raspberry Pi 4B
Building an Android Automotive OS might not be a difficult task on its own, but the lack of good tutorials makes it exceptionally hard. It only gets harder if you don't have at hand any specialized hardware like R-Car or Dragonboard. However, you can easily get a Raspberry Pi - a small ARM-powered, multi-usage computer and a perfect candidate to run AAOS. To make the process easier for everyone struggling with this kind of task, in this article, I'll explain step-by-step how to build and run the latest version: Android Automotive OS 13.
Let's get started!
Prerequisites
To build the system, you will need a Linux. You can use WSL or MacOS (remember, you need a case-sensitive file system), but pure Linux is the best option.
Hardware
As in the previous article , you need a Raspberry Pi 4B microcomputer, a power adapter (or you can power it from your PC with a USB cable), a memory card, and a display. It's nice to have a touchscreen, but you can use your mouse and, optionally, a keyboard if more convenient.
Another nice-to-have element is a USB-TTL bridge for debugging. Find my previous article for more details on how to use it.
TL;DR;
If you're looking for the effortless way, go to https://github.com/grapeup/aaos_local_manifest and follow the readme. There are just a few commands to download, build and create a writeable IMG file for your Raspberry. But you need a few hours to download and build it anyway. Warning! It may not start if you won’t adjust the display settings (see below for details).
Adjusting AOSP to make it AAOS
This project is based on Raspberry Vanilla by KonstaT - a great AOSP port for Raspberry Pi. It covers everything you need to run a pure Android on your Raspberry - an adjusted kernel, hardware drivers, etc. However, there is no automotive build, so you need to construct it.
There are four repositories in github.com/grapeup regarding AAOS – three forks based on Raspberry Vanilla and one new one.
The repository aaos_local_manifest contains a list of modified and new repositories. All significant changes are located in device/brcm/rpi4 and device/brcm/rpi4-car projects defined in the manifest_brcm_rpi4.xml file. In the readme of this repository, you'll find steps to clone and build the project.
The next repository, aaos_device_brcm_rpi4 , contains three elements:
The first and most important is to utilize the new rpi4-car project and remove conflicting items from the base project.
In the aosp_rpi4.mk file, there is a new line
$(call inherit-product, device/brcm/rpi4-car/rpi4_car.mk)
to include a new project.
In the device.mk file, the product characteristic is changed to " automotive,nosdcard " , and all custom overlays are removed, along with the overlay directory next to the file.
In the manifest.xml file, the " android.hardware.automotive.vehicle " HAL (Hardware Abstraction Layer) is added.
The second element is to configure the build for the display I use . I had to set the screen resolution in vendor.prop and set the screen density in BoardConfig.mk . You probably don’t need such changes if you use a standard PC monitor, or you need some other one for your custom display. Be aware that the system won’t start at all if the resolution configured here is not supported by your display.
The last element contains my regional/language settings in aosp_rpi4.mk . I've decided to use this file, as it's not automotive-related, and to leave it in the code to show how to adjust it if needed.
The main part
The most major changes are located in the aaos_device_brcm_rpi4_car repository.
The rpi4_car.mk file is based on device/generic/car/common/car.mk with few changes.
Conditional, special settings for the Generic System Images are removed along with the emulator configuration ( device/generic/car/common/config.ini ) and the emulator audio package ( android.hardware.audio.service-caremu ) .
Instead, you need a mixture of vendor-specific and board-specific components, not included in the common/car makefile designed for an emulator.
Android Automotive OS is strictly coupled with an audio engine, so you need to add an automotive audio control package (android.hardware.automotive.audiocontrol@2.0-service ) to make it work, even if you don’t want to connect any speakers to your board. Also, AAOS uses a special display controller with the ability to use two displays at the same time ( android.frameworks.automotive.display@1.0-service ) , so you need to include it too. The next part is SELinux policy for real boards (not an emulator).
BOARD_SEPOLICY_DIRS += device/generic/car/common/sepolicy
Then you need to add permissions to a few pre-installed, automotive-oriented packages, to allow them to run in the system or user spaces.
PRODUCT_COPY_FILES += device/google/cuttlefish/shared/auto/preinstalled-packages-product-car-cuttlefish.xml:$(TARGET_COPY_OUT_PRODUCT)/etc/sysconfig/preinstalled-packages-product-car-cuttlefish.xml
The next component is EVS - Exterior View System introduced to AAOS 13. Even if you don’t really want to connect multiple cameras to the system so far, you have to include the default implementation of the component and configure it to work as a mock.
  DEVICE_PACKAGE_OVERLAYS += device/google/cuttlefish/shared/auto/overlay
  ENABLE_EVS_SERVICE ?= true
  ENABLE_MOCK_EVSHAL ?= true
  ENABLE_CAREVSSERVICE_SAMPLE ?= true
  ENABLE_SAMPLE_EVS_APP ?= true
  ENABLE_CARTELEMETRY_SERVICE ?= true
  CUSTOMIZE_EVS_SERVICE_PARAMETER := true
  PRODUCT_PACKAGES += android.hardware.automotive.evs@1.1-service
  PRODUCT_COPY_FILES += device/google/cuttlefish/shared/auto/evs/init.evs.rc:$(TARGET_COPY_OUT_VENDOR)/etc/init/init.evs.rc
  BOARD_SEPOLICY_DIRS += device/google/cuttlefish/shared/auto/sepolicy/evs
The last part is to adjust variables for a system when running. You set two system properties directly in the makefile (to allow a forced orientation and to enable the AVRCP Bluetooth profile).
  PRODUCT_SYSTEM_DEFAULT_PROPERTIES += \
  config.override_forced_orient=true \
  persist.bluetooth.enablenewavrcp=false
In the end, you override the following system variables, using predefined and custom overlays.
  PRODUCT_PACKAGE_OVERLAYS += \
  device/brcm/rpi4-car/overlay \
  device/generic/car/common/overlay
Generally speaking, PRODUCT_PACKAGE_OVERLAYS allows us to overwrite any value from a property file located in the source code. For example, in our case the overlay root directory is device/brcm/rpi4-car/overlay , so the file device/brcm/rpi4-car/overlay/frameworks/base/core/res/res/values/config.xml overwrites properties from the file frameworks/base/core/res/res/values/config.xml.
Let’s dive into properties changed.
- frameworks/base/core/res/res/values/config.xml file :
- config_useVolumeKeySounds disables usage of hardware volume keys, as they are not present in our setup,
- config_voice_capable enables data-only mode, as there is no possibility to make a voice call from our board,
- config_sms_capable disables SMS capabilities for the same reason,
- networkAttributes and radioAttributes sets the system to use WiFi, Bluetooth and ethernet connections only, as there is no GSM modem onboard,
- config_longPressOnPowerBehavior disables long-press on a power button, as there is no power button connected,
- config_disableUsbPermissionDialogs disables USB permission screen, as it shouldn’t be used in the AAOS,
- config_defaultUiModeType enables the automotive launcher by default,
- config_defaultNightMode enables night mode as the default one.
- frameworks/base/packages/SettingsProvider/res/values/defaults.xml file:
- def_wifi_on enables WiFi by default,
- def_accelerometer_rotation sets the default orientation,
- def_auto_time enables obtaining time from the Internet when connected,
- def_screen_brightness sets the default screen brightness,
- def_bluetooth_on enables Bluetooth by default,
- def_location_mode allows applications to use location services by default,
- def_lockscreen_disabled disables the lockscreen,
- def_stay_on_while_plugged_in sets the device to stay enabled all the time.
-
packages/apps/Car/LatinIME/res/layout/input_keyboard.xmlkeyTextColorPrimaryandtextColorparameters to adjust it. -
packages/apps/Car/LatinIME/res/values/colors.xmlsets colors or symbol characters on the default keyboard and the letter/symbols switch on the bottom right corner. -
packages/apps/Car/SystemUI/res/values/colors.xml sets the background color of the status bar quick settings to make the default font color readable. -
packages/apps/Car/SystemUI/res/values/config.xml
- packages/apps/Settings/res/values/config.xml file :
- config_show_call_volume disables volume control during calls,
- config_show_charging_sounds disables charging sounds,
- config_show_top_level_battery disables battery level icon.
- packages/modules/Wifi/service/ServiceWifiResources/res/values/config.xml enables 5Ghz support for the WiFi.
-
packages/services/Car/service/res/values/config.xmldisables running a dedicated application when the system starts up or a driver is changed.
You can read more about each of those settings in the comments in the original files which those settings came from.
The very last repository is aaos_android_hardware_interfaces . You don’t need it, but there is one useful property hardcoded here. In Android, there is a concept called HAL – Hardware Abstraction Layer. For AAOS, there is VHAL - Vehicle Hardware Abstraction Layer. It is responsible, among others, for HVAC - Heating, Ventilation, and Air Conditioning. In our setup, there is no vehicle hardware and no physical HVAC, so you use android.hardware.automotive.vehicle@V1-emulator-service whose default implementation is located under hardware/interfaces/automotive/vehicle . To change the default units used by HVAC from imperial to rest-of-the-world, you need to adjust the hardware/interfaces/automotive/vehicle/aidl/impl/default_config/include/DefaultConfig.h file.
Building
The building process for AAOS 13 for Raspberry Pi is much easier than the one for AAOS 11. The kernel is already precompiled and there is much less to do.
Just call those three commands:
  . build/envsetup.sh
  lunch aosp_rpi4-userdebug
  make bootimage systemimage vendorimage
On a Windows laptop (using WSL, of course) with the i7-12850HX processor and 32GB RAM, it takes around 1 hour and 40 minutes to accomplish the build.
Creating a bootable SD card
There are two options – with or without the mkimg.sh script. The script is located under device/brcm/rpi4 directory and linked in the main directory of the project as rpi4-mkimg.sh . The script creates a virtual image and puts 4 partitions inside - boot, system, vendor , and userdata . It's useful because you can use Raspberry Pi Imager to write it into an SD card however, it has a few limitations. The image always has 7GB (you can change it by adjusting the IMGSIZE variable in the script), so you won't use the rest of your card, no matter how big it is. Besides that, you always need to write 7GB to your card - even if you have to update only a single partition, and including writing zeros to an empty userdata partition.
The alternative way is to write it on the card by hand. It's tricky under Windows as WSL doesn't contain card reader drivers, but it's convenient in other operating systems. All required files are built in the out/target/product/rpi4 directory. Let's prepare and write the card. Warning! In my system, the SD card is visible as /dev/sdb . Please adjust the commands below not to destroy your data.
OK, let’s clean the card. You need to wipe each partition before wiping the entire device to remove file systems signatures.
  sudo umount /dev/sdb*
  sudo wipefs -a /dev/sdb*
  sudo wipefs -a /dev/sdb
Now let’s prepare the card. This line will use fdisk to create 4 partitions and set flags and filesystems.
echo -e "n\n\n\n\n+128M\na\nt\n0c\nn\n\n\n\n+2G\nn\n\n\n\n+256M\nn\np\n\n\nw\n" | sudo fdisk /dev/sdb
The last step is to write data and prepare the last partition.
  sudo dd if=boot.img of=/dev/sdb1 bs=1M
  sudo dd if=system.img of=/dev/sdb2 bs=1M
  sudo dd if=vendor.img of=/dev/sdb3 bs=1M
  sudo mkfs.ext4 -L userdata /dev/sdb4
  sudo umount /dev/sdb*
Summary
Android Automotive OS is a giant leap for the automotive industry . As there is no production vehicle with AAOS 13 so far, you can experience the future with this manual. What's more, you can do it with a low-budget Raspberry Pi computer. This way, I hope you can develop your applications and play with the system easily without an additional layer of using emulators. Good luck and happy coding!

Native app vs. hybrid app: How to choose a solution that meets your business needs
Every time we start a new project, we organize brainstorming sessions about architecture and how to manage the project. Regarding mobile apps, we have one additional question – should we choose a hybrid or native app?
Let's start from the absolute beginning. What is a native app?
A native app is a software or program developed to carry out a specific task within a platform or environment. Native apps are built using software development tools (SDK) for particular software frameworks, hardware platforms, or operating systems. Native apps are built for use on a particular device, such as Apple iPhone or Google Android. To create an iOS application, we use Swift, which replaced Objective-C a few years ago. If we want our app to be available on Android phones, we can choose Kotlin (more popular) or Java (replaced by Kotlin a few years ago, however, we can still use it). Let's start by discussing the pros and cons of native apps.
PROS
First – native apps are stable and reliable. That's especially worthwhile cause if you work on large projects, you want to focus on implementing new features, not fight with platform limitations. While working on a native app, you can be sure you will find well-prepared documentation for each part of the SDK – it does not matter if it's a camera, Bluetooth, or design principles.
If you want to use a specific part of SDK or hardware that is specific to a platform, such as Bluetooth, a camera native app also would be a better choice. Even if you decide to go hybrid, these components need to be handled by native code, so you would need a library or plugins. It doesn't make sense to use native frameworks in hybrid apps.
If we are planning a big battery driller app with a beautiful, complicated, animated UI, we should choose a native app. Performance and responsiveness are much better than hybrid can offer. Same thing if we're talking about UX; better UX equals digital customer engagement.
All these points are essential, but what matters the most is security. You should know that native apps are much safer, more stable, and less vulnerable to security risks.
CONS
Of course, native apps are not perfect, and we can easily find examples of ideas when a hybrid app would be a better choice.
Native apps, of course, have a separate codebase for Android and iOS. This means we have (at least) two teams to manage one project. This also reflects bug fixing – it's much easier and takes less time to find and fix bugs if we have one code base.
You should also consider the time you have to create an app. Developing on multiple platforms means a more extended development schedule and, as a result, higher development costs. Therefore, native app development quickly eats up resources.
Go hybrid?
You always have a choice 😊 Native app is a clever idea, but is it always the best one, and what is it - a hybrid app? A (hybrid app) is a software application that combines elements of both native apps and web applications. Simply – it is the technology where we share the codebase between platforms – Android and iOS. The most popular frameworks are:
- React Native
- Flutter
- Xamarin
- KMM (soon 😉)
Let's discuss the pros and cons of hybrid apps.
PROS
Of course, the most significant advantage of hybrid apps is that they can be used across platforms and devices – they share one code base. Cool, isn't it? This means more accessible updates, bug fixes, and maintenance. Also, Development is much simpler and quicker by not having to build from the ground up for each platform.
A crucial thing is the deployment process. Hybrid apps can be deployed much faster than native apps, which can be extremely helpful, especially in big, complicated projects.
Regarding performance, reduced time frames equate to reduced resource drain. We should keep that in mind.
Finally - Hybrid apps can take advantage of dynamic web content. If you plan to create a big social platform – mobile app, web page, and so on – you should consider a hybrid app.
CONS
Looks interesting, right? Well, it is not an ideal solution. Like everything else – it has some limitations.
As we mentioned, there are components that 100% rely on device-specific components or hardware – like cameras, Bluetooth, etc. To use that feature in hybrid applications, we need to implement plugins or parts – or create them ourselves. That can be time assuming but also can present security risks.
The second important thing is user experience - it can suffer as hybrid apps cannot take advantage of the platform's UI.
The last thing - being unable to take full advantage of the hardware sometimes impacts the performance of our applications by making them poor and insecure.
There is one proposition that eliminates most of our cons – KMM, Kotlin Multiplatform Mobile. Its significant advantage is that we share the whole business logic between platforms – Android and iOS using Kotlin language. We create separate native layouts and UI layers for each platform. But of course – there is a problem 😊 KMM is still in the alpha phase, and, in my opinion, it is not production ready yet. But we should keep an eye on that as it might be a revolution.
Summary
It is not an easy task to choose the best technology. We should consider many varied factors that can impact our app. Here are key takeaways for both solutions – native and hybrid.
Native apps: Key takeaways
Native apps provide the best stability and security. They will tend to perform faster and be able to handle the most demanding tasks. This kind of application is best placed to use specific devices' hardware functionality. The user experience is smooth and featureful.
Hybrid apps: Key takeaways
Hybrid apps are easy to get onto iOS and Android. By utilizing a single codebase, you can reduce budget and time costs.

Dynamic pricing: How car rentals use connected car data to increase revenue
By 2025, over 400 million connected cars will be on the road. Car rentals and fleet managers can use connected car data to manage their vehicles more effectively and increase revenue. A huge part of that approach is related to dynamic pricing – a data-driven technique enabling you to set the best prices for your service. Let’s have a look at how your business can benefit from dynamic pricing and connected car data.
Vehicles generate tons of valuable information. Most of it comes from their engine control units (ECUs) that collect data from many different sensors within the engine and controller area networks that enable microcontrollers and devices to communicate.
Thanks to data coming from these and other sources, the car rental company can have immediate access to telemetry data, including:
- The specific vehicle’s location
- Its current engine status and speed
- The vehicle’s status (e.g., if the car is locked) etc.
As a derivative of the telemetry data, you can also understand the driving style of a given driver.
Interestingly, the connected car penetration has already surpassed that of non-connected cars ( over 50% market share in Q2 2022 ) [1] .
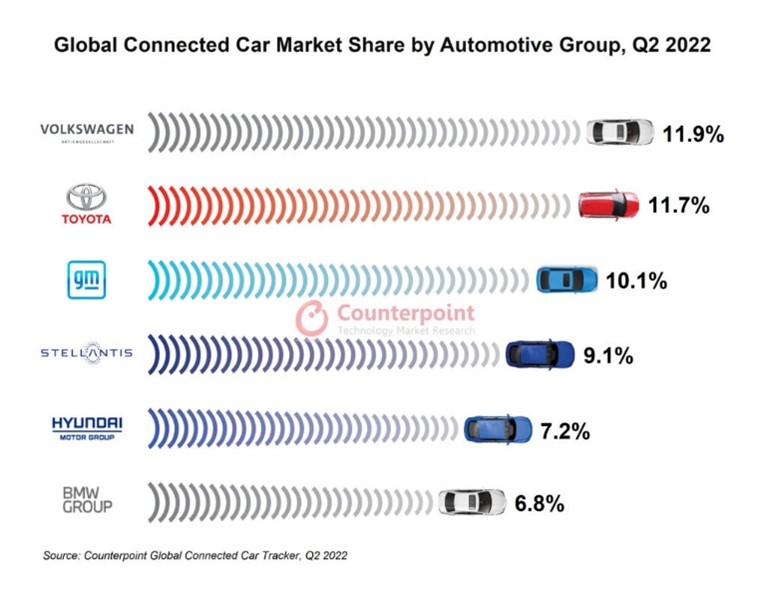
Because connected car data provides automotive businesses with useful input (especially when combined with web and market data ), car rentals and fleet managers can use it to adjust their offers and, thus, grow revenue. Here, dynamic pricing is the most prominent solution.
What is dynamic pricing?
In a nutshell, it’s a data-driven strategy that exploits intelligent algorithms (frequently based on machine learning and automation) to set and maintain the best prices within specific market conditions.
Dynamic pricing algorithms continually analyze the available data (coming from the website, the market, and the vehicles themselves) and use it to automatically adjust prices and other service conditions available on your website or in your app.
As a result, prices for renting a car can be optimized multiple times a week (or even a day) depending on:
- Current demand and car availability
- Time of day
- Traffic conditions
- Fuel prices
- Previous driving history of a given user
- And even the likelihood that a given person will be happy to pay more for the service (e.g., because they are running out of battery in their cellphone and they need to arrange transportation quickly)
Dynamic pricing is prevalent in both large car rentals, rideshare companies, and mobility-as-a-service providers, such as Uber. And speaking of Uber, some time ago, Forbes published an article explaining how Uber’s pricing works. They use an advanced dynamic pricing algorithm based on AI and multiple price points to determine the optimal price each user sees in their app.

As a result, Uber can charge the optimal rate for every ride, which helps them make more money. A similar solution can be introduced in any car rental company.
But the price of the service is just one puzzle piece. When it comes to car rentals, there are other conditions and fees renters have to be aware of before signing on the dotted line. Here, connected car data can also be of help! Let’s dig a bit deeper.
Dynamic pricing, connected car data, and the question of the insurance
Renting a car involves additional fees, primarily insurance, which is almost always mandatory . It stands to reason that this fee should also be dependent on a given driver and their experience and driving habits.
Insurance companies have been collecting data about drivers’ behaviors for years. And yes, they’ve been using it to calculate insurance premiums and offer discounts (so-called usage-based insurance – UBI ). Today, it’s possible thanks to mobile applications that have to be always on when driving a car. Such an app can track each driver’s behavior on the road. Soon, though, connected car data will replace these apps altogether.
Although this idea is still in its infancy, we can expect that it will be shortly doable on a large scale, especially given the fact that the number of connected vehicles is continually going up (the global connected car market size is projected to reach almost USD 192 billion by 2028 – CAGR of 18.1% [2] ).
The first applications enabling the implementation of dynamic pricing in car insurance are already here. Thanks to millions of connected cars offering trillions of data points, car rental companies can understand their customers and their driving behaviors.
This knowledge can be used to offer cheaper insurance and other rental fees to renters with a proven history of safe driving. Another idea worth considering is using data from connected vehicles to improve reward and loyalty programs (a safe driver could get discounts to rent a car or get additional loyalty points).
However, there are still some challenges that need to be addressed.
The challenges of making the most of connected car data...
As McKinsey explains in their recent report , “ many OEMs have struggled with connectivity or related software developments, resulting in poor customer reviews and delayed start of production ”. Car manufacturers and other OEMs struggle with convincing customers that car-connectivity services deliver additional value. Add poor execution of services and communication issues to the mix, and it becomes obvious that consumers are still a bit reluctant towards such services. It’s the same story with usage-based insurance.
In 2021, there was a survey conducted in Canada concerning UBI. 77% of Canadians are concerned about potential rate hikes. And 51% are hesitant in case it negatively affects their current insurance rates [3] .
And then, there is the data management issue. McKinsey estimates you need to access 1 to 2 terabytes of raw data per car each day to fully benefit from connected car data. That means huge data centers capable of processing all that information daily.
…and the inevitable future
The future of the automotive industry is software-centric, and car rentals and fleet management companies are no exception. As the number of connected vehicles goes up, we will be able to benefit from more advanced data-driven solutions.
At GrapeUp, we tirelessly work on them every day! We develop custom solutions for both OEMs and car rental companies that enable collecting data, seamless processing, and even distributing it further. All to allow you to make more money.
If you run a car rental company, we can help you implement the solutions discussed in this article. To find out more, see our offer for the automotive sector .
[1] https://www.counterpointresearch.com/global-connected-car-market-q2-2022/
[2] https://www.globenewswire.com/en/news-release/2022/08/17/2499966/0/en/Global-Connected-Car-Market-Size-to-Hit-USD-191-83-Billion-at-a-CAGR-of-18-1-for-2021-2028-Fortune-Business-Insights.html
[3] https://www.ratehub.ca/blog/ubi-saves-money-but-87-per-cent-not-trying-survey-data/


In-car infotainment: How to build long-term relationships and unlock new revenue streams
With the automotive industry seeking to create a more comfortable and enjoyable travel experience for its customers, automakers and designers are stepping up investment in in-car infotainment solutions. These technologies aim to personalize the travel experience by providing noise reduction, in-vehicle sound zones, and immersive audio/video content tailored to the driver's lifestyle. And more importantly, they contribute to building OEM customer loyalty, new revenue streams, and creating lasting customer relationships.
Four in-car entertainment strategies, almost endless opportunities to build a new offer
There is no turning back from in-car entertainment. The development of flat screens, broadband internet access, and the possibility of personalization and customization of content to the viewer are the reasons why no one is willing to give up this form of service.
For automakers, it's an opportunity to build a stronger relationship with their customers and create new (often subscription-based) revenue models .
For the driver and especially for passengers, it's about overcoming the boredom associated with long journeys and introducing solutions into vehicles that until now have been known for their high-end audiophile systems.
No wonder an increasing number of OEMs today are consciously developing the concept of the digital cockpit of the future . This approach is supposed to shift the focus from the practical functionality of the vehicle to providing compelling entertainment.
Most popular in-car infotainment strategies
Of course, the process of change is not simple and cannot happen overnight. It requires continuous growth in vehicle technological performance, partially related to the car's GPU, E/E Architecture, 5G Internet access, and the development of new display forms. Nevertheless, OEMs have at their disposal one of the following four strategies for developing such solutions.
1. Rear-Seat Entertainment
Using this strategy, entertainment is streamed to displays located in the rear seats or on the roof of the vehicle (for example, the BMW i7)... The user does not need to use a smartphone or tablet in addition to this solution to enjoy the leisure experience.
2. Any-Seat Entertainment
In this solution, content streaming can apply to all displays of the infotainment system in the car (including the driver's seat) - again without having to use smartphones and tablets to navigate. This concept allows video viewing, e.g., while charging an electric car.
3. Augmented Entertainment
A step further can be taken by manufacturers who incorporate the capabilities of 4D cinema and AR applications into their offer. This approach creates a whole new kind of driver's cockpit and develops a unique UX that may become a vehicle's trademark. This type of screen has a variety of potential applications, such as displaying destination-related information, traffic warnings, or intelligent terrain mapping of other vehicles. In the near future, this technology may also be used for augmented marketing, such as showing interesting offers and discounts from nearby restaurants, shops, or malls on the windscreen.
4. Live Entertainment
Finally, real-time entertainment services enable car-to-car interaction and/or social networking among vehicle users. These types of solutions can be used to share viewing, commentary, and engagement among vehicle users through cultural events or music concerts, for example.
New possibilities of infotainment in cars. The 2022 perspective
The ability to combine modern audio-visual technologies with data analytic s and personalized user information allows OEMs to create entirely new services and products, often ones previously unrelated to the automotive industry.
- Among these the most notable is, of course, streaming video and audio content, which is usually based on partnerships with third parties (e.g., Netflix, Amazon, YouTube, Apple TV or Spotify) and usually operate on a subscription model. In the future, the car is likely to become another medium where we can simply activate the service and continue watching videos, as we move from the living room to the vehicle.
- Access to gaming platforms and services that will provide an interactive way of spending time for the driver and passengers while traveling or charging their EV.
- A tourist offer that is related to visiting a particular place - acts as a virtual travel agency, which highlights specific points on the map and expands the knowledge of the visited locations (also in the form of quizzes or riddles for passengers).
- Audiovisual, highly personalized ads, tailored to the context of where we are traveling, the driver's needs, or resulting from the wear and tear of the vehicle components.
Dynamic growth of the in-car infotainment market
With each passing year, there are new examples of interesting implementations in in-car entertainment, and the market itself is growing rapidly. In 2020, it was valued at more than $21 million, while by 2028 it is predicted to grow to more than $37.5 million, registering a CAGR of 7.5% from 2021 to 2028.
Below is a rundown of the most interesting advanced infotainment solutions that are becoming increasingly popular and have been implemented by specific OEMs in recent times.
- Larger display and video entertainment on demand
With large displays and the increasingly widespread streaming of video and audio content into the vehicle, a substantial base is becoming established for the development of infotainment in the automotive industry.
It is all about introducing more immersive services and features in vehicles. This is especially relevant for EVs, because, after all, drivers need to pass their time somehow while charging their vehicles at public stations, and this can be done from the comfort of the car seat.
Total spending on video on demand is expected to reach $127 billion by 2025 (11.8% CAGR). Video streaming alone is expected to account for 86% of revenues .
The chart below illustrates how trends are changing in terms of screen sizes in today's automotive market . It is noticeable that, roughly since 2017, there has been a marked increase in the use of large displays in vehicles.
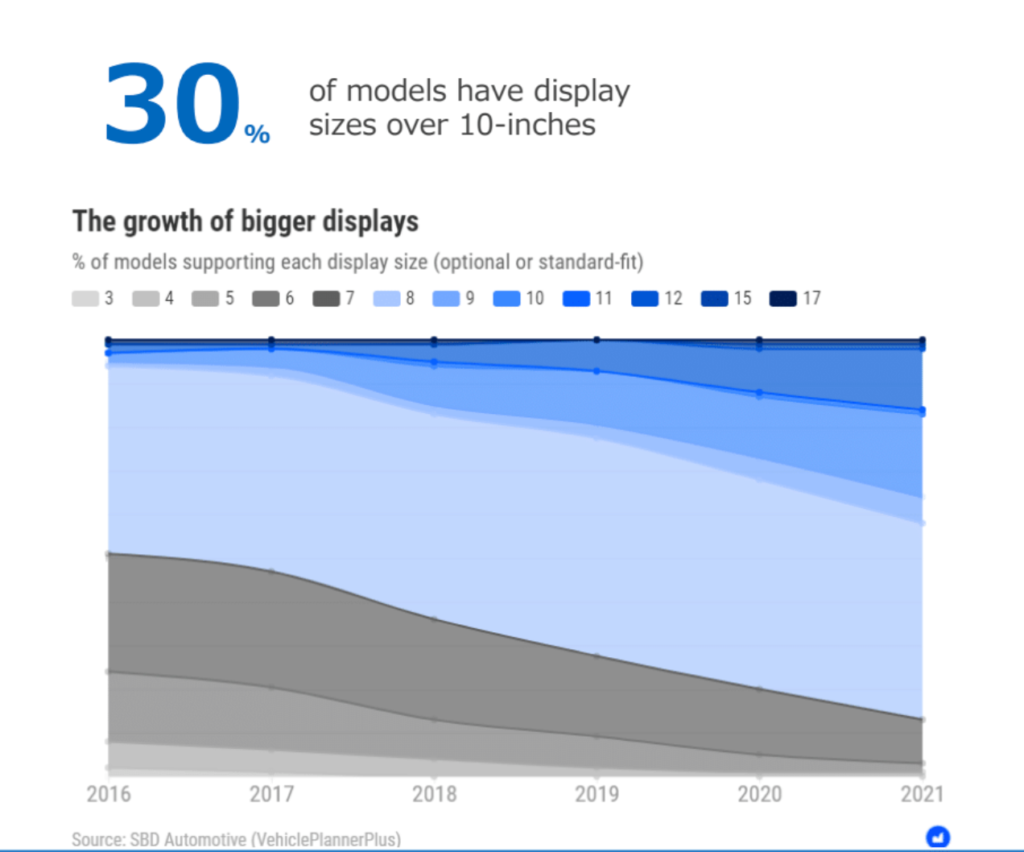
Continuing down this path, major OEMs are already announcing in-vehicle video streaming services that use this type of display and video entertainment. Some of the latest examples from the market are as follows:
- Jeep Wagoneer and Grand Wagoneer from the Stellantis fleet have recently been offering Amazon Fire TV as infotainment for rear-seat passengers. It allows users to stream movies, shows, or games via a Wi-Fi hotspot or download content for later. The same service will also be implemented in vehicles from Ford Motor Co . factories.
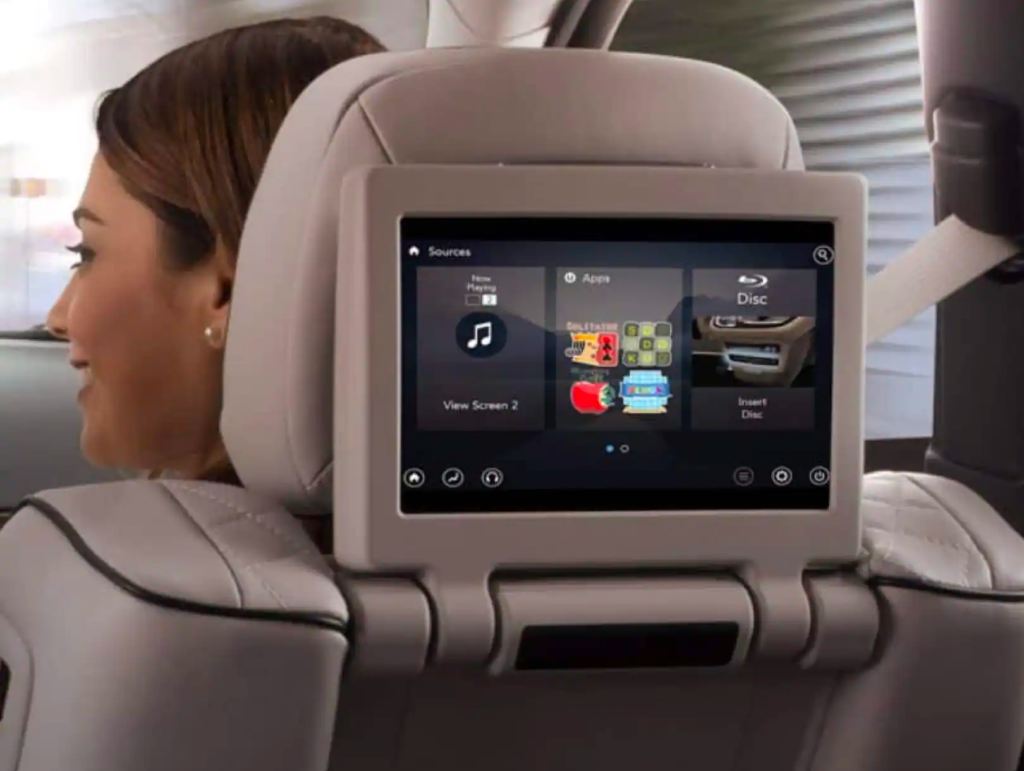
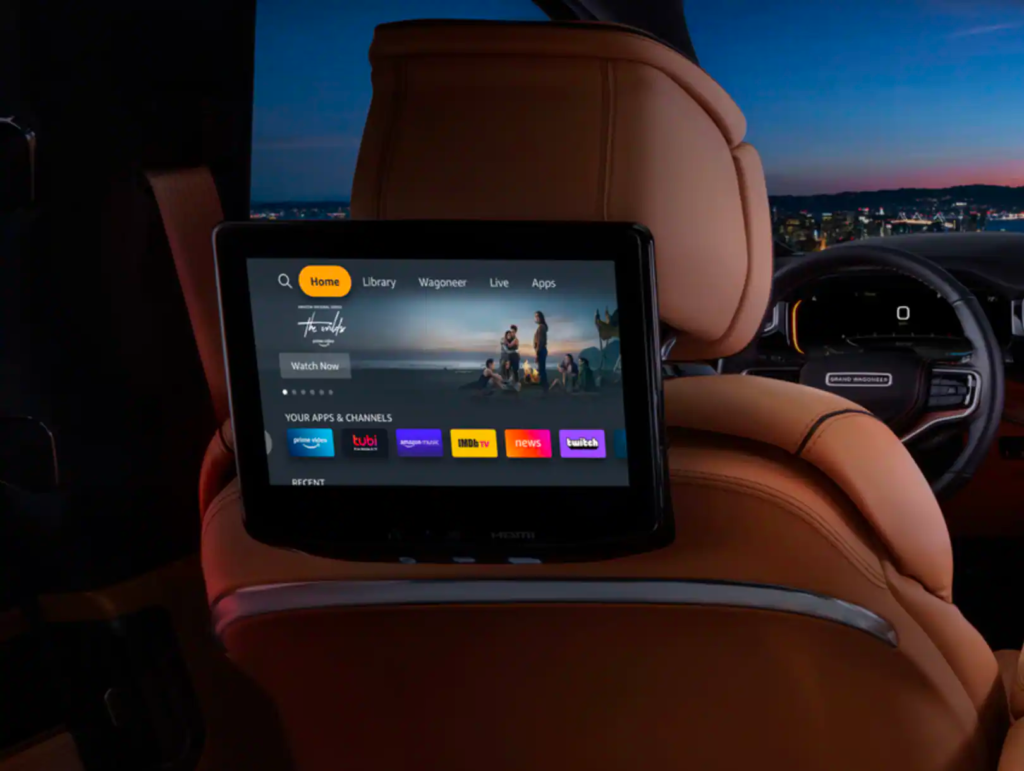
- Volvo intends to implement a YouTube app, available via the Play Store in vehicles equipped with Google Automotive Services. The idea is to provide entertainment while charging an EV.
- BMW has recently unveiled its proprietary Theater Screen concept. This mode adjusts lighting and dimming, converting the car's interior into a mobile theater. The idea is supposed to be workable thanks to a 31-inch widescreen display. It offers a 32:9 aspect ratio and 8K resolution and includes built-in Amazon Fire TV and smart TV features.

- Enhanced in-vehicle display capabilities with flexible interactive displays
Design teams are persistently seeking ways to further integrate displays into the surface of a car's dashboard. Some of the most remarkable solutions in the automotive market today are Flexible Interactive Displays (FITs).
They allow manufacturers to provide more display areas for infotainment functions . All vehicle elements, such as Center consoles, pillars, and seat backs, can potentially be converted into one large screen. It could extend across the entire passenger space, turning the vehicle into a mobile movie theater or high-tech office. These types of solutions are already being tested by ROYOLE.
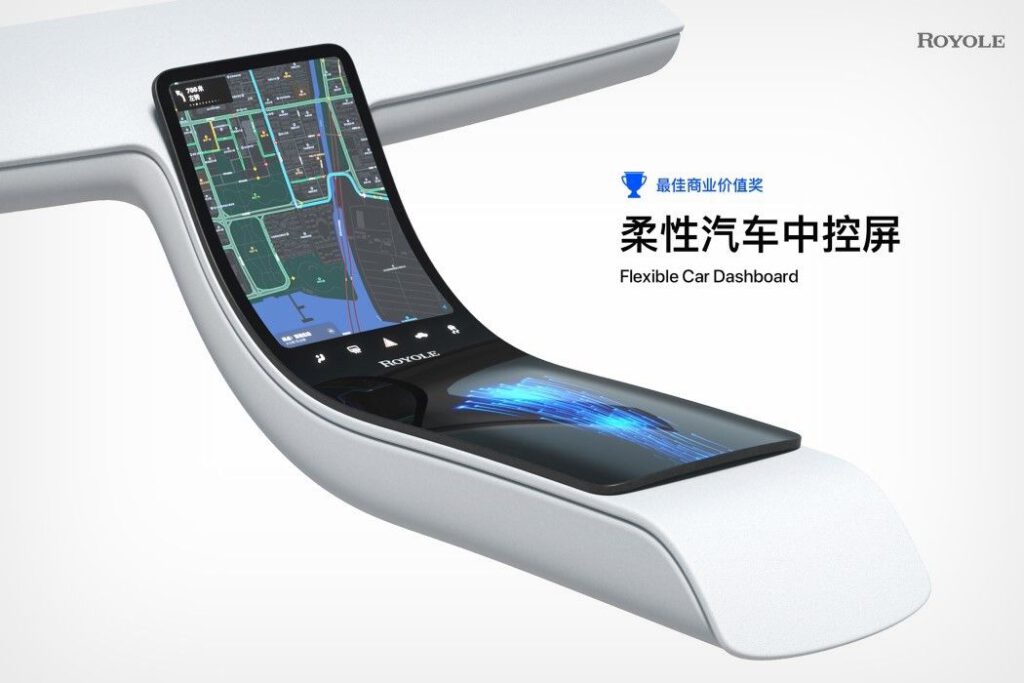
This technology is essential not only for convenience but also for safety. This is due to the idea of replacing layers of glass (traditionally used in automotive electronics) with durable plastic.
In the future, it might be possible to build sensors (e.g. fingerprint reader) into the display area. This will enable the interface to be controlled from a screen spanning the entire surface.
- The sound provides a more comfortable experience
While video content has only recently begun to make its way into cars, a good sound system and access to music have always been part of the automotive experience (in fact, for many consumers they were an essential factor in deciding whether to purchase a particular vehicle). Car manufacturers and designers are well aware of this and are stepping up their investments in the following solutions.
- Noise reduction. A focused anti-noise system prevents the penetration of noises common to driving but does not block sounds important to maintaining safety (such as emergency sirens). Next-generation active noise cancellation has been applied, for example, in the new Cadillac Lyriq, where it intelligently measures road vibrations and, using an AKG speaker system, actively reduces noises from outside.
- In-vehicle Sound Zones. This allows the driver and passengers to access different audio content. There is also an option to share the same sound at different volume levels. An additional advantage of such solutions is that unwanted music from the back seat does not distract the driver during the ride.
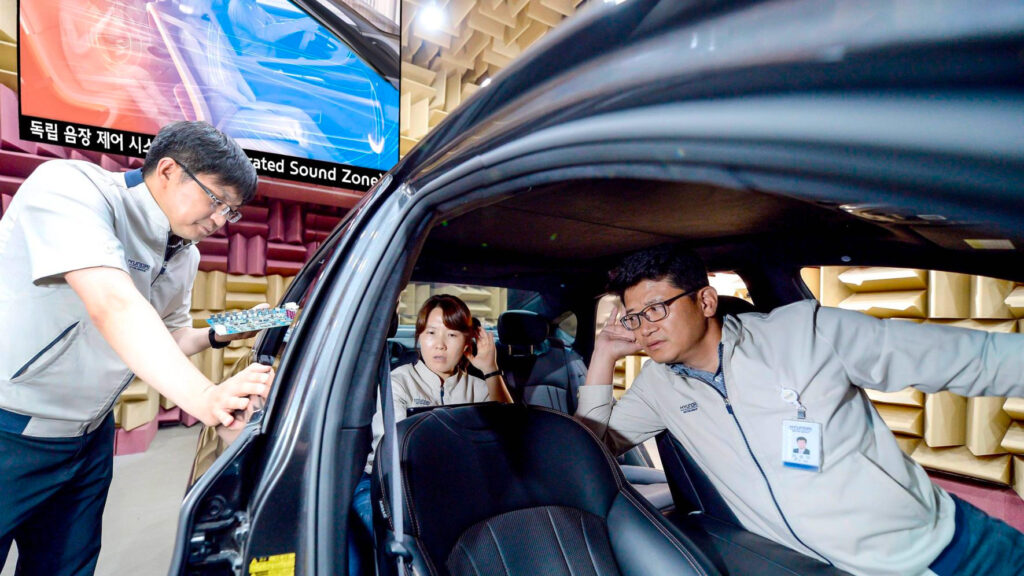
Hyundai , for example, is testing such a solution. Whilst using the latest-generation Separated Sound Zone (SSZ) technology developed in-house, the Asian brand is able to create and control sound fields in the car. Both the driver and each passenger are able to hear isolated sounds without a headset.
- Immersive solutions customized to the driver's lifestyle
Key players in the market are becoming bolder in developing immersive technologies in their vehicles and emphasizing personalized options to tailor the journey to the user's specifications.
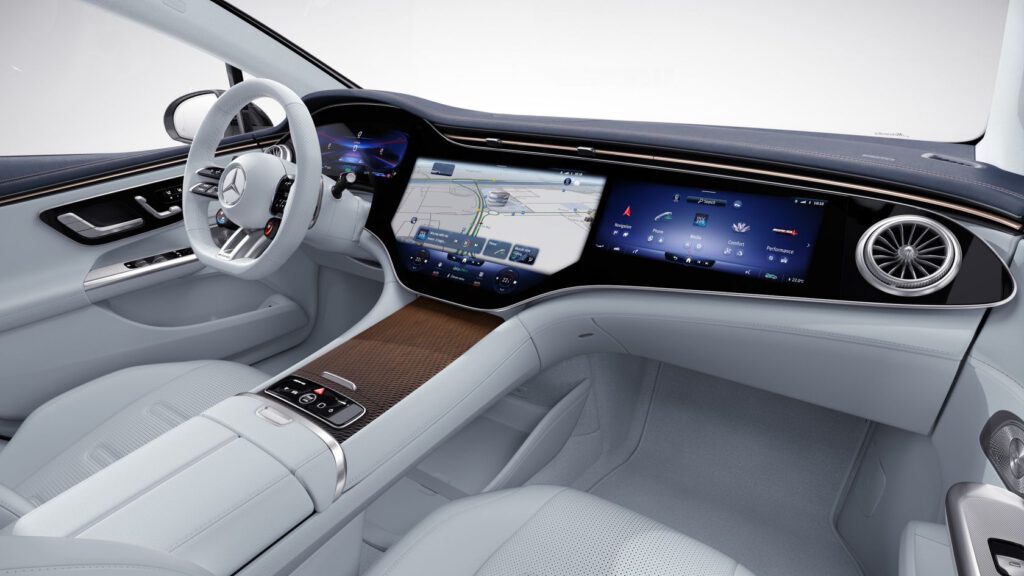
Developed by Mercedes-Benz, MBUX Hyperscreen is a prime example. It is designed to provide a high degree of individualized infotainment content. The vehicle users can determine for themselves which information to display in a specific place, in a specific order, and in line with a selected theme. In order to aggregate streaming content from various sources within its own vehicles, Mercedes has partnered with California-based ZYNC. The collaboration is expected to help develop a platform and interface that will allow access to digital entertainment from different providers.
The designers of the NIO ES7 Electric SUV are taking it even further. This vehicle will be equipped with Banyan smart OS software and NIO's Aquila Super Sensing and Adam Super Computing platform. All of these will be combined with a compatible digital cockpit based on AR/VR. This is a golden opportunity to"immerse" yourself in a world filled with colors and sounds . The passenger riding in the back can delight in a 200+ inch "screen" and a 7.1.4 Dolby Atmos sound system.
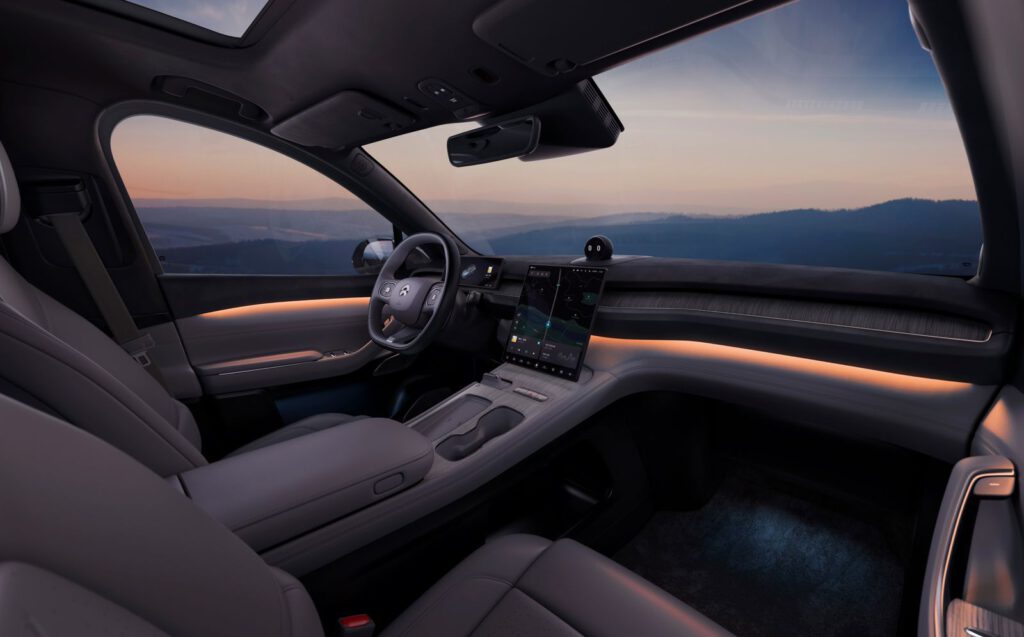
After all, the aforementioned EV is already being advertised by the developers as a "second living room," being a continuation of home entertainment. What is noteworthy is not just the audiovisual system itself, but also the options for dimming the lights or the appropriate choice of seat positions, which are supposed to make the viewer feel as if they are watching a movie at home. This is a perfect example of how the automotive industry is getting closer to the users, their daily life , and their habits.
Why is in-car infotainment a key to building long-term relationships and new revenue streams?
Tremendous competition and market oversupply make it more difficult than ever to commit a customer to a brand. User loyalty needs to be built in many possible ways and new ways to reach out with an offer need to be sought.
Car infotainment is at the cusp of dynamic development and is certainly one of the leading areas that can help find new groups of customers and create lasting relationships with them.
This type of technology is no longer an add-on option, but an indication of "being up-to-date." Manufacturers who focus on the development of car infotainment become trendsetters and initiators of change. They make it clear that they follow their consumers, and understand their lifestyles and expectations. And this is not insignificant for the modern consumer.
Research shows that customers are willing to pay more for a vehicle with these types of solutions - we're talking about up to $10,000 for a single car. In contrast, more than 70% of younger millennials list infotainment technology and features as "must-haves" when buying a car.
With these statistics in mind, it is necessary to remain competitive in this area and constantly develop the offer.
A special focus should be also put on the areas that build customer loyalty and connect them more strongly with the brand, for example:
- access to media- based on a subscription model,
- rich entertainment offerings for the driver and passengers;
- personalization features and adjusting to users' lifestyles;
- a fine-tuned user interface (UX), for a seamless and intuitive experience.
If you combine seamless and intuitive in-car infotainment with a deep understanding of consumer needs, chances for building long-term relationships and unlocking new revenue streams grow dramatically.
Build and run Android Automotive OS on Raspberry Pi 4B
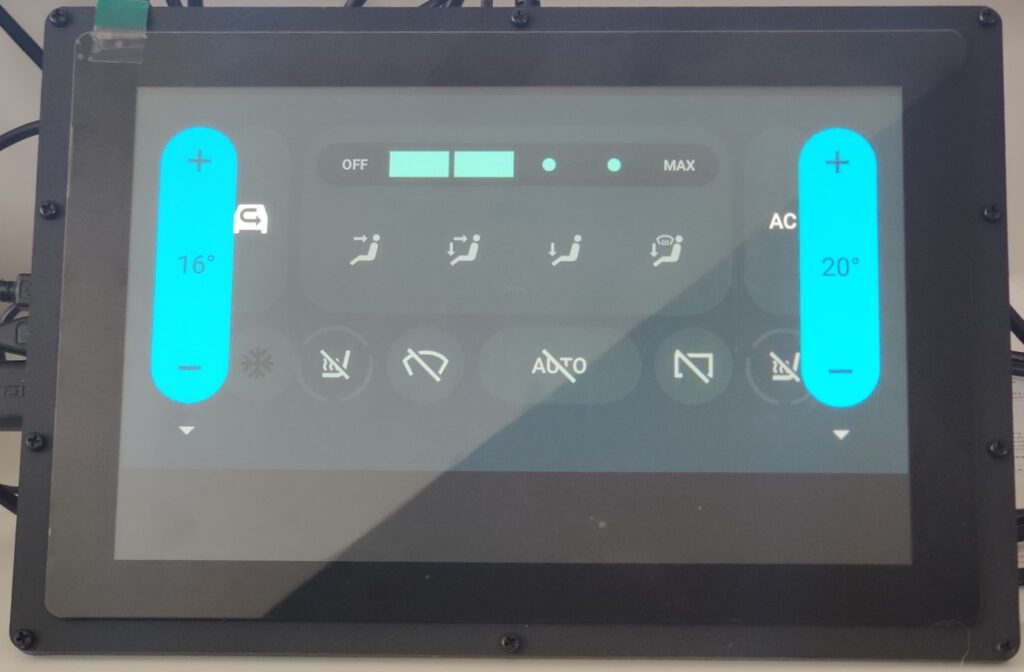
Have you ever wanted to build your own Android? It’s easy according to the official manual, but it’s getting harder on a Windows (or Mac) machine, or if you’d like to run it on physical hardware. Still too easy? Let’s build Android Automotive OS – the same source code, but another layer of complexity. In this manual, we’ll cover all steps needed to build and run Android Automotive OS 11 AOSP on Raspberry Pi 4B using Windows. The solution is not perfect, however. The most principal issue is a lack of Google Services because the entire AAOS is on an open-source project and Google doesn’t provide its services this way. Nevertheless, let’s build the open-source version first, and then we can try to face incoming issues.
TL;DR: If you don't want to configure and build the system step-by-step, follow the simplified instruction at https://github.com/grapeup/aaos_11_local_manifest
Prerequisites
Hardware
If you want to run the system on a physical device, you need one. I use the Raspberry Pi 4 model B with 8GB of RAM ( https://www.raspberrypi.com/products/raspberry-pi-4-model-b/ ). By the way, if you want to build and run an emulator from the source, it’s also possible, but there is a small limitation – packaging the emulator to a zip file, moving it to another computer, or even running it under Android Studio was introduced in Android 12.
To power your Raspberry, you need a power adapter (USB C, min. 5V 3A). I use the Raspberry-official 5.1V 3A model. You can also power the Raspberry computer from your desktop/laptop’s USB port, especially if you’re going to debug it via a serial connection. Check the “If it doesn’t work” section below for the required hardware.
Another piece of hardware needed is an SD card. In theory, 4GB is all you need, however, I recommend buying a larger card to have some extra space for your applications on Android . I use 32GB and 64GB cards. You’ll also need a built-in or external card reader. I use the latter.
The next step is a screen. It’s optional but fancy. You can connect your mouse and optionally keyboard to your Raspberry Pi via USB and connect any display you have via micro-HDMI but using a touch screen is much more intuitive. I use a Waveshare 10-inch screen dedicated to Raspberry ( https://www.waveshare.com/wiki/10.1inch_HDMI_LCD_(B)_(with_case ). The screen box has a place to screw the Raspberry too, so you don’t need any extra case. You can also buy it with a power adapter and a display cable.
If you don’t buy a bundle, make sure you have all necessary accessories: micro-HDMI – HDMI cable to connect a screen (Waveshare or any other), USB A – USB mini A cable to connect a touch sensor of the screen, USB mini A 5V 3A adapter to power the screen.
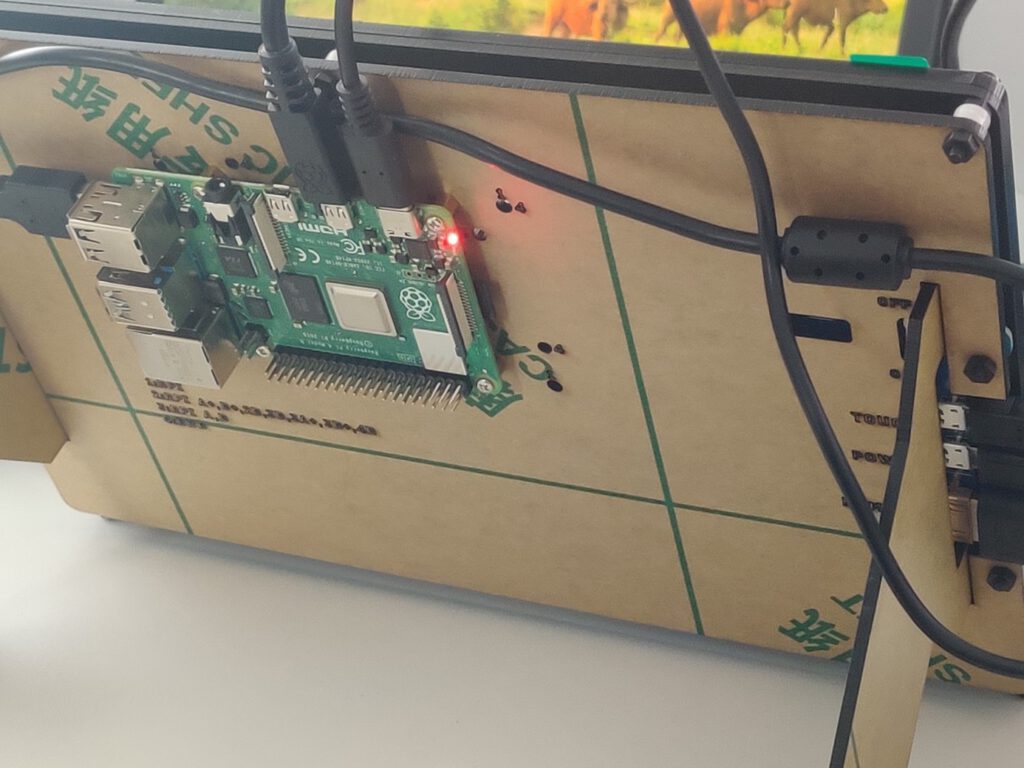
Of course, you need a computer. In this manual, we use a Windows machine with at least 512GB of storage (the Android source is huge) and 16GB of RAM.
Software
You can probably build everything in pure Windows, but the recommended method is to use WSL. I assume you already have it installed, so just make sure you have the newest WSL2 version. If you have never used WSL before, see the full manual here https://learn.microsoft.com/en-us/windows/wsl/install .
WSL adjustments
The standard WSL installation uses a too-small virtual drive and limited RAM, so you need to adjust it.
Let’s start with the disk. Make sure the WSL is shut down by running ‘wsl –shutdown’ in the command prompt. Open Windows Command Prompt with admin privileges and enter ‘diskpart ’. Then run ‘select vdisk file=”<path to WSL drive file>”’. For me, the path is “C:\Users\<user>\AppData\Local\Packages\CanonicalGroupLimited.Ubuntu_<WSL_instance_id>\LocalState\ext4.vhdx ”. Now you can expand it with the command ‘expand vdisk maximum=512000’. Around 300GB is enough for Android 11, but if you want to play with multiple branches of Android at the same time, you need more space. Now you can close the diskpart with the ‘exit’ command. Next, open the WSL and run ‘sudo resize2fs /dev/sdb 512000M’. I assume you have only a single drive attached to the WSL and it’s visible in the Linux subsystem as /dev/sdb. You can check it with the commands ‘sudo mount -t devtmpfs none /dev || mount | grep ext4’.
Now, let’s adjust the memory. Stop the WSL again. Open your home directory in Windows and open .wslconfig file. Create it if this file doesn’t exist yet. In the file, you need to create a [wsl2] section and memory configuration. The complete file should look like this:
[wsl2]
memory=16GB
As you can see, I’ve attached 16GB to the virtual machine. It’s assigned dynamically, according to needs, but you must be aware that the virtual machine can take all of it, so if you allow it to eat your entire RAM, it can force your Windows to use a hard disk to survive (which will slow everything down significantly).
Disclaimer:
Building Android on 8 cores, 16GB RAM machine takes around 4 hours. If you want to do it faster or you don’t have a computer powerful enough at your home or office, you can consider building in the cloud. Simple AWS EC2 with 32 cores and 64GB of memory does the job in one hour (to download and build) and costs just a few bucks.
Let's get ready to rumble!!!
..or at least to building.
More prerequisites
We need some software but not much. Just install the following packages. This set of libraries allows you to build Android Automotive OS versions 11 to 13.
sudo apt update && sudo apt install gcc-aarch64-linux-gnu libssl-dev bc python3-setuptools repo python-is-python3 libncurses5 zip unzip make gcc flex bison -y
Source code downloading
Let’s create a home directory for our android and download sources.
mkdir android-11.0.0_r48 && cd android-11.0.0_r48
repo init -u https://android.googlesource.com/platform/manifest -b android-11.0.0_r48 --partial-clone --clone-filter=blob:limit=10M
git clone https://github.com/android-rpi/local_manifests .repo/local_manifests -b arpi-11
repo sync
“repo init” will ask you for some personal data. It’s collected by Google. To learn more about optimizations here, check this manual: https://docs.gitlab.com/ee/topics/git/partial_clone.html . ‘git clone’ adds a custom code from Android RPI project ( https://groups.google.com/g/android-rpi ) with drivers for your Raspberry Pi. The project is great and it’s all you need if you want to run Android TV. To run Android Automotive OS, we’ll need to adjust it slightly (see “Adjustments” section below). ‘repo sync’ will take some time because you need to download around 200GB of code. If you have a powerful machine with a great Internet connection, you can use more threads with ‘-j X’ parameter added to the command. The default thread count is 4. If you have already synchronized your source code without android-rpi local manifest, you need to add --force-sync to the ’repo-sync’ command.
Adjustments
All changes from this section can download as a patch file attached to this article. See the “Path file” section below.
Android-rpi provides Android TV for Raspberry Pi. We need to remove the TV-related configuration and add the Automotive OS one.
Let’s start with removing unnecessary files. You can safely remove the following files and directories:
- device/arpi/rpi4/overlay/frameworks/base/core/res/res/anim
- device/arpi/rpi4/overlay/frameworks/base/core/res/res/values-television
- device/arpi/rpi4/overlay/frameworks/base/core/res/res/values/dimens.xml
- device/arpi/rpi4/overlay/frameworks/base/core/res/res/values/styles.xml
- device/arpi/rpi4/overlay/frameworks/base/packages
To remove the user notice screen not needed in Automotive OS, create a new file device/arpi/rpi4/overlay/packages/services/Car/service/res/values/config.xml with the following content:
<?xml version="1.0" encoding="utf-8"?>
<resources xmlns:xliff="urn:oasis:names:tc:xliff:document:1.2">
<string name="config_userNoticeUiService" translatable="false"></string>
</resources>
To replace the basic TV overlay config with the Automotive overlay config, adjust the configuration in device/arpi/rpi4/overlay/frameworks/base/core/res/res/values/config.xml.
Remove:
- <integer name="config_defaultUiModeType">4</integer> <!--disable forced UI_MODE_TYPE_TELEVISION, as there is only MODE_TYPE_CAR available now-->
- <integer name="config_longPressOnHomeBehavior">0</integer> <!--disable home button long press action-->
- <bool name="config_hasPermanentDpad">true</bool> <!--disable D-pad-->
- <string name="config_appsAuthorizedForSharedAccounts">;com.android.tv.settings;</string> <!--remove unnecessary access for a shared account as there is nothing in com.android.tv.* now-->
… and add:
- <bool name="config_showNavigationBar">true</bool> <!--enable software navigation bar, as there is no hardwave one-->
- <bool name="config_enableMultiUserUI">true</bool> <!--enable multi-user, as AAOS uses background processes called in another sessions -->
- <integer name="config_multiuserMaximumUsers">8</integer> <!--set maximum user count, required by the previous one-->
Now let’s rename the android-rpi original /device/arpi/rpi4/rpi4.mk to /device/arpi/rpi4/android_rpi4.mk. We need to adjust the file a little bit.
Remove the following variables definitions. Some of them you will re-create in another file, while some of them are not needed.
- PRODUCT_NAME
- PRODUCT_DEVICE
- PRODUCT_BRAND
- PRODUCT_MANUFACTURER
- PRODUCT_MODEL
- USE_OEM_TV_APP
- DEVICE_PACKAGE_OVERLAYS
- PRODUCT_AAPT_PRED_CONFIG
- PRODUCT_CHARACTERISTICS
Remove the following invocations. We’re going to call necessary external files in another mk file.
- $(call inherit-product, device/google/atv/products/atv_base.mk)
- $(call inherit-product, $(SRC_TARGET_DIR)/product/core_64_bit_only.mk)
- $(call inherit-product, $(SRC_TARGET_DIR)/product/languages_full.mk)
- include frameworks/native/build/tablet-10in-xhdpi-2048-dalvik-heap.mk
In PRODUCT_PROPERTY_OVERRIDES remove debug.drm.mode.force=1280x720 and add the following properties. This way you remove the TV launcher configuration and override the default automotive launcher configuration.
- dalvik.vm.dex2oat64.enabled=true
- keyguard.no_require_sim=true
- ro.logd.size=1m
Now you need to completely remove the android-rpi TV launcher and add RenderScript support for Automotive OS. In PRODUCT_PACKAGES remove:
- DeskClock
- RpLauncher
… and add:
- librs_jni
Create a new rpi4.mk4 with the following content:
PRODUCT_PACKAGE_OVERLAYS += device/generic/car/common/overlay
$(call inherit-product, $(SRC_TARGET_DIR)/product/core_64_bit.mk)
$(call inherit-product, device/arpi/rpi4/android_rpi4.mk)
$(call inherit-product, $(SRC_TARGET_DIR)/product/full_base.mk)
$(call inherit-product, device/generic/car/common/car.mk)
PRODUCT_SYSTEM_DEFAULT_PROPERTIES += \
android.car.number_pre_created_users=1 \
android.car.number_pre_created_guests=1 \
android.car.user_hal_enabled=true
DEVICE_PACKAGE_OVERLAYS += device/arpi/rpi4/overlay device/generic/car/car_x86_64/overlay
PRODUCT_NAME := rpi4
PRODUCT_DEVICE := rpi4
PRODUCT_BRAND := arpi
PRODUCT_MODEL := Raspberry Pi 4
PRODUCT_MANUFACTURER := GrapeUp and ARPi
Due to the license, remember to add yourself to the PRODUCT_MANUFACTURER field.
Now you have two mk files – android-rpi.mk is borrowed from android-rpi project and adjusted, and rpi.mk contains all changes for Automotive OS. You can meld these two together or split them into more files if you’d like, but keep in mind that the order of invocations does matter (not always, but still).
As Android Automotive OS is bigger than Android TV, we need to increase the system partition size to fit the new image. In device/arpi/rpi4/BoardConfig.mk increase BOARD_SYSTEMIMAGE_PARTITION_SIZE to 2147483648, which means 2GB.
You need to apply all changes described in https://github.com/android-rpi/device_arpi_rpi4/wiki/arpi-11-:-framework-patch too. Those changes are also included in the patch file attached .
If you use the 8GB version of Raspberry Pi, you need to replace device/arpi/rpi4/boot/fixup4.dat and device/arpi/rpi4/boot/start4.elf files. You can find the correct files in the patch file attached or you may use the official source: https://github.com/raspberrypi/firmware/tree/master/boot . It’s probably not needed for 4GB version of Raspberry, but I don’t have such a device for verification.
Path file
If you prefer to apply all changes described above as a single file, go to your sources directory and run ‘git apply --no-index <path_to_patch_file> ’. There is also a boot animation replaced in the patch file . If you want to create one of your own, follow the official manual here: https://android.googlesource.com/platform/frameworks/base/+/master/cmds/bootanimation/FORMAT.md .
Now we can build!
That’s the easy part. Just run a few commands from below. Firstly, we need to build a custom kernel for Android. ‘merge_config.sh’ script just configures all variables required. The first ‘make’ command builds the real kernel image (which can take a few minutes). Next, build a device tree configuration.
cd kernel/arpi
ARCH=arm64 scripts/kconfig/merge_config.sh arch/arm64/configs/bcm2711_defconfig kernel/configs/android-base.config kernel/configs/android-recommended.config
ARCH=arm64 CROSS_COMPILE=aarch64-linux-gnu- make Image.gz
ARCH=arm64 CROSS_COMPILE=aarch64-linux-gnu- DTC_FLAGS="-@" make broadcom/bcm2711-rpi-4-b.dtb
ARCH=arm64 CROSS_COMPILE=aarch64-linux-gnu- DTC_FLAGS="-@" make overlays/vc4-kms-v3d-pi4.dtbo
cd ../..
The next part is to build the entire system. “envsetup.sh” script sets up variables and adds custom commands to your terminal. Then you can pick the correct pair of Android versions and devices with “lunch”. You can run it without parameters to see (almost) all possible configurations. In this step, you can decide to build a system for dedicated hardware (eg. Dragonboard) and switch between phone/tablet/TV/wearable/automotive versions of Android. The last line is a real building. We can’t run just “make” or “m”, as documented in the official manual because we need to create three specific images to write them on an SD card and run them on Raspberry Pi. Replace “X” in ‘-j X’ with the number of threads you want to use. The default value is the number of logical processors on your computer.
source build/envsetup.sh
lunch rpi4-eng
make -j X ramdisk systemimage vendorimage
I hope you have a delightful book next to you because the last building takes a few hours depending on your hardware. Good news! If you need to adapt something and build again, in most cases you just need the three last lines (or even just the very last one) – to source the environment setup, to pick the lunch configuration, and to make ramdisk, system, and vendor images. And it takes hours for the first time only.
Creating an SD card
This step seems to be easy, but it isn’t. WSL doesn’t contain drivers for the USB card reader. You can use usbip to forward a device from Windows to the subsystem, but it doesn’t work well with external storage without partitions. The solution is a VirtualBox with Ubuntu installed. Just create a virtual machine, install Ubuntu, and install Guest Additions. Then you can connect the card reader and pass it to the virtual machine. If you’re a minimalist, you can use Ubuntu Server or any other Linux distribution you like. Be aware that using a card reader built into your computer may be challenging depending on drivers and the hardware connection type (USB-like, or PCI-e).
Now, you need to create a partition schema on the SD card. I assume the card is loaded to the system as /dev/sdb. Check your configuration before continuing to avoid formatting your main drive or another disaster. Let’s erase the current partition table and create a new one.
sudo umount /dev/sdb*
sudo wipefs -a /dev/sdb
sudo fdisk /dev/sdb
Now let’s create partitions. First, you need a 128MB active partition of the W95 FAT32 (LBA) type, second a 2GB Linux partition, third a 128MB Linux partition, and the rest of the card for user data (also Linux partition). Here’s how to navigate through fdisk menu to configure all partitions.
Welcome to fdisk (util-linux 2.37.2).
Changes will remain in memory only, until you decide to write them.
Be careful before using the write command.
Device does not contain a recognized partition table.
Created a new DOS disklabel with disk identifier 0x179fb9bc.
Command (m for help): n
Partition type
p primary (0 primary, 0 extended, 4 free)
e extended (container for logical partitions)
Select (default p):
Using default response p.
Partition number (1-4, default 1):
First sector (2048-61022207, default 2048):
Last sector, +/-sectors or +/-size{K,M,G,T,P} (2048-61022207, default 61022207): +128M
Created a new partition 1 of type 'Linux' and of size 128 MiB.
Command (m for help): a
Selected partition 1
The bootable flag on partition 1 is enabled now.
Command (m for help): t
Selected partition 1
Hex code or alias (type L to list all): 0c
Changed type of partition 'Linux' to 'W95 FAT32 (LBA)'.
Command (m for help): n
Partition type
p primary (1 primary, 0 extended, 3 free)
e extended (container for logical partitions)
Select (default p):
Using default response p.
Partition number (2-4, default 2):
First sector (264192-61022207, default 264192):
Last sector, +/-sectors or +/-size{K,M,G,T,P} (264192-61022207, default 61022207): +2G
Created a new partition 2 of type 'Linux' and of size 2 GiB.
Command (m for help): n
Partition type
p primary (2 primary, 0 extended, 2 free)
e extended (container for logical partitions)
Select (default p):
Using default response p.
Partition number (3,4, default 3):
First sector (4458496-61022207, default 4458496):
Last sector, +/-sectors or +/-size{K,M,G,T,P} (4458496-61022207, default 61022207): +128M
Created a new partition 3 of type 'Linux' and of size 128 MiB.
Command (m for help): n
Partition type
p primary (3 primary, 0 extended, 1 free)
e extended (container for logical partitions)
Select (default e): p
Selected partition 4
First sector (4720640-61022207, default 4720640):
Last sector, +/-sectors or +/-size{K,M,G,T,P} (4720640-61022207, default 61022207):
Created a new partition 4 of type 'Linux' and of size 26,8 GiB.
Command (m for help): w
The partition table has been altered.
Calling ioctl() to re-read partition table.
Syncing disks.
Be careful with the last partition – fdisk proposes creating an extended one by default, which is not needed in our use case.
If you don’t do it for the first time on the same card, you may see a warning that some partition already contains a file system signature. You can safely agree to remove it.
Partition #4 contains a ext4 signature.
Do you want to remove the signature? [Y]es/[N]o: Y
The signature will be removed by a write command.
Now, let’s supply file systems for the first and the last partitions.
sudo mkdosfs -F 32 /dev/sdb1
sudo mkfs.ext4 -L userdata /dev/sdb4
We won’t write anything to the last one, as it’s for user data only and will be filled by Android during the first boot. But we need to write some files for the first one. Let’s create a temporary mount directory under /mnt/p1 (like “partition 1”), mount it, and copy the necessary files from the Android built in the earlier section. It’s strange, but we’re going to copy files from one virtual machine (WSL) to another (VirtualBox). You can simply mount a wsl drive as a shared folder in VirtualBox. If you don’t see a WSL drive in your Windows Explorer, you can map it as a network drive using “\\wsl$\Ubuntu” path
sudo mkdir /mnt/p1
sudo mount /dev/sdb1 /mnt/p1
sudo mkdir /mnt/p1/overlays
cd <PATH_TO_YOUR_ANDROID_SOURCES_IN_WSL>
sudo cp device/arpi/rpi4/boot/* /mnt/p1
sudo cp kernel/arpi/arch/arm64/boot/Image.gz /mnt/p1
sudo cp kernel/arpi/arch/arm64/boot/dts/broadcom/bcm2711-rpi-4-b.dtb /mnt/p1
sudo cp kernel/arpi/arch/arm/boot/dts/overlays/vc4-kms-v3d-pi4.dtbo /mnt/p1/overlays/
sudo cp out/target/product/rpi4/ramdisk.img /mnt/p1
sudo umount /mnt/p1
sudo rm -rf /mnt/p1
If you’re looking at the official android-rpi project manual, there is a different path for vc4-kms-v3d-pi4.dtbo file. That’s OK – they use a symbolic link we are unable to use in this filesystem.
Sometimes, you can see an error message when creating an “overlays” directory. It happens from time to time, because “mount” returns to the console before really mounting the drive. In such a case, just call “mkdir” again. Be aware of that, especially if you’re going to copy-paste the entire listing from above.
Now, let’s copy the two remaining partitions. If you’re struggling with dd command (it may hang), you can try to copy big *.img files from WSL to VirtualBox first.
cd <PATH_TO_YOUR_ANDROID_SOURCES_IN_WSL>/out/target/product/rpi4/
sudo dd if=system.img of=/dev/sdb2 bs=1M status=progress
sudo dd if=vendor.img of=/dev/sdb3 bs=1M status=progress
Congratulations!
You’re done. You’ve downloaded, prepared, built, and saved your own Android Automotive OS. Now you can put the SD card into Raspberry, and connect all cables (make sure you connect the Raspberry power cable at the end). There is no “power” button, and it doesn’t matter which micro-HDMI or USB port of Raspberry you use. It’s now time to enjoy your own Android Automotive OS!
If it doesn’t work
The world is not perfect and sometimes something goes terribly wrong. If you see the boot animation for a long time, or if your device crashes in a loop a few seconds after boot, you can try to debug it.
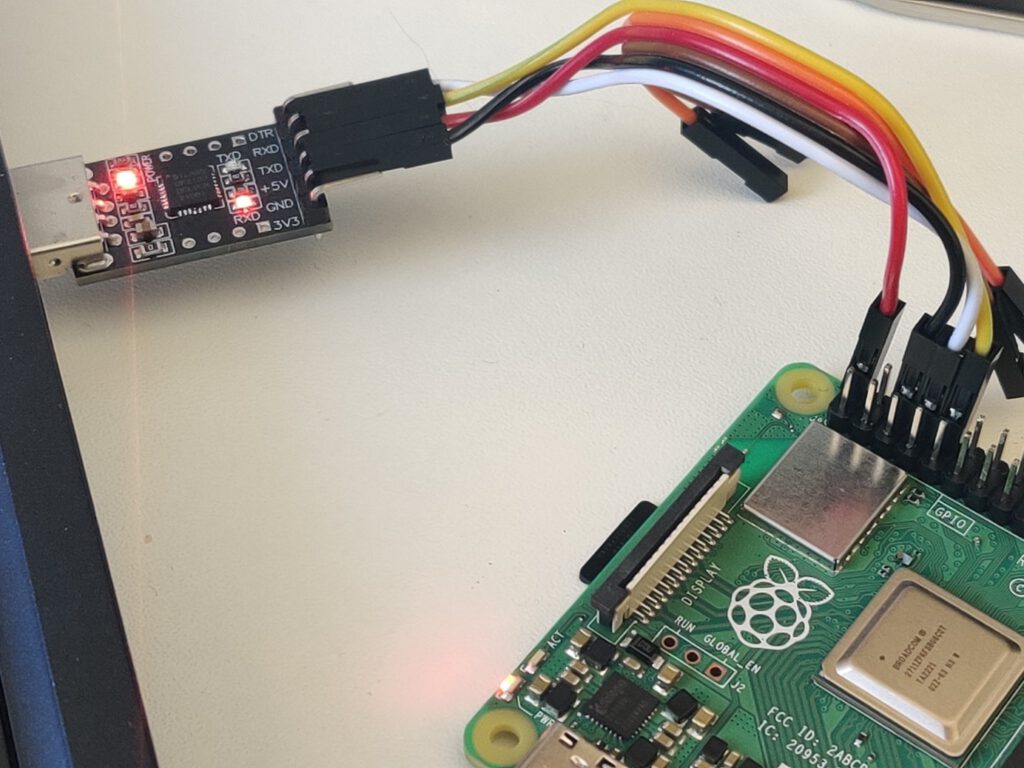
You need a USB-TTL bridge (like this one https://www.sunrom.com/p/cp2102-usb-ttl-uart-module ) to connect the correct pins from the Raspberry to the USB. You need to connect pin 6 (ground) to the GND pin in the bridge, pin 8 (RXD) to the RXD pin of the bridge and pin 10 (TXD) to the TXD pin of the bridge. If you want to power the Raspberry via the bridge, you need to also connect pin 2 to +5V pin of the bridge. It is not recommended, because of the lower voltage, so your system might be unstable. If you don’t have a power adapter, you can simply connect a USB cable between your computer port and the USB C port of the Raspberry. Warning! You can’t connect both a +5V connector here and a USB C power port of the Raspberry or you’ll burn the Raspberry board.
See the schema for the connection reference.
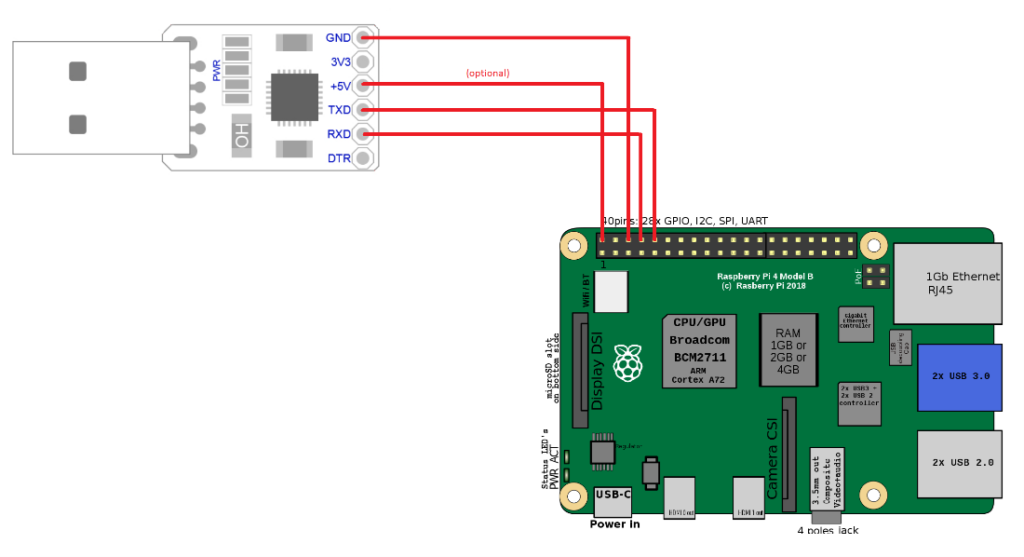
Depending on your bridge model, you may need an additional driver. I use this one: https://www.silabs.com/developers/usb-to-uart-bridge-vcp-drivers?tab=downloads .
When you connect the +5V pin or USB-C power adapter ( again, never both at the same time! ), the Raspberry starts. Now you can open Putty and connect to your Android. Pick Serial and type COMX in the serial line definition. X is the number of your COM port. You can check it in your device manager – look for “USB to UART bridge (COM4)” or the like. The correct connection speed is 115200.
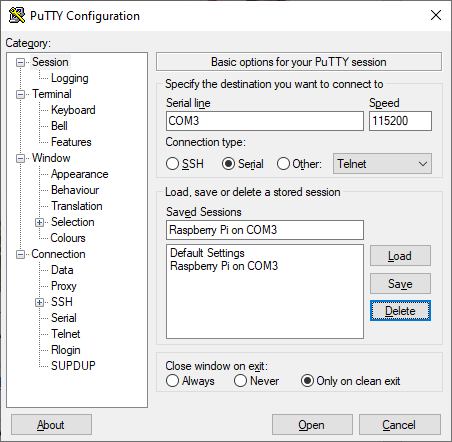
Open the connection to access the Android shell. By default, Android spawns all logs to the standard output, so you should see a lot of them right away. Anyway, it’s dual-side communication and you have full terminal access to your Android if you need to check/modify any file or call any command. Just strike enter to see the command prompt. You can even call ‘su’ to gain superuser access on your Android running on Raspberry.
Connecting via adb
If you want to use Android Debug Bridge to connect to your device, using a USB bridge is not enough. When running ‘adb devices’ on your computer, the Android Automotive OS running on Raspberry is not recognized. You can use a putty connection to turn on a TCP debug bridge instead.
Make sure you’ve connected Android and your computer to the same network. Open putty and connect to the running Android console. Log as root and enable ADB via TCP. Then check your IP address.
su
setprop service.adb.tcp.port 5555
stop adbd
start adbd
ifconfig wlan0
Now, using your Windows command line, go to the Android SDK platform-tools directory and connect to your device. As you can see, the IP address of mine Raspnberry is 192.168.50.47.
cd %userprofile%\AppData\Local\Android\Sdk\platform-tools
adb connect 192.168.50.47:5555
If you want to use ADB in WSL, you can link the Windows program in WSL using the following command.
sudo ln -s /mnt/c/Users/<your_username>/AppData/Local/Android/Sdk/platform-tools/adb.exe /usr/bin/adb
You can now use ADB to use logcat without putty or to install applications without manually transferring APK files to the SD card. Fun fact – if you use a USB bridge and USB power supply, you have two physical connections between your computer and the Android-running one, however, you still need to use ADB over WiFi to use the debug bridge.
Summary: Android Automotive OS on Raspberry Pi 4B
That’s all. Android Automotive OS 11 is running. You can install the apps you need, take them to your car, or do whatever you’d like with them. Using hardware instead of an emulator allows you to manually manage partitions (e.g. for the OTA update ) and connect external devices like a real GPS receiver or accelerometer. The bare metal hardware overperforms the emulator too. And most importantly – you can easily take it to your car, receive power from an in-car USB port, connect it to an ODB-II port and run real-life tests without a laptop.
Is your project ready? Great, now you can try doing the same with AAOS 13 .
What's next for the digital twin
Digital twins, or virtual copies of material objects, are being used in various types of simulations and the automotive industry is tapping into the potential offered by this technology. Representatives of this market can comprehensively monitor equipment and systems and prevent numerous failures. But what does the future hold for Digital Twin solutions, and who will play the leading role in their development in the years ahead?
The concept of Digital Twin today
To get started, let's have a few words of reminder. A virtual model called a digital twin is based on data from an actual physical object, equipped with special sensors. The collected information allows to the creation of a simulation of the object’s behavior in the real world, while testing takes place in virtual space.
The concept of Digital Twins is developing by leaps and bounds, with its origins dating back to 2003. For many years, more components have been added to this technology . Currently, we distinguish the following:
- digital (virtual) aspect,
- physical object,
- the connection between the two,
- data,
- services.
The last two were added to the classification by experts only in recent years. This was triggered by developments such as machine learning, Big Data , IoT, and cybersecurity technologies.
Capabilities of digital twins in automotive
Digital twins are excelling in many fields when it comes to working on high-tech cars, especially those connected to the network. Below are selected areas of influence.
Designing the vehicle
3D modeling is a way of designing that has been around for many years in the widespread automotive manufacturing industry. But this one is not standing still, and the growing popularity of digital twins is proof of that. Digital replicas extend the concept of physical 3D modeling to virtual representations of software, interactive systems, and usage simulations. As such, they take the conceptual process to a higher level of sophistication.
Production stage
Design is not everything. In fact, the technology mentioned above also works well at the production stage . First and foremost, DT's solutions facilitate control over advanced manufacturing techniques. Since virtual twins improve real-time monitoring and management of facilities, they support the construction of increasingly complex products.
Besides, the safety of the work itself during the production of cars and parts adds to the issue. By simulating manufacturing processes , digital twins contribute to the creation of appropriate employment conditions.
Advanced event prediction
Virtual copies have the ability to simulate the physical state of a vehicle and thus predict the future. Predictive maintenance in this case is based on such reliable data as temperature, route, engine condition, or driver behavior. This can be used to ensure optimal vehicle performance.
Aspects of cyber security
DT predicted for automotive software can help simulate the risk of data theft or other cybersecurity threats. The digital twin of the whole Datacenter can be created to simulate different attack vectors. Continuous software monitoring is also helpful in the early detection of vulnerabilities to hacking attacks (and more)
Development of security-improving systems
Virtual replicas of vehicles and the real world also enable the prediction of specific driving situations and potential vehicle responses. This is valuable knowledge that can be used, for example, to further develop ADAS systems such as electronic stability control and autonomous driving. This is all aimed at ensuring safer, faster, and more economical driving.
How will the digital twin trend evolve in the coming years?
One of the leading trend analysis companies from the automotive world has developed its own prediction of the development of specific sub-trends within the scope of the digital twin. In this regard, the experts analyzed such areas of development as:
- Predictive Maintenance.
- Powertrain Control (e.g. vehicle speed and other software parameters).
- Cybersecurity.
- Vehicle Manufacturing.
- Development and Testing.
The analysis shows that all of the above issues will move into the mainstream in the third decade of the 21st century. On the other hand, some of them will develop at a slower pace in the years to come, while others will develop at a slightly higher rate.
Subtrend Powertrain Control will have a lot to say. As early as around 2025, we will see that basic control parameters will be defined and tested primarily in the digital twin.
To a lesser extent, but still, Development and Testing solutions will also be implemented. DTs will be created to simulate systems in such a way as to accelerate development processes. The same will be true in the area of Predictive Maintenance. Vehicle condition information will soon be sent in bulk to the cloud or database. There, a virtual copy will be used to predict how certain changes will affect maintenance needs.
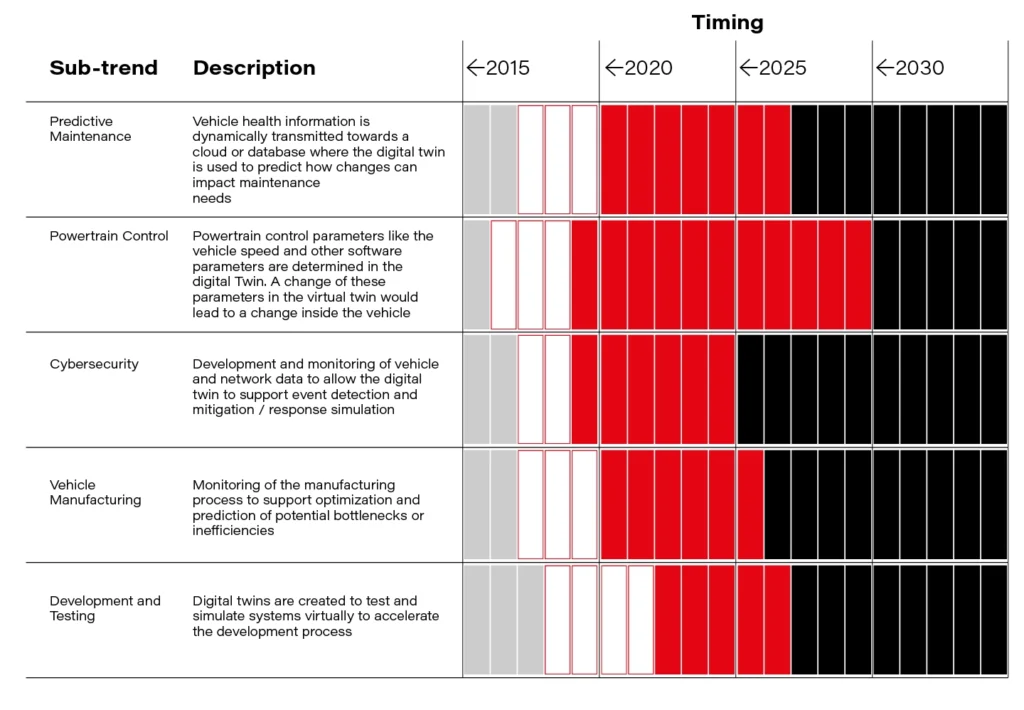
Key players in DT development in automotive
The market is already witnessing the emergence of brands that will push (with varying intensity) DT technology in the broader automotive sector (cars, software, parts). Specifically standing out in this regard are:
- Tesla,
- BOSCH,
- SIEMENS,
- Porsche,
- Volkswagen,
- Continental.
Both OEMs and Suppliers will shift their focus to the Development and Testing area. The proportions are somewhat different in the case of Vehicle Manufacturing, as this slice of the pie tends to go to OEMs for the time being. However, it is possible that parts manufacturers will also get their share before long. On the other hand, without any doubt, the area of Cybersecurity already belongs to OEMs , and the percentage of such companies that use DT to improve cybersecurity is prevalent.
The digital twin and the future of automotive brands
The digital twin is a solution that helps address mature challenges specific to the entire modern automotive industry. It supports digitization processes and data-driven decision-making. Manufacturers can apply this technology at all stages of the production process, thus eliminating potential abnormalities.
In the upcoming years, we can expect DT-type applications to become more common, especially among OEMs.
So what are brands supposed to do if they want to secure a significant position in a market where the DM trend is becoming highly relevant? First, it's a good idea if they collaborate with those driving change. Second, it' s worth adopting a specific strategy, as not every sub-trend needs to be addressed in every scenario. This is brilliantly illustrated in the SBD chart below. The authors of this chart recommend certain behaviors, breaking them down into specific categories and relating them to specific market participants.
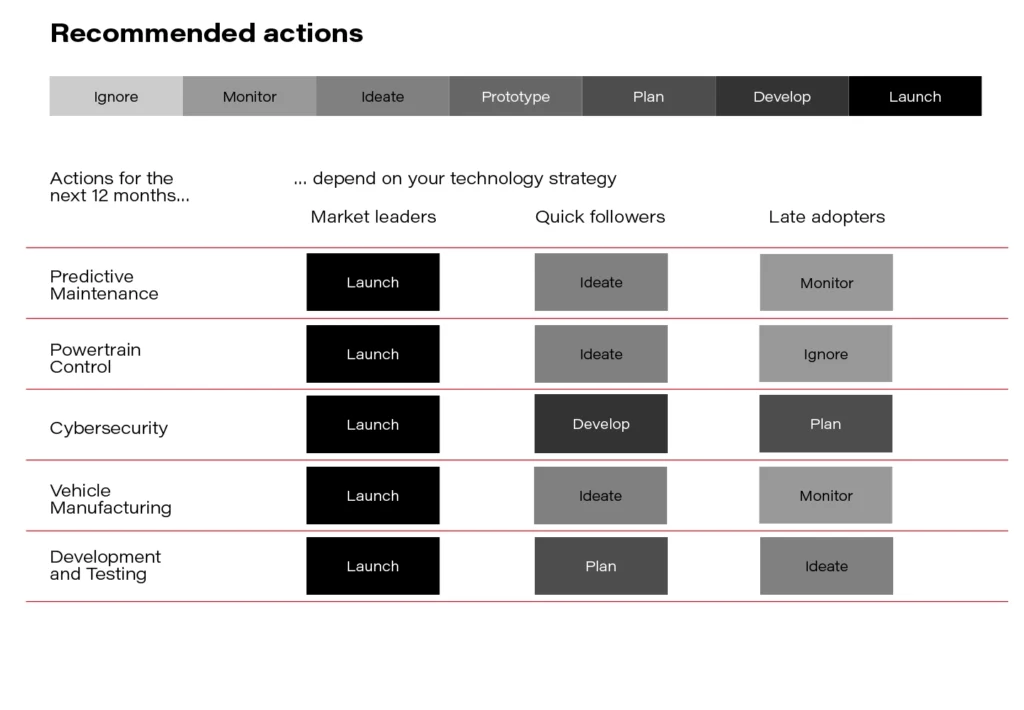
Based on this overview, it's good to see that the leaders don't have too much choice, and over the next 12 months, they should be releasing solutions that fall into every sub-trend. The issue of cyber security is becoming essential as well . The digital twins have great potential in developing it, so basically all stakeholders should focus on this area.
gRPC Remote Procedure Call (with Protobuf)
One of the most crucial technical decisions during designing API is to choose the proper protocol for interchanging data. It is not an easy task. You have to answer at least a few important questions - which will integrate with API, if you have any network limitations, what is the amount and frequency of calls, and will the level of your organization's technological maturity allow you to maintain this in the future?
When you gather all the information, you can compare different technologies to choose one that fits you best. You can pick and choose between well-known SOAP, REST, or GraphQL. But in this article, we would like to introduce quite a new player in the microservices world - gRPC Remote Procedure Call.
What is gRPC (Remote Procedure Call)?
gRPC is a cross-platform open-source Remote Procedure Call (RPC) framework initially created by Google. The platform uses Protocol Buffers as a data serialization protocol, as the binary format requires fewer resources and messages are smaller. Also, a contract between the client and server is defined in proto format, so code can be automatically generated. The framework relies on HTTP/2 (supports TLS) and beyond performance, interoperability, and code generation offers streaming features and channels.
Declaring methods in contract
Have you read our article about serializing data with Protocol Buffers ? We are going to add some more definitions there:
message SearchRequest {
string vin = 1;
google.protobuf.Timestamp from = 2;
google.protobuf.Timestamp to = 3;
}
message SearchResponse {
repeated Geolocation geolocations = 1;
}
service GeolocationServer {
rpc Insert(Geolocation) returns (google.protobuf.Empty);
rpc Search(SearchRequest) returns (SearchResponse);
}
The structure of the file is pretty straightforward - but there are a few things worth noticing:
-
service GeolocationServer- service is declared by keyword with that name -
rpc Insert(Geolocation)- methods are defined byrpckeyword, its name, and request parameter type -
returns (google.protobuf.Empty)- and at the end finally a return type. As you can see you have to always return any value, in this case, is a wrapper for an empty structure -
message SearchResponse {repeated Geolocation geolocations = 1};- if you want to return a list of objects, you have to mark them asrepeatedand provide a name for the field
Build configuration
We can combine features of Spring Boot and simplify the setup of gRPC server by using the dedicated library GitHub - yidongnan/grpc-spring-boot-starter: Spring Boot starter module for gRPC framework. (follow the installation guide there) .
It let us use all the goodness of the Spring framework (such as Dependency Injection or Annotations).
Now you are ready to generate Java code! ./gradlew generateProto
Server implementation
To implement the server for our methods definition, first of all, we have to extend the proper abstract class, which had been generated in the previous step:
public class GeolocationServer extends GeolocationServerGrpc.GeolocationServerImplBase
As the next step add the @GrpcService annotation at the class level to register gRPC server and override server methods:
@Override
public void insert(Geolocation request, StreamObserver<Empty> responseObserver) {
GeolocationEvent geolocationEvent = convertToGeolocationEvent(request);
geolocationRepository.save(geolocationEvent);
responseObserver.onNext(Empty.newBuilder().build());
responseObserver.onCompleted();
}
@Override
public void search(SearchRequest request, StreamObserver<SearchResponse> responseObserver) {
List<GeolocationEvent> geolocationEvents = geolocationRepository.searchByVinAndOccurredOnFromTo(
request.getVin(),
convertTimestampToInstant(request.getFrom()),
convertTimestampToInstant(request.getTo())
);
List<Geolocation> geolocations = geolocationEvents.stream().map(this::convertToGeolocation).toList();
responseObserver.onNext(SearchResponse.newBuilder()
.addAllGeolocations(geolocations)
.build()
);
responseObserver.onCompleted();
}
-
StreamObserver<> responseObserver- stream of messages to send -
responseObserver.onNext()- writes responses to the client. Unary calls must invoke onNext at most once -
responseObserver.onCompleted()- receives a notification of successful stream completion
We have to convert internal gRPC objects to our domain entities:
private GeolocationEvent convertToGeolocationEvent(Geolocation request) {
Instant occurredOn = convertTimestampToInstant(request.getOccurredOn());
return new GeolocationEvent(
request.getVin(),
occurredOn,
request.getSpeed().getValue(),
new Coordinates(request.getCoordinates().getLatitude(), request.getCoordinates().getLongitude())
);
}
private Instant convertTimestampToInstant(Timestamp timestamp) {
return Instant.ofEpochSecond(timestamp.getSeconds(), timestamp.getNanos());
}
Error handling
Neither client always sends us a valid message nor our system is resilient enough to handle all errors, so we have to provide ways to handle exceptions.
If an error occurs, gRPC returns one of its error status codes instead, with an optional description.
We can handle it with ease in a Spring’s way, using annotations already available in the library:
@GrpcAdvice
public class GrpcExceptionAdvice {
@GrpcExceptionHandler
public Status handleInvalidArgument(IllegalArgumentException e) {
return Status.INVALID_ARGUMENT.withDescription(e.getMessage()).withCause(e);
}
}
-
@GrpcAdvice- marks the class as a container for specific exception handlers -
@GrpcExceptionHandler- method to be invoked when an exception specified as an argument is thrown
Now we ensured that our error messages are clear and meaningful for clients.
gRPC - is that the right option for you?
As demonstrated in this article, gRPC integrates well with Spring Boot, so if you’re familiar with it, the learning curve is smooth.
gRPC is a worthy option to consider when you’re working with low latency, highly scalable, distributed systems. It provides an accurate, efficient, and language-independent protocol.
Check out the official documentation for more knowledge! gRPC

How automotive open source technologies accelerate software development in the automotive industry
The driving properties or the external appearance of cars, which used to serve as a differentiator between manufacturers, no longer play a key marketing role today. It is the car's software that has become the new growth engine for the automotive industry. Yet, the question remains where this software should come from and whether it pays to use a free-access license. Here we compare the most popular automotive open-source solutions.
What exactly is Open Source Software in the automotive industry?
Most of the software developed by the major automotive companies is copyrighted to other players in the market. Does this mean that being a less well-resourced player, it is impossible to thrive in the SDV sector? Not necessarily, and one of the solutions may be to take advantage of open-source software (OSS).
A characteristic of such access is that the source code is freely available to programmers under certain licensing conditions.
Flexible customization to meet your needs
It is important to know that OSS does not necessarily entail that a given vehicle manufacturer is "doomed" to certain functionalities. After all, the operating system, even if based on publicly available code, can then be developed manually.
The programmer is therefore authorized to benefit from free libraries, and cut and paste individual values into the code at will, modifying the content of the whole .
OSS is gaining ground
According to Flexera's research, more than 50% of all code written globally today runs on open source. That's a large percentage, which reflects the popularity of free software.
The OSS trend has also gained importance in the automotive industry in recent years, with OEMs trying with all their might to keep up with technological advances and new consumer demands. According to the same study, between 50% and 70% of the automotive software stack today comes from open source.
In contrast, Black Duck software audits of commercial applications demonstrate that open-source components are predicted to account for 23% of automotive applications.
Automotive Open-Source Software implies a number of benefits. But can we already talk about a revolution?
Why is the mentioned solution so popular nowadays? In fact, there are several reasons.
- Allows minimizing costly investments (budget saved can be used as a way of developing other solutions).
- Enables vehicle manufacturers to offer consumers a fresh and compelling digital experience .
- Contributes to faster business growth due to reduced expenses and "tailor-made" software development teams.
- Provides benefits to consumers by making cars safer with more reliable data.
- It is used to maximize product agility cost-effectively.
Clearly, these arguments are quite strong. Yet, to be able to talk about a revolution and a complete transition to OSS in the automotive industry, it will still take some more time. After all, at present, this is applied mainly to selected vehicle functions, such as entertainment.
Nevertheless, some companies are already embracing free licensing, seeing it as a new business model. The potential is certainly substantial, although not yet fully harnessed. For instance, it is said to be very difficult to meet all the requirements of SDV, including those related to digital security issues, as we write later in the article.
Examples of open-source solutions in the auto industry
Automotive Grande Linux
The Linux operating system is a prime example of the power of an open-source solution. The base of this tech giant ranks among the top operating systems worldwide, especially when talking about automotive.
The Automotive Grade Linux (AGL) project is particularly noteworthy here, as it brings together manufacturers, suppliers, and representatives of technology companies. AGL platform, with Linux at its core, develops an open software platform from the ground up that can serve as the de facto industry standard, enabling the rapid development of the connected car market. Automotive companies, including Toyota, already leverage Linux open-source for automotive.
As of today, AGL (hosted by the Linux Foundation, the world's) is the only organization that seeks to fully aggregate all the functionalities of modern vehicles into Open-Source software. This includes such areas as:
- Infotainment System – UCB 8.0 currently available, SDK available.
- Instrument Cluster – device profile available with UCB 6.0 (Funky Flounder).
- Telematics – device profile available with UCB 6.0 (Funky Flounder).
- Heads-up Display (HUD).
- Advanced Driver Assistance Systems (ADAS).
- Functional Safety.
- Autonomous Driving.
The founders of the project assume that in the current reality it is becoming obvious that the amount of code needed to support autonomous driving is too large for any one company to develop it independently. That's why they are the first in the world aiming to create a coherent OSS ecosystem for the automotive industry.
Red Hat In-Vehicle Operating System
A competitive approach is being adopted by Red Hat, which has also mushroomed into a group of free software innovators in connected cars. Their proprietary solution, Red Hat In-Vehicle Operating System, is designed to help automakers integrate software-defined vehicle technology into their production line faster than ever.
General Motors and Qualcomm Technologies Inc. have already declared their interest in such an approach.
Part of the mission of the above-mentioned company is to develop certified functional safety systems built on Linux with functional safety certification (ASIL-B) to support critical in-vehicle applications. IVOS from Red Hat is currently (Fall 2022) being tested on the Snapdragon® Digital Chassis™ . This is a set of cloud-connected platforms for telematics and connectivity, digital cockpit, and advanced driver assistance systems. This collaboration is intended to provide:
- faster implementation of new digital services and innovative new features connected to the cloud,
- new opportunities for more in-depth customer engagement,
- the ability to update services over the vehicle's lifetime via the cloud,
- the option of gaining expanded capabilities to perform simple and efficient vehicle updates and maintain functional safety,
- the ability to redefine the driving experience for customers by ensuring seamless connectivity and enhanced intelligence.
Android Automotive OS
Great opportunities are also offered by the software based on a system featuring a distinctive green robot in its logo.
Android Automotive OS (AAOS), as its name is known, is earning increasing recognition across the globe. This is no coincidence, as it allows car companies to provide customers with the most tailor-made experience. Polestar and Volvo were among the first to introduce Android Automotive OS to their Polestar 2 and XC40 Recharge, andrecently Renault has done this with Megane E-Tech.
Other brands have followed suit. Manufacturers such as PSA, Ford, Honda, and GM have already declared their intention to incorporate AAOS into the vehicles they develop.
Part of the implementations come with Google Automotive Services (GAS): Play Store, Google Maps, Google Assistant, and other parts without, their own app stores, and assistants.
Here are selected capabilities of the above-mentioned software:
- AAOS being an integral part of the car brings ideas about controlling features of a car, or at least reading them and reacting within an application accordingly. Emulation provides just a few options to simulate car state, ignition, speed, gear, parking brake, low fuel level, night mode, and environment sensors(temperature, pressure, etc.).
- There is still a requirement to follow design patterns for automotive, and Google is providing a whole design system page.
- Applications submitted to the store are mandatory for an additional review.
- Right now, the documentation states that supported categories for Android Automotive OS apps are focused on in-vehicle infotainment systems: Media, Navigation, Point of Interest, and Video.
Regrettably, though Android has a lot of potential, it still has limitations in terms of functionality and capabilities. Hence, it cannot be described as an ideal solution at this point. We wrote more about these issues and possible solutions to AAOS .
Meanwhile, if you are interested in automotive implementation using Android read this guide.
COVESA / Genivi
The embedded Android Automotive system in vehicles requires proper integration with existing software and with other systems found in the car (for safety, car data, etc.). The Android Automotive SIG project, led by GENIVI, was created with large-scale rollouts in mind.
The premise of the AASIG Android Development Platform is that OEMs, their suppliers, and the broader cockpit software ecosystem can easily and successfully identify both the shortcomings and requirements. This is intended to be done in close collaboration with Google's Android Automotive team.
Among the issues addressed are the following:
- safety,
- access to vehicle information,
- responsibility for long-term maintenance,
- multi-display operation,
- audio management,
- extensions for Android in the automotive environment,
- keeping the in-vehicle system updated to support new Android versions,
- outlining the boundaries within which Tier 1/OEM suppliers must take over major responsibility for supporting Google's Android Automotive team.
As can be seen, in the case of Android, there are a number of hot spots that need to be properly dealt with.
What limitations do you need to be aware of?
Ensuring a high level of security in safety-critical automotive environments has always posed a major challenge for Open-Source Software. This is because you have to reconcile customer expectations while also ensuring data protection.
Certainly, open-source software has more vulnerabilities than dedicated software and thus is more susceptible to hacker attacks. Even a single exploit can be used to compromise hundreds of thousands of applications and websites. Obviously, static and dynamic application security testing (SAST and DAST) can be implemented to identify coding errors. However, such testers do not perform particularly well in identifying vulnerabilities in third-party code.
So if you plan to use connected car technology , you need to examine the ecosystem of software used to deliver these functions. It is also critical to properly manage open-source software in your overall security strategy.
OSS opportunities and challenges
All told, until some time ago, OSS was mainly focused on entertainment. Besides, OEMs have historically been forced to choose between only a few software stacks and technologies. But today they are faced with a rapidly growing number of OSS proposals, APIs, and other solutions.
On top of that, they have a growing number of partners and tech companies to collaborate with. And initiatives such as Autoware and Apollo shift their focus toward applications relevant to the safety and comfort of autonomous vehicles. Of course, these opportunities are also coupled with challenges, such as those related to security or license compliance . On the other hand, this still does not negate the enormous potential of open-source software.
It can be hypothesized that in the long term, a complete transition to SDV will require manufacturers to make optimal use of open-source software. And this will include an increasing range of vehicle functionality. This is an obvious consequence of the rapidly changing automotive market (which in a way forces the search for agile solutions) and growing consumer and infrastructure demands.
Sooner or later, major OEMs and the automotive community will have to face a decision and choose: either proprietary comfort (such as CARIAD from Volkswagen) or the flexibility offered by OSS projects.
Protobuf: How to serialize data effectively with protocol buffers
In a world of microservices, we often have to pass information between applications. We serialize data into a format that can be retrieved by both sides. One of the serialization solutions is Protocol Buffers (Protobuf) - Google's language-neutral mechanism. Messages can be interpreted by a receiver using the same or different language than a producer. Many languages are supported, such as Java, Go, Python, and C++.
A data structure is defined using neutral language through .proto files. The file is then compiled into code to be used in applications. It is designed for performance. Protocol Buffers encode data into binary format, which reduces message size and improves transmission speed.
Defining message format
This .proto the file represents geolocation information for a given vehicle.
1 syntax = "proto3";
2
3 package com.grapeup.geolocation;
4
5 import "google/type/latlng.proto";
6 import "google/protobuf/timestamp.proto";
7
8 message Geolocation {
9 string vin = 1;
10 google.protobuf.Timestamp occurredOn = 2;
11 int32 speed = 3;
12 google.type.LatLng coordinates = 4;
13}
1 syntax = "proto3";
Syntax refers to Protobuf version, it can be proto2 or proto3 .
1package com.grapeup.geolocation;
Package declaration prevents naming conflicts between different projects.
1 message Geolocation {
2 string vin = 1;
3 google.protobuf.Timestamp occurredOn = 2;
4 int32 speed = 3;
5 google.type.LatLng coordinates = 4;
6}
Message definition contains a name and a set of typed fields. Simple data types are available, such as bool, int32, double, string, etc. You can also define your own types or import them.
1google.protobuf.Timestamp occurredOn = 2;
The = 1 , = 2 markers identify the unique tag. Tags are a numeric representation for the field and are used to identify the field in the message binary format. They have to be unique in a message and should not be changed once the message is in use. If a field is removed from a definition that is already used, it must be reserved .
Field types
Aside from scalar types, there are many other type options when defining messages. Here are few, but you can find all of them in the Language Guide Language Guide (proto3) | Protocol Buffers | Google Developers .
Well Known Types
1 import "google/type/latlng.proto";
2 import "google/protobuf/timestamp.proto";
3
4 google.protobuf.Timestamp occurredOn = 2;
5 google.type.LatLng coordinates = 4;
There are predefined types available to use Overview | Protocol Buffers | Google Developers . They are known as Well Know Types and have to be imported into .proto .
LatLng represents a latitude and longitude pair.
Timestamp is a specific point in time with nanosecond precision.
Custom types
1 message SingularSearchResponse {
2 Geolocation geolocation = 1;
3}
You can use your custom-defined type as a field in another message definition.
Lists
1 message SearchResponse {
2 repeated Geolocation geolocations = 1;
3}
You can define lists by using repeated keyword.
OneOf
It can happen that in a message there will always be only one field set. In this case, TelemetryUpdate will contain either geolocation, mileage, or fuel level information.
This can be achieved by using oneof . Setting value to one of the fields will clear all other fields defined in oneof .
1 message TelemetryUpdate {
2 string vin = 1;
3 oneof update {
4 Geolocation geolocation = 2;
5 Mileage mileage =3;
6 FuelLevel fuelLevel = 4;
7 }
8}
9
10 message Geolocation {
11 ...
12}
13
14 message Mileage {
15 ...
16}
17
18 message FuelLevel {
19 ...
20}
Keep in mind backward-compatibility when removing fields. If you receive a message with oneof that has been removed from .proto definition, it will not set any of the values. This behavior is the same as not setting any value in the first place.
You can perform different actions based on which value is set using the getUpdateCase() method.
1 public Optional<Object> getTelemetry(TelemetryUpdate telemetryUpdate) {
2 Optional<Object> telemetry = Optional.empty();
3 switch (telemetryUpdate.getUpdateCase()) {
4 case MILEAGE -> telemetry = Optional.of(telemetryUpdate.getMileage());
5 case FUELLEVEL -> telemetry = Optional.of(telemetryUpdate.getFuelLevel());
6 case GEOLOCATION -> telemetry = Optional.of(telemetryUpdate.getGeolocation());
7 case UPDATE_NOT_SET -> telemetry = Optional.empty();
8 }
9 return telemetry;
10 }
Default values
In proto3 format fields will always have a value. Thanks to this proto3 can have a smaller size because fields with default values are omitted from payload. However this causes one issue - for scalar message fields, there is no way of telling if a field was explicitly set to the default value or not set at all.
In our example, speed is an optional field - some modules in a car might send speed data , and some might not. If we do not set speed, then the geolocation object will have speed with the default value set to 0. This is not the same as not having speed set on messages.
In order to deal with default values you can use official wrapper types protobuf/wrappers.proto at main · protocolbuffers/protobuf . They allow distinguishing between absence and default. Instead of having a simple type, we use Int32Value, which is a wrapper for the int32 scalar type.
1 import "google/protobuf/wrappers.proto";
2
3 message Geolocation {
4 google.protobuf.Int32Value speed = 3;
5}
If we do not provide speed, it will be set to nil .
Configure with Gradle
Once you’ve defined your messages, you can use protoc , a protocol buffer compiler, to generate classes in a chosen language. The generated class can then be used to build and retrieve messages.
In order to compile into Java code, we need to add dependency and plugin in build.gradle
1 plugins {
2 id 'com.google.protobuf' version '0.8.18'
3}
4
5 dependencies {
6 implementation 'com.google.protobuf:protobuf-java-util:3.17.2'
7}
and setup the compiler. For Mac users an osx specific version has to be used.
1 protobuf {
2 protoc {
3 if (osdetector.os == "osx") {
4 artifact = "com.google.protobuf:protoc:${protobuf_version}:osx-x86_64"
5 } else {
6 artifact = "com.google.protobuf:protoc:${protobuf_version}"
7 }
8 }
9}
Code will be generated using generateProto task.
The code will be located in build/generated/source/proto/main/java in a package as specified in .proto file.
We also need to tell gradle where the generated code is located
1 sourceSets {
2 main {
3 java {
4 srcDirs 'build/generated/source/proto/main/grpc'
5 srcDirs 'build/generated/source/proto/main/java'
6 }
7 }
8}
The generated class contains all the necessary methods for building the message as well as retrieving field values.
1 Geolocation geolocation = Geolocation.newBuilder()
2 .setCoordinates(LatLng.newBuilder().setLatitude(1.2).setLongitude(1.2).build())
3 .setVin("1G2NF12FX2C129610")
4 .setOccurredOn(Timestamp.newBuilder().setSeconds(12349023).build())
5 .build();
6
7 LatLng coordinates = geolocation.getCoordinates();
8 String vin = geolocation.getVin();
Protocol Buffers - summary
As shown protocol buffers are easily configured. The mechanism is language agnostic, and it’s easy to share the same .proto definition across different microservices.
Protobuf is easily paired with gRPC, where methods can be defined in .proto files and generated with gradle.
There is official documentation available Protocol Buffers | Google Developers and guides Language Guide (proto3) | Protocol Buffers | Google Developers .

V2X: What needs to be done to accelerate the implementation
Technology that allows vehicles to communicate wirelessly with other vehicles and road infrastructure is the go-to solution of the future. Regrettably, for the time being, the business justification for V2X roll-out by most OEMs remains beyond reach. What are the prospects for the coming years and what can be done to bring the vision of mass V2X implementation closer?
The role of V2X in supporting ADAS and AV
To begin with the basics, let's explore the dynamics of change today when it comes to automation in the automotive industry .
The relationship between ADAS (i.e., the systems that currently prevail) and V2X (new type systems) is best captured in the chart below. It shows that the higher the SAE automation levels are, the more the role of V2X technology is emphasized.
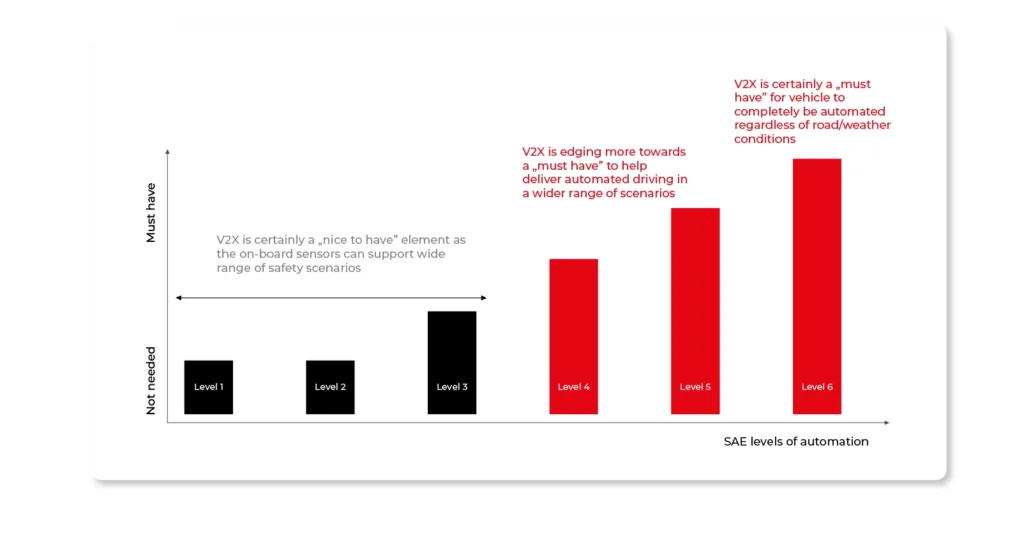
Levels 0 to 2 represent the dominance of old-style, sensor-based security systems. Higher levels of automation are already more oriented toward extensive collaboration:
- Between vehicles,
- Between vehicles and infrastructure.
Advanced Driver Assistance Systems (ADAS) for the past 20 years have relied mainly on elements such as onboard sensors (cameras, radars, ultrasound). Low-level automation worked for a while, but it has its shortcomings. Primarily it is about its maximum range, which is only up to 200 meters. The other thing is its low performance in contact with obstacles, such as blind bends and densely parked vehicles.
Meanwhile, sensing technologies have developed so widely that today it is possible to fully collaborate in such configurations as:
- V2V – Vehicle-to-Vehicle.
- V2D – Vehicle-to-device.
- V2P – Vehicle-to-pedestrian.
- V2H – Vehicle-to-home.
- V2G – Vehicle-to-grid.
- V2I – Vehicle-to-Infrastructure.
The most optimistic scenario assumes, among other things, that most vehicles will be able to connect with each other on highways. And this will markedly increase road safety.
Does this mean that as automotive development continues, V2X will replace existing ADAS solutions? Not necessarily. Yet, it is possible that V2X will greatly expand the applications of current and future driver assistance systems. Thus, it will facilitate reaching greater levels of vehicle autonomy.
V2X: benefits and unique selling points
V2X technology, which enables vehicle-to-vehicle and vehicle-to-infrastructure information exchange, is considered a resource worth having and developing in any automotive company. This is chiefly due to the numerous benefits that can be achieved in terms of traffic efficiency and safety. Here are just some of them.
- Addressing the LoS (Lack of Sight) problem which involves the non-visibility of another object. V2X can even detect elements that are invisible or undetectable by traditional sensors. This includes "blind spots" in the side mirror or objects behind a sharp bend.
- Early warning. Drivers of connected vehicles learn in a timely manner about dangers on multi-lane roads, especially high-speed roads. This allows them to react to the problem at an early stage. It is advisable to know that a vehicle's ABS system is activated within 1 mile of another vehicle equipped with V2X.
- Reducing congestion and streamlining traffic. With the technology described here, such modern fleet management methods as platooning can be successfully applied (see the following paragraphs for more details on this thread).
- Driving assistance even in adverse weather conditions. Fog interferes with " standard" sensors, such as cameras. Meanwhile, the V2X also performs well during limited visibility.
- Efficient alerting. Approaching emergency vehicles can signal their presence from a great distance. Drivers are therefore able to quickly form an emergency lane on the highway.
- Attaining higher levels of vehicle autonomy. Partially autonomous vehicles perform well in a wide range of scenarios on the road (including merging scenarios).
Are there any limitations when implementing V2X?
One of the obstacles facing OEMs at this point is insufficient demand. Although the technology is up and running and there are already many use cases around the world, consumers are reluctant to pay extra for it. This is happening for a good reason.
For example, most customers don't understand why they should pay extra for safety-related functionalities. These are already regulated by law anyway, and besides, they are guaranteed as part of ADAS (and these systems are already included in the basic vehicle price). Let's also bear in mind that a high level of data penetration in a car is not always possible. Most cars are still not high-tech enough. Many features would therefore simply be unavailable. So - why should we incur the cost of it anyway?
Beyond that, there is a long delay between the availability of the technology and the existence of a sufficient number of cars equipped with it. Meanwhile, to talk about V2X on a large scale, these two factors must exist in parallel.
Also, the road infrastructure is not necessarily designed to handle V2X. City authorities still have to focus on "putting out the current fires," so technological development sometimes takes a back seat. Besides, not all of the city's road investment is being carried out at the same time due to limited funds.
Of course, in the long run, safer roads and less congestion are the goal worth achieving, but things can't be done all at once. Examples from specific regions of the world, described in the following paragraphs, in fact, illustrate this point well.
DSRC vs. C-V2X
In the framework of V2X, there are two competing technology solutions:
DSRC - Dedicated Short-Range Communication
A form of wireless communication technology defined by the 802.11p standard. It is essentially an amendment to the IEEE 802.11 (WLAN) standard that defines changes and enhancements in order to effectively support Intelligent Transport Systems (ITS).
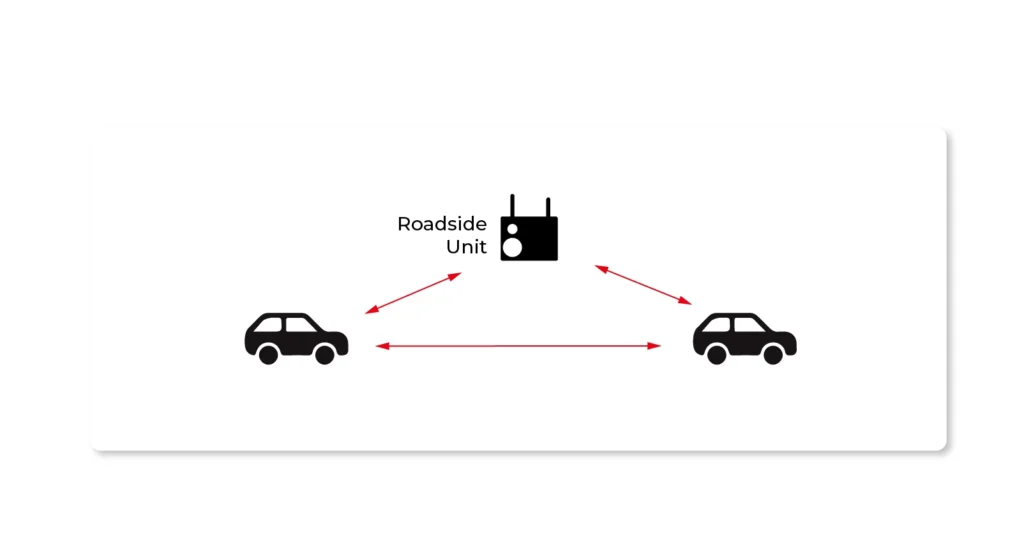
C-V2X - Cellular – V2X
A form of a wireless communication solution using mobile network technology. C-V2X has two modes of operation: PC5 (Direct communication) and Uu (Indirect method of communication using a cellular network).
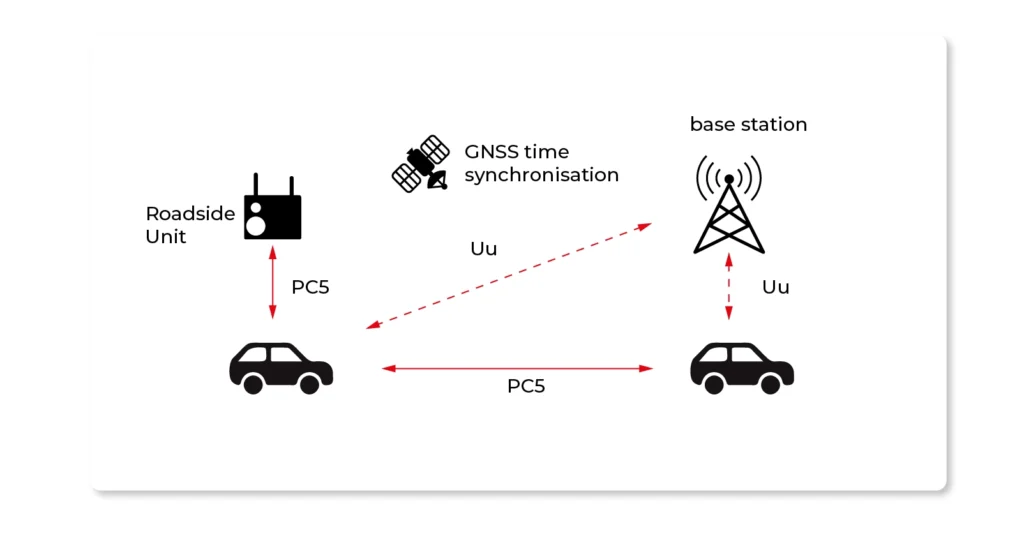
Implementation of systems in specified regions of the world
After decades of development of the aforementioned technology, it is slowly becoming apparent that DSRC is giving way to the popularity of C-V2X. Although the former system still dominates in Europe and the US, this will certainly not last forever. According to experts, before long US and European OEMs will prefer C-V2X in their vehicles exclusively. For the time being, however, both solutions are operating equally in these markets.
This is quite different from China, where the use of Cellular V2X has been embraced without question. For what it's worth, the issue is a bit more complicated in another Asian region, namely Japan, where DSRC-based ETC (electronic toll collection) has been under development for many years. In the Land of the Cherry Blossom, there is uncertainty about which way to eventually head. Cautious predictions, however, point to a slow transition to C-V2X.
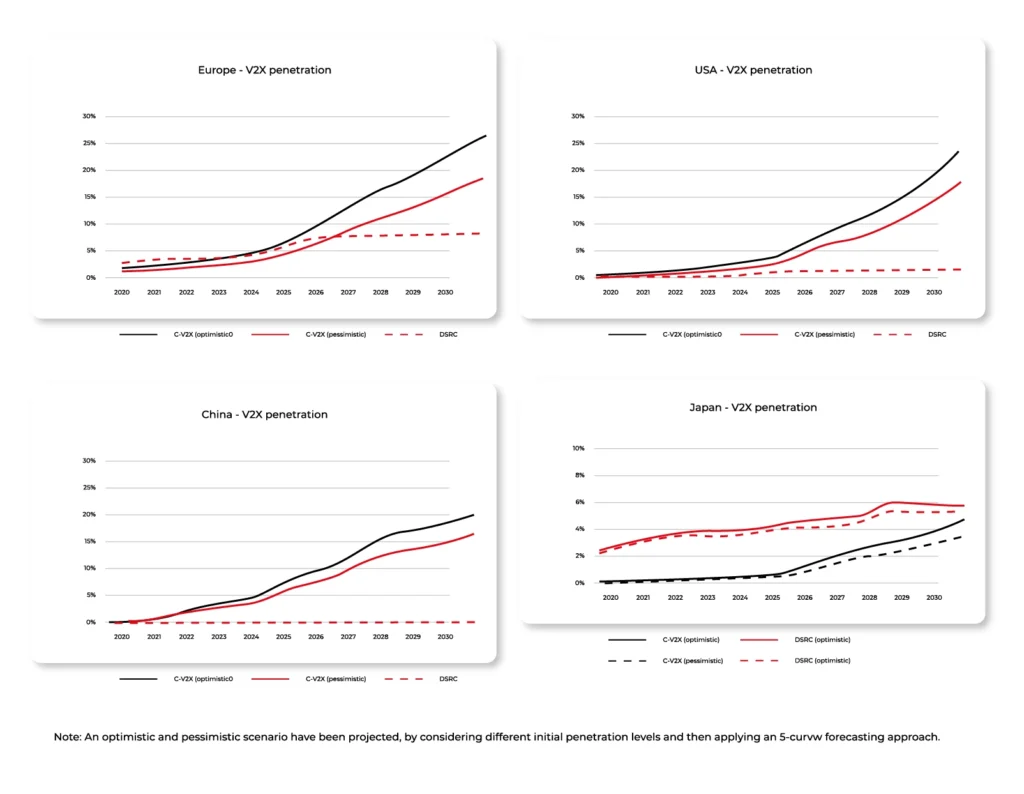
Fundamentals for developing V2X
One thing to realize with V2X is that the benefits are spread across all traffic users. For this to happen, however, some key driving forces are needed for the introduction and market adoption of this technology. These are:
- Platooning.
- Fuel efficiency.
- Smart cities.
- Driver and pedestrian safety.
- Platooning
Trucks moving in a single formation is an environmentally friendly and commercially viable solution. But what does it have in common with V2X? Quite a lot, because for platooning to take place, advanced communications technology is a must.
V2X allows trucks in a platoon to coordinate braking and acceleration among each other. It also makes it possible to perform many complex maneuvers .
Main beneficiaries
Carriers, fleet operators and the entire logistics industry, in general, would benefit enormously from V2X technology. This would not only optimize the transportation costs themselves but also fit in with increasingly stringent emissions standards.
- Fuel efficiency
Governments around the world strive to reduce their environmental impact by cutting emissions. In Europe, for instance, the EC Strategy on Sustainable and Smart Mobility is being prepared, outlining plans to reduce them by up to 90 (!) percent by 2050. To achieve this goal, policymakers are looking for technologies that help comply with the aforementioned limits. V2X shows huge potential in this regard.
Example? Solutions such as GLOSA (green light speed optimization) minimize the need for a car to come to a complete stop just before traffic lights and then restart the engine or accelerate. Consequently, fuel consumption and harmful gas emissions are reduced.
Main beneficiaries
Environmental policymakers and regulators are (and will be) under mounting pressure related to emissions. V2X can play a key role in this puzzle, and it is up to policymakers to adopt and implement this technology.
The advantages of the aforementioned technology, however, can also be enjoyed by OEMs. Since V2X reduces fuel consumption, the driver spends less on a monthly basis. Such information can be quoted in marketing communications.
- Smart cities
The idea of a smart city is based on interconnected technologies and systems for collecting and using data. So it is quite natural that for functioning, smart cities need V2K solutions.
They enable communication between vehicles and buildings, signals, pedestrians, and other road users. All information is transmitted in real-time, so you gain greater awareness of your surroundings and current needs. More broadly, such intelligent transportation and road infrastructure management systems help reduce congestion. Noise levels, pollution in densely populated areas, and the likelihood of collisions are also curbed.
Automated urban logistics is the future of urbanization - without any doubt.
Main beneficiaries
Connected through VCX, a smart urban area can offer many benefits not only for overall security, but also for local commerce and the quality of life for its residents.
City authorities can plan individual processes more efficiently, resulting in real savings. In a potential scenario, city-funded traffic operators are immediately notified of incidents via V2X and smart cameras. By doing so, they warn other road users of the danger or make an instant decision to set up a detour. If necessary, they prioritize emergency vehicles.
Urban businesses are also enjoying the perks of a V2X-equipped smart city. That's because they benefit from shorter times for transporting goods from the place of manufacture to the point of trade. This is due to less congestion on the roads, intelligent route planning, and fully automated city logistics.
- Driver and pedestrian safety
Traffic collisions, injuries, and deaths not only incur unit costs but also seriously drain the public budget.
The solution to these problems may lie exactly in V2X technology, which makes it possible to identify more hazards on the road than ever before. Drivers can react more quickly to dangerous maneuvers by other road users and make early decisions that could potentially affect someone's health or life.
Main beneficiaries
Consumer purchasing power and public opinion certainly have a bearing on the success of V2X deployment. If road users understand that such solutions actually contribute to safety, they will be eager to push them.
Local politicians will also benefit from the achievements of new connected vehicle technologies. They, in fact, often base their election campaigns on claims related to reducing road accidents in their regions. And V2X is helping to fulfill those promises.
Who will implement first - cities or OEMs?
An important question to be answered is who will ultimately be responsible for the introduction and development of V2X. And who will begin to do it on a large scale. The answer is not straightforward.
From the very outset, cities are faced with the difficult task of making significant infrastructure investments. For this, funds have to be obtained at some point, especially since once implemented solutions still have to be sustained. Certainly, though, the benefits associated with V2X are well worth the funds expended on this technology.
On the other hand, we have OEMs that need a trigger to push their products forward. This must be fostered by the right market environment (a sufficient number of vehicles with V2X capabilities) and the commitment of the authorities responsible for maintaining public infrastructure. At this point, there are also constraints related to consumer reluctance, e.g. in the face of excessively high vehicle data penetration rates.
So, it all boils down to goodwill, openness to change, and the fact that certain technologies need to mature on the market.
How new mobility services change the automotive industry
The automotive industry is changing right before our very eyes. Today, services based on the CASE model are looming on the horizon. They are capturing an increasing market share and gaining more and more each year in total dollar value. What's in store for the automotive sector and how automotive enterprises can seize these opportunities?
New mobility services are emerging rapidly
By 2030, over 30 percent of the projected increase in vehicle sales due to urbanization and macroeconomic growth will be unlikely to happen owing to the shared mobility expansion.
In China, the European Union, and the United States, which are countries supporting shared mobility solutions , the mobility market could reach 28 percent annual growth from 2015 to 2030 . Of course- this would be the most optimistic scenario. FutureBridge specialists expect the shared mobility market to grow significantly over the next five to seven years at a CAGR of 16 percent from 2018, reaching 180 billion dollars by 2025 . How can the growing demand for new mobility services be explained?
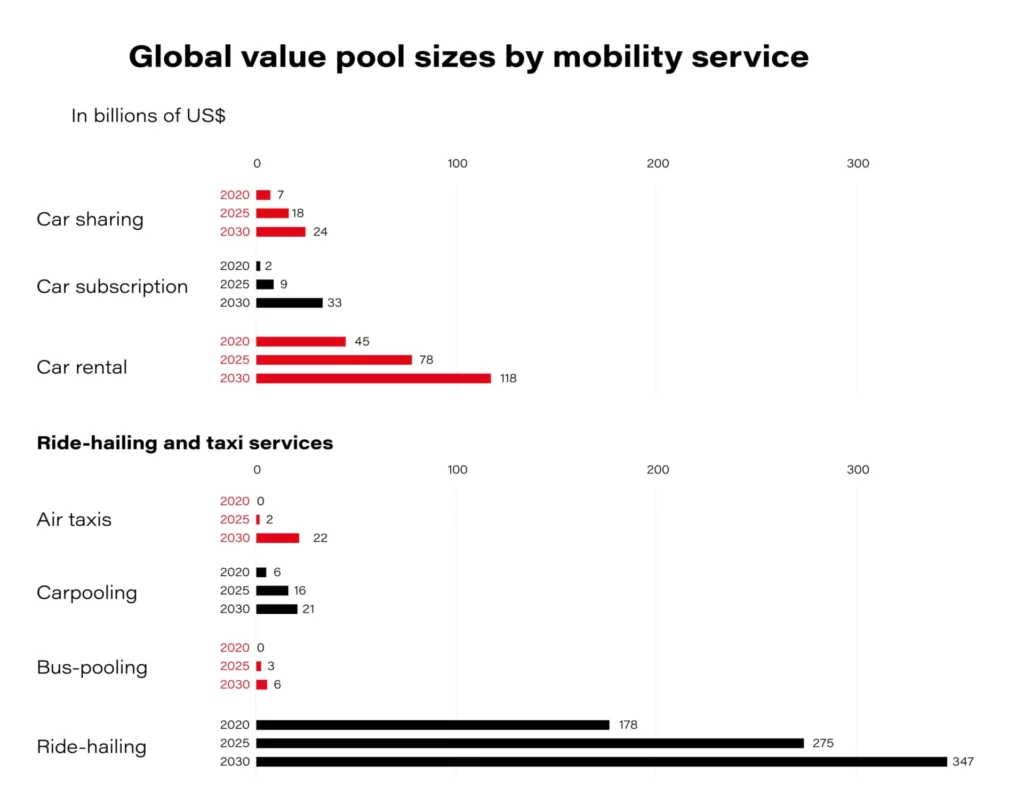
On the one hand, the automotive industry deals with changing consumer preferences . One travels by car covering shorter distances, but much more frequently. And it doesn’t have to be by car at all, as new means of transportation are becoming more accessible.
On the other hand, soaring car prices (though cars lose their value a few months after the purchase) prompt us to search for other, cheaper alternatives that provide optimal driving comfort anyway.
How will companies relying on the traditional car ownership model respond to this trend? They will provide new services such as substitution models, in which, for a once-off monthly payment, you can have a new car with insurance, maintenance, roadside assistance, etc. Subscriptions will soon account for about 15% of new car sales and should have risen to 25% by 2025. In this context, new mobility in the form of rental and ride-sharing services, which are also part of the transformation on the roads, also becomes significant.
The third thing is growing technology, based on the CASE model(Connectivity, Autonomous driving, Shared mobility, Electrification,) that empowers the development of new mobility services on an unprecedented scale. According to Microsoft experts, by 2030 virtually all new cars will have been connected devices, functioning as data centers on wheels.
6 leading new mobility services
Carsharing
A short-term car rental model that allows users to choose a vehicle and pick-up/drop-off location. Users can determine vehicles and flexible rent times. Operators gain high ROI with high utilization and minimal staffing.
Examples: citybee, E-VAI, fetch
Ride-hailing
A form of cab rental in which the drivers are usually contractors using their private vehicles rather than direct employees. The user has immediate availability and payment is handled through the operator. The benefits are also the ability to track and monitor journeys. For operators instead, traditional fleet costs must be handled by the drivers. It’s an easily scalable service.
Examples: Uber, Lyft, Bolt, marcel, OLA
P2P Sharing
this service allows vehicle owners to rent their vehicles when they are not currently in use. BMW-run ReachNow is piloting a version of this type of service, which allows Mini owners to offer their currently unused vehicles for rent. The benefits for users are the lower costs than traditional vehicle rental. Meanwhile, the operator has no fleet to manage and gets access to an easily scalable model of business.
Examples: HoppyGo, SnappCar
Carpooling
Allows users to join an already scheduled trip. The operating company acts as an "intermediary" through which rides can be announced and joined. Carpooling can apply both to people taking a trip alone and to those who want to share rides to reduce the total cost of the trip for a single passenger. It’s a cheap and environmentally friendly service. What is more, the operator has a higher margin per ride and no fleet to manage.
Examples: BlaBlaCar, GoMore, liftshare
Car rental
The evolution of the traditional car rental by the day, allowing users to rent cars for different periods without the traditional hassle associated with this type of service. From the user's point of view, such new services enable an easier and quicker process of vehicle rental. Also, it’s possible to choose a vehicle before finalizing the rental. In turn, the operator has less staffing than a traditional rental and can utilize already existing fleets.
Examples: Audi Silvercar, Hertz, Sixt, PORSCHE DRIVE, UBEEQO
Multimodal
An integrator of public transport mobility services, as well as other modes of transportation, such as public transportation, rail networks, and even cabs. The goal of such services is to get people from their starting point to their destination in the fastest, cheapest, or most efficient way, depending on individual needs. In this model, the operator gets access to additional potential users and has relatively low costs of deployment due to a lack of physical assets.
Examples: FREE2MOVE, whim, Google Maps
Which new mobility services are growing the fastest?
Of the 55 providers of the aforementioned new mobility services operating in European countries, the most popular are those in the area of carsharing (51%) . The second most popular are car rental services (20%) , followed by P2P sharing (13%) .
In terms of ownership, most new mobility services were OEM owned (over 36%), although many of them were independent (over 38%). Also included were OEM invested services (31%).
Technologies and functionalities fueling the development of new mobility services
Mobility services are based on advanced software that uses, at least, the Internet of Things, to transfer data from the vehicle to the cloud. Then the individual information is available on the user's mobile application.
For services based on unmanned vehicle rental, modern security features have been considered when it comes to opening and closing the car.
With a view to minimizing possible problems, the developers of digital new mobility services are also introducing a fault reporting option.
Below is a selection of the most common functionalities and technologies in detail for each new mobility service in Europe.
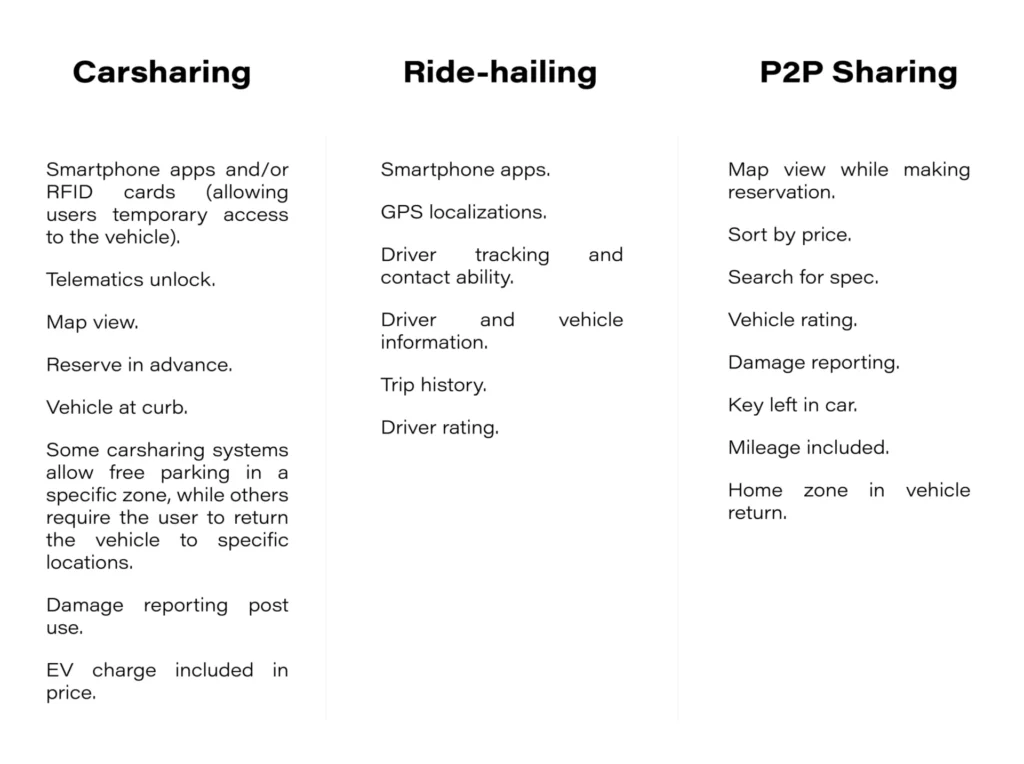
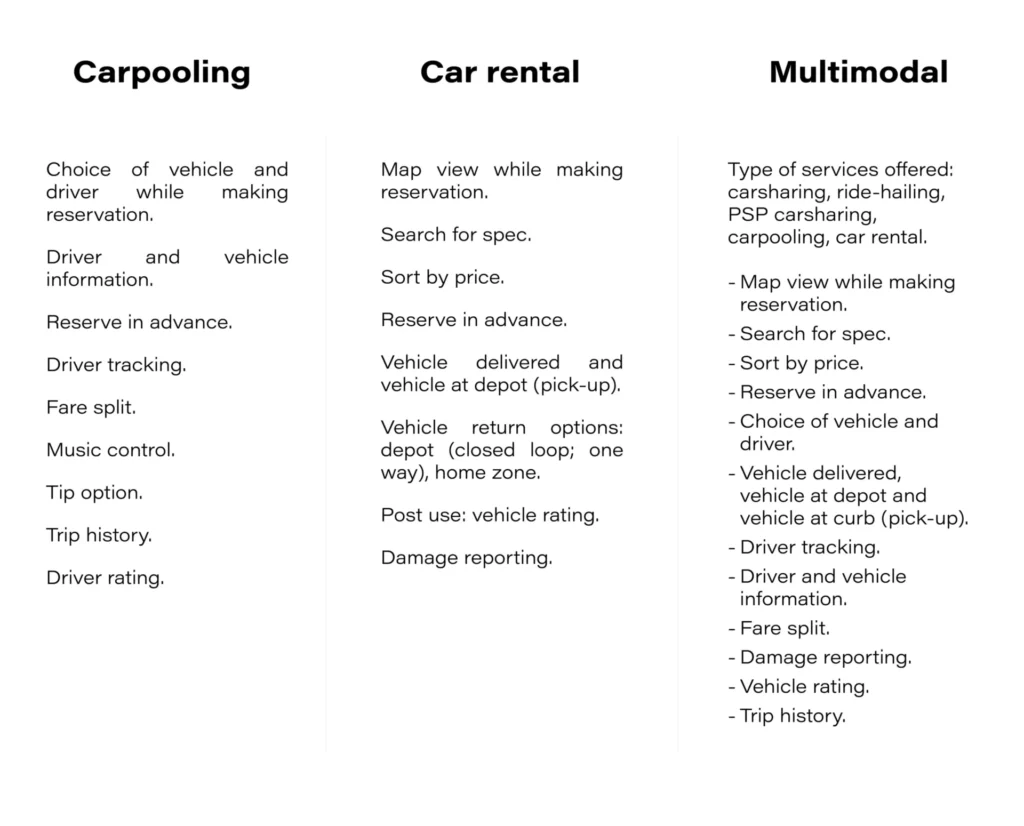
All of these and other options provide guidance and a certain pattern of behavior for future developing OEMs.
Key factors crucial for the development of new mobility services
CASE trends provide new opportunities for the vehicles of the future. However, the interrelationships between software, in-car sensors, and electronic systems require a huge amount of resources , especially when we are talking about reliable operations that translate into a competitive advantage of new mobility services and popularity among potential users.
Therefore, if you want to develop in this area, consider at least these few factors.
- Cybersecurity . In addition to creating huge amounts of code, what also matters is that your user data tracking processes comply with the standards and regulations that apply in your geographic region.
- Careful listening to user needs. In order to compete with technology start-ups, OEMs should focus on innovative digital solutions oriented towards actual consumer expectations . What matters is flexibility, when it comes to the portfolio of functionalities.
- Certainly, emotion is a factor that must be taken into account. Solution providers should care about providing unique experiences and sensations that will make the user eager to re-use a particular service, and in the process, spread it to their community.
- Flexibility and scalability . You need to be prepared not only to meet the changing expectations of customers who come in with feedback but also to expand functionality to include those that competitors already have (or to offer completely innovative solutions).
- Being ready to expand the offering . For example, with new types of vehicles: not only internal combustion but also hybrid, electric; not only cars but also city scooters, etc.
If you want to deal with the challenges that come with developing new mobility services and are considering the above and other growth factors, contact Grape Up. We can help you expand your business in terms of features and values appreciated by today's conscious consumers.
How to set up Kafka integration test
Do you consider unit testing as not enough solution for keeping the application's reliability and stability? Are you afraid that somehow or somewhere there is a potential bug hiding in the assumption that unit tests should cover all cases? And also is mocking Kafka not enough for project requirements? If even one answer is ‘yes’, then welcome to a nice and easy guide on how to set up Integration Tests for Kafka using TestContainers and Embedded Kafka for Spring!
What is TestContainers?
TestContainers is an open-source Java library specialized in providing all needed solutions for the integration and testing of external sources. It means that we are able to mimic an actual database, web server, or even an event bus environment and treat that as a reliable place to test app functionality. All these fancy features are hooked into docker images, defined as containers. Do we need to test the database layer with actual MongoDB? No worries, we have a test container for that. We can not also forget about UI tests - Selenium Container will do anything that we actually need.
In our case, we will focus on Kafka Testcontainer.
What is Embedded Kafka?
As the name suggests, we are going to deal with an in-memory Kafka instance, ready to be used as a normal broker with full functionality. It allows us to work with producers and consumers, as usual, making our integration tests lightweight.
Before we start
The concept for our test is simple - I would like to test Kafka consumer and producer using two different approaches and check how we can utilize them in actual cases.
Kafka Messages are serialized using Avro schemas.
Embedded Kafka - Producer Test
The concept is easy - let's create a simple project with the controller, which invokes a service method to push a Kafka Avro serialized message.
Dependencies:
dependencies {
implementation "org.apache.avro:avro:1.10.1"
implementation("io.confluent:kafka-avro-serializer:6.1.0")
implementation 'org.springframework.boot:spring-boot-starter-validation'
implementation 'org.springframework.kafka:spring-kafka'
implementation('org.springframework.cloud:spring-cloud-stream:3.1.1')
implementation('org.springframework.cloud:spring-cloud-stream-binder-kafka:3.1.1')
implementation('org.springframework.boot:spring-boot-starter-web:2.4.3')
implementation 'org.projectlombok:lombok:1.18.16'
compileOnly 'org.projectlombok:lombok'
annotationProcessor 'org.projectlombok:lombok'
testImplementation('org.springframework.cloud:spring-cloud-stream-test-support:3.1.1')
testImplementation 'org.springframework.boot:spring-boot-starter-test'
testImplementation 'org.springframework.kafka:spring-kafka-test'
}
Also worth mentioning fantastic plugin for Avro. Here plugins section:
plugins {
id 'org.springframework.boot' version '2.6.8'
id 'io.spring.dependency-management' version '1.0.11.RELEASE'
id 'java'
id "com.github.davidmc24.gradle.plugin.avro" version "1.3.0"
}
Avro Plugin supports schema auto-generating. This is a must-have.
Link to plugin: https://github.com/davidmc24/gradle-avro-plugin
Now let's define the Avro schema:
{
"namespace": "com.grapeup.myawesome.myawesomeproducer",
"type": "record",
"name": "RegisterRequest",
"fields": [
{"name": "id", "type": "long"},
{"name": "address", "type": "string", "avro.java.string": "String"
}
]
}
Our ProducerService will be focused only on sending messages to Kafka using a template, nothing exciting about that part. Main functionality can be done just using this line:
ListenableFuture<SendResult<String, RegisterRequest>> future = this.kafkaTemplate.send("register-request", kafkaMessage);
We can’t forget about test properties:
spring:
main:
allow-bean-definition-overriding: true
kafka:
consumer:
group-id: group_id
auto-offset-reset: earliest
key-deserializer: org.apache.kafka.common.serialization.StringDeserializer
value-deserializer: com.grapeup.myawesome.myawesomeconsumer.common.CustomKafkaAvroDeserializer
producer:
auto.register.schemas: true
key-serializer: org.apache.kafka.common.serialization.StringSerializer
value-serializer: com.grapeup.myawesome.myawesomeconsumer.common.CustomKafkaAvroSerializer
properties:
specific.avro.reader: true
As we see in the mentioned test properties, we declare a custom deserializer/serializer for KafkaMessages. It is highly recommended to use Kafka with Avro - don't let JSONs maintain object structure, let's use civilized mapper and object definition like Avro.
Serializer:
public class CustomKafkaAvroSerializer extends KafkaAvroSerializer {
public CustomKafkaAvroSerializer() {
super();
super.schemaRegistry = new MockSchemaRegistryClient();
}
public CustomKafkaAvroSerializer(SchemaRegistryClient client) {
super(new MockSchemaRegistryClient());
}
public CustomKafkaAvroSerializer(SchemaRegistryClient client, Map<String, ?> props) {
super(new MockSchemaRegistryClient(), props);
}
}
Deserializer:
public class CustomKafkaAvroSerializer extends KafkaAvroSerializer {
public CustomKafkaAvroSerializer() {
super();
super.schemaRegistry = new MockSchemaRegistryClient();
}
public CustomKafkaAvroSerializer(SchemaRegistryClient client) {
super(new MockSchemaRegistryClient());
}
public CustomKafkaAvroSerializer(SchemaRegistryClient client, Map<String, ?> props) {
super(new MockSchemaRegistryClient(), props);
}
}
And we have everything to start writing our test.
@ExtendWith(SpringExtension.class)
@SpringBootTest
@AutoConfigureMockMvc
@TestInstance(TestInstance.Lifecycle.PER_CLASS)
@ActiveProfiles("test")
@EmbeddedKafka(partitions = 1, topics = {"register-request"})
class ProducerControllerTest {
All we need to do is add @EmbeddedKafka annotation with listed topics and partitions. Application Context will boot Kafka Broker with provided configuration just like that. Keep in mind that @TestInstance should be used with special consideration. Lifecycle.PER_CLASS will avoid creating the same objects/context for each test method. Worth checking if tests are too time-consuming.
Consumer<String, RegisterRequest> consumerServiceTest;@BeforeEach
void setUp() {
DefaultKafkaConsumerFactory<String, RegisterRequest> consumer = new DefaultKafkaConsumerFactory<>(kafkaProperties.buildConsumerProperties();
consumerServiceTest = consumer.createConsumer();
consumerServiceTest.subscribe(Collections.singletonList(TOPIC_NAME));
}
Here we can declare the test consumer, based on the Avro schema return type. All Kafka properties are already provided in the .yml file. That consumer will be used as a check if the producer actually pushed a message.
Here is the actual test method:
@Test
void whenValidInput_therReturns200() throws Exception {
RegisterRequestDto request = RegisterRequestDto.builder()
.id(12)
.address("tempAddress")
.build();
mockMvc.perform(
post("/register-request")
.contentType("application/json")
.content(objectMapper.writeValueAsBytes(request)))
.andExpect(status().isOk());
ConsumerRecord<String, RegisterRequest> consumedRegisterRequest = KafkaTestUtils.getSingleRecord(consumerServiceTest, TOPIC_NAME);
RegisterRequest valueReceived = consumedRegisterRequest.value();
assertEquals(12, valueReceived.getId());
assertEquals("tempAddress", valueReceived.getAddress());
}
First of all, we use MockMvc to perform an action on our endpoint. That endpoint uses ProducerService to push messages to Kafka. KafkaConsumer is used to verify if the producer worked as expected. And that’s it - we have a fully working test with embedded Kafka.
Test Containers - Consumer Test
TestContainers are nothing else like independent docker images ready for being dockerized. The following test scenario will be enhanced by a MongoDB image. Why not keep our data in the database right after anything happened in Kafka flow?
Dependencies are not much different than in the previous example. The following steps are needed for test containers:
testImplementation 'org.testcontainers:junit-jupiter'
testImplementation 'org.testcontainers:kafka'
testImplementation 'org.testcontainers:mongodb'
ext {
set('testcontainersVersion', "1.17.1")
}
dependencyManagement {
imports {
mavenBom "org.testcontainers:testcontainers-bom:${testcontainersVersion}"
}
}
Let's focus now on the Consumer part. The test case will be simple - one consumer service will be responsible for getting the Kafka message and storing the parsed payload in the MongoDB collection. All that we need to know about KafkaListeners, for now, is that annotation:
@KafkaListener(topics = "register-request")
By the functionality of the annotation processor, KafkaListenerContainerFactory will be responsible to create a listener on our method. From this moment our method will react to any upcoming Kafka message with the mentioned topic.
Avro serializer and deserializer configs are the same as in the previous test.
Regarding TestContainer, we should start with the following annotations:
@SpringBootTest
@ActiveProfiles("test")
@Testcontainers
public class AbstractIntegrationTest {
During startup, all configured TestContainers modules will be activated. It means that we will get access to the full operating environment of the selected source. As example:
@Autowired
private KafkaListenerEndpointRegistry kafkaListenerEndpointRegistry;
@Container
public static KafkaContainer kafkaContainer = new KafkaContainer(DockerImageName.parse("confluentinc/cp-kafka:6.2.1"));
@Container
static MongoDBContainer mongoDBContainer = new MongoDBContainer("mongo:4.4.2").withExposedPorts(27017);
As a result of booting the test, we can expect two docker containers to start with the provided configuration.
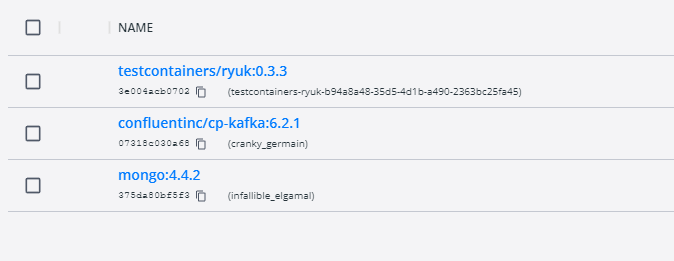
What is really important for the mongo container - it gives us full access to the database using just a simple connection uri. With such a feature, we are able to take a look what is the current state in our collections, even during debug mode and prepared breakpoints.
Take a look also at the Ryuk container - it works like overwatch and checks if our containers have started correctly.
And here is the last part of the configuration:
@DynamicPropertySource
static void dataSourceProperties(DynamicPropertyRegistry registry) {
registry.add("spring.kafka.bootstrap-servers", kafkaContainer::getBootstrapServers);
registry.add("spring.kafka.consumer.bootstrap-servers", kafkaContainer::getBootstrapServers);
registry.add("spring.kafka.producer.bootstrap-servers", kafkaContainer::getBootstrapServers);
registry.add("spring.data.mongodb.uri", mongoDBContainer::getReplicaSetUrl);
}
static {
kafkaContainer.start();
mongoDBContainer.start();
mongoDBContainer.waitingFor(Wait.forListeningPort()
.withStartupTimeout(Duration.ofSeconds(180L)));
}
@BeforeTestClass
public void beforeTest() {
kafkaListenerEndpointRegistry.getListenerContainers().forEach(
messageListenerContainer -> {
ContainerTestUtils
.waitForAssignment(messageListenerContainer, 1);
}
);
}
@AfterAll
static void tearDown() {
kafkaContainer.stop();
mongoDBContainer.stop();
}
DynamicPropertySource gives us the option to set all needed environment variables during the test lifecycle. Strongly needed for any config purposes for TestContainers. Also, beforeTestClass kafkaListenerEndpointRegistry waits for each listener to get expected partitions during container startup.
And the last part of the Kafka test containers journey - the main body of the test:
@Test
public void containerStartsAndPublicPortIsAvailable() throws Exception {
writeToTopic("register-request", RegisterRequest.newBuilder().setId(123).setAddress("dummyAddress").build());
//Wait for KafkaListener
TimeUnit.SECONDS.sleep(5);
Assertions.assertEquals(1, taxiRepository.findAll().size());
}
private KafkaProducer<String, RegisterRequest> createProducer() {
return new KafkaProducer<>(kafkaProperties.buildProducerProperties());
}
private void writeToTopic(String topicName, RegisterRequest... registerRequests) {
try (KafkaProducer<String, RegisterRequest> producer = createProducer()) {
Arrays.stream(registerRequests)
.forEach(registerRequest -> {
ProducerRecord<String, RegisterRequest> record = new ProducerRecord<>(topicName, registerRequest);
producer.send(record);
}
);
}
}
The custom producer is responsible for writing our message to KafkaBroker. Also, it is recommended to give some time for consumers to handle messages properly. As we see, the message was not just consumed by the listener, but also stored in the MongoDB collection.
Conclusions
As we can see, current solutions for integration tests are quite easy to implement and maintain in projects. There is no point in keeping just unit tests and counting on all lines covered as a sign of code/logic quality. Now the question is, should we use an Embedded solution or TestContainers? I suggest first of all focusing on the word “Embedded”. As a perfect integration test, we want to get an almost ideal copy of the production environment with all properties/features included. In-memory solutions are good, but mostly, not enough for large business projects. Definitely, the advantage of Embedded services is the easy way to implement such tests and maintain configuration, just when anything happens in memory.
TestContainers at the first sight might look like overkill, but they give us the most important feature, which is a separate environment. We don't have to even rely on existing docker images - if we want we can use custom ones. This is a huge improvement for potential test scenarios.
What about Jenkins? There is no reason to be afraid also to use TestContainers in Jenkins. I firmly recommend checking TestContainers documentation on how easily we can set up the configuration for Jenkins agents.
To sum up - if there is no blocker or any unwanted condition for using TestContainers, then don't hesitate. It is always good to keep all services managed and secured with integration test contracts.