Thinking out loud
Where we share the insights, questions, and observations that shape our approach.
Key takeaways from SpringOne Platform by Pivotal 2018
Business is happy with delivery acceleration and developers are happy with focusing only on writing code — Key Takeaways from Spring One 2018 in Washington D.C. SpringOne Platform was an amazing, large-scale event. As an IT consulting company, we were more than excited to be a Silver Sponsor of a conference which gathers hundreds, if not thousands of cloud experts in one place. Now that we’re back and the whole event winds down, we thought it would be a great idea to take a minute, look back and share with the world what we have learned at this year’s edition of SpringOne Platform. It seems like the best way to sum up the whirl of presentations, keynotes and tech talks is to break everything into the following:

Operating at scale
There is a lot of fuss going on around Kubernetes nowadays. The excitement is, of course, completely reasonable, and we could witness it in its pure form during workshops and at all the booths in the community hub. In addition to that, several presentations also hovered around the topic of Kubernetes. For example, there was an interesting speech about the K8s basics: “All You Need to Know to Deploy Applications on Kubernetes” , but what was also in the center of attention was the aspect of operating at scale, which is the key feature of the platform. On top of that, Pivotal has also announced in “Buildpacks Anywhere” that they are working on open buildpacks to run both on CFCR and PCF, which might be yet another game-changer on the market.
Apache Geode community meeting
However, if there was one thing that attracted the most attention at the conference, it would be the Apache Geode — a data management platform originated as commercial Gemfire. There were over 10 workshops on this topic, from such basics as “Geode: Much More Than a Cache” , through an open panel “Questions, Answers, and Oddly Specific Opinions with Apache Geode Committers” to quite complex topics like “Implementing PII Encryption with PDX Serialization” . Not to mention all the success stories of large companies and banks which only proves the scale of the solution and how it’s getting more and more mature.
Kessel run
Part of SpringOne is always about business success stories for companies that use Cloud Foundry or Kubernetes in cooperation with Pivotal. One of the most amazing ones which definitely deserves a little more "airtime" than the rest is "Kessel Run" project of U.S. Air Force (no, it’s not a typo, the name does indeed come directly from Star Wars!) which is a cloud-native startup inside the DoD.
During his presentation, Capitan Byron Kroger (@bjkroger) explained in depth how they dealt not only with difficulties but also with all paperwork which was slowing them down at that time. And he proudly sports our Oh My BOSH t-shirt which gives him additional points

Reactive and event-driven methodologies
A great focus was also put on the modern solutions and technologies, especially event-driven architecture in the cloud . Apache Kafka can definitely help with that and it makes architecture simpler and cleaner. All this was explained in this one presentation from Neha Narkhede, the co-creator of Kafka. On the main stage, Olive Gerkie and Rossen Stoyanchev announced R2DBC - Reactive Relational Database Connectivity Client which is still in its early stage of development but has already gained a great deal of momentum and may revolutionize how developers connect to databases from Spring. That topic was also further explored in “Reactive Relational Database Connectivity” and some other lectures.

7 tips on how to manage backlog in XP
Proper backlog maintenance is extremely important for the product to be successful. Usually, it's the Product Owner’s responsibility to manage the backlog. The right approach and tools can be very helpful in this case.
Imagine a situation in which the product has already been released to the customers. You had a very specific plan with every step written out and what should be done next. Then, every week brings in a few new ideas on how to improve the product. At one point, you realize that you have several hundred new feature ideas which haven’t even been analyzed yet. Been there, done that, right? Right!
There are many factors and models out there saying how backlog should be managed. As a matter of fact, there is no right answer as to how it should be done. It must be somehow unique and aligned to your team, company, strategy and your resources. Depending on the project size, the ability to work with the business or support departments there are many ways in which the workflow can be divided. The only sure thing is — it's always the Product Owner’s responsibility to keep the backlog in good shape and make sure that only the best feature ideas are being stored in it. Those feature ideas should be considered as a new value added to the product.
With all that said, let's discuss in more detail the good practices on how to manage the backlog in XP environment.

One backlog, no excuses
First and foremost, align your backlog management to the KISS principle (Keep it simple, stupid) to work efficiently. It is crucial that backlog management is done continuously and without any ice boxes or intermediate placeholders. Keep it plain, have a stack of ideas, accept or reject them, add to the backlog and develop. It's important to keep everything in order so that it is transparent to the team and especially to the stakeholders. Also, remember that everyone should have access to the backlog and be able to see the big picture. In other words, these are not the Product Owner’s personal notes.
Another aspect of this is feature idea management. The ideas will come from different sources - customers, answers to bugs, analysts’ vision, stakeholder ask, etc. Depending on the project size, the PO won’t be able to manage everything by himself and track every idea inside of the backlog. Therefore, if the projects start to grow, you should consider having a separate bucket for these ideas which haven’t been verified and which of them would be the support’s, assistant’s or the team’s responsibility. Those items would need to be verified, transformed into a legitimate improvement request, preferably with the use of a template.
It is worth mentioning that bugs are not always a part of the backlog. Given the project size, sometimes you'll need a separate tool for the support team and you don't want all customer issues to interfere with the business vision of your product. It’s great if you can manage both in one place, but it's not mandatory and at some point, you'll need to divide those two buckets. The backlog should focus on the business value — user stories — so basically anything new that will be added or enhanced.
Manage the backlog given the business perspective
Many Product Owners are deeply invested in team management. The common mistake, however, is structuring the backlog based on some other factors than the business value — i.e. specific resources being available.
It is important, though, to have the ability to sort and filter items in the backlog, so that you are able to achieve what had been mentioned earlier. If someone from your team has limited knowledge and can only work in particular areas, they should be able to find their way without the help from the PO.
Clean up the backlog regularly
If there is a feature idea that has been sitting in the backlog for a few months while you do frequent releases - remove it. Apparently, there’s always something more important to do and that particular feature is just not that mandatory. Priorities always tend to shift, product changes over time. You should focus only on the current and next release. If you know for sure that this feature will not be done in this timeline, better throw it away.
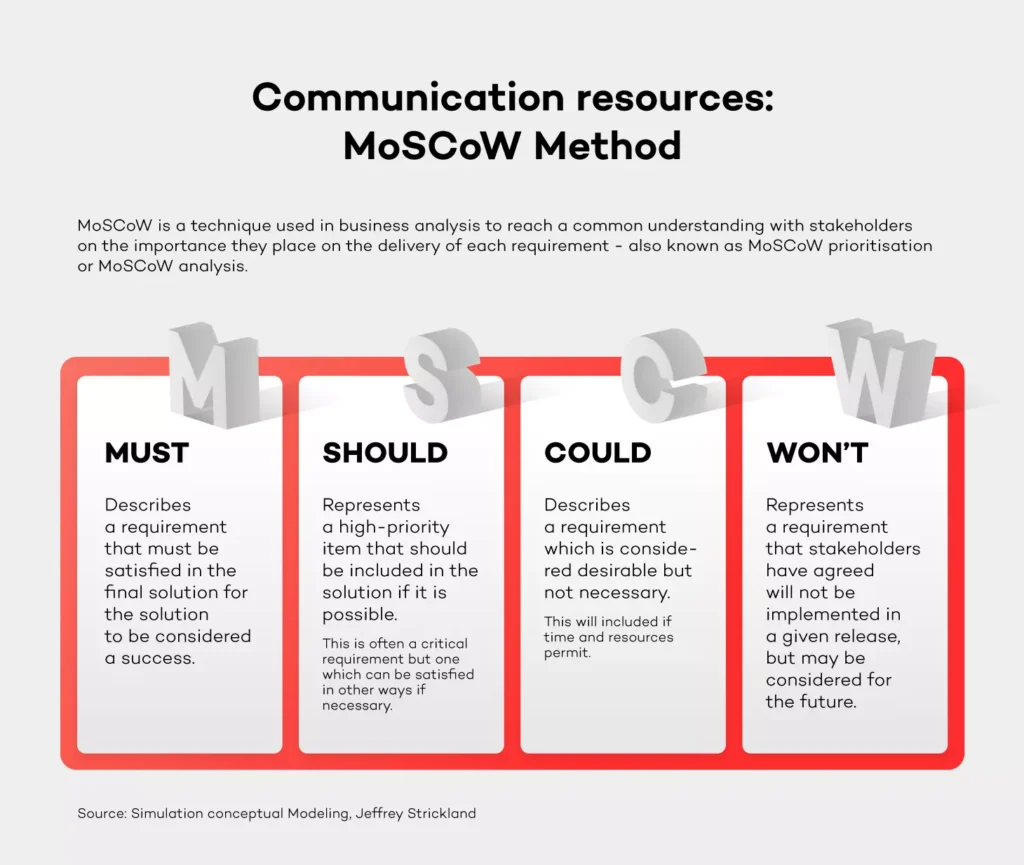
You need to make hard choices every day and reject feature ideas on the fly. If you need to consult your decision in some cases, do it on a weekly basis - don't postpone the decision. Think only about the current state of the project. A good way of prioritizing things is the MoSCoW method (identify items as a Must, Should, Could or Won't have). Using a number as priority (i.e. P1-P4) usually doesn't say nothing about the actual willingness to do the work - it rather indicates when you want to do something.
Verify feature ideas on the market
So, you've come to the point that you have more than enough to plan a release. What's next? Usually, it would be the implementation phase. I'd strongly suggest verifying every idea on the market. There are several ways of doing that. While conducting interviews with customers or people who work in the same industry would take too much time and resources, an online voting system would be perfect. On top of that, in-depth market research done by the Discovery Product Manager could also be a good idea. Keep the balance though, if stakeholders have a strong opinion about doing the feature which is estimated for a low cost, take a leap of faith if you feel like it.
This is also an important message sent to the market – hearing out users or customers, asking them for verification and priority. It will make them feel as if they have had a huge impact since the product is aligned with their needs.
Adjust backlog to release cycle
As I mentioned previously, the backlog should reflect the current and the next sprint. Let’s say that you release every 3 months. Once the current sprint is already planned, put new items only for the next sprint. You should have an idea of what the velocity of your team is, so if something more valuable comes to the backlog, you need to remove something from it.
Be responsible for the product
As a Product Owner, you can always ask for help from the team, but in the end, you're the driver. It's your mission. The team can help with the analysis, completing the requirements, designs or estimate but you are fully responsible for the outcome and maximizing the value of the product.
They say that the Product Owner should be an independent decision maker, but you know what it’s like. Your boss will sometimes have a different opinion, but if you feel strong about your assessment, you shouldn't let go.
Adjust and look for a silver lining
Don't adopt things as they are, just because someone said so. You need to take the process, adjust it to your situation and make it work. As I stated in the introduction, every project and company have their own unique structure. There is no point in making a revolution and changing everything.
It's all about enhancing the product and making your life easier . Take one day at a time and do your best to improve the process with one thing in mind - the product always comes first. Processes shouldn't interfere with your daily work.
Summary
I hope that this article will help you manage backlog better. My main advice is to keep it simple and transparent. It’s all about keeping the whole team happy and engaged. Every vision, even the most ideal one needs a compromise to make it work in real life.

3 questions to Tomasz Ćwięk, DevOps Engineer at Grape Up
DevOps engineers have a diverse and unique skill set and the profile of the DevOps engineer is evolving. I asked Tomasz Ćwięk who is a DevOps Engineer at Grape Up to explain in more detail what it's like to be in that role.
1. What is the real impact that you have on the product, the processes and the team as a DevOps Engineer?
Since a DevOps Engineer is a person who operates in a wider IT area than a programmer or an operator, it is easier for him to see the “bigger picture”. Thanks to this, it is easier for him to predict the potential problems faster and determine in advance whether an idea is going in the right direction.
If a given solution requires a test or a proof of concept (PoC), a DevOps engineer is able to quickly and effectively run without involving more people. Then, using knowledge and appropriate tools, such as the CI/CD pipeline, monitoring, metrics, they can immediately draw conclusions, and save many hours or even days of work of the rest of the team.
2. Who can become a DevOps Engineer? Is there an ideal candidate profile?
Well, I used to work as a developer. Then one day, I felt that my work has slowly become “not-so-exciting” (not to call it boring) and monotonous. I felt the urge to change something back then. Now, the variety of tasks and problems that I encounter and have to deal with on a daily basis makes my day so much more exciting. Personally, I think that becoming a DevOps engineer is perfect for people who are good problem solvers. Additional experience as a system administrator and a programmer, is a nice to have.
3. What does a day in the life of a DevOps Engineer look like?
Currently, I work on several projects which differ from one another. Some of them are support projects, which is why it is very difficult to predict what the next day will look like. For example, one day we design the network infrastructure for new tools, the next day we debug the problem of updating the platform or installing a new tool. We wear many hats. Quite often we work as consultants, advising the client on how to best solve the problem, design a new solution or even reasonably plan tasks for the team.
When it comes to my daily tasks — there are plenty of them and all of them are different. The key to mastering this chaos is establishing a good relationship with the client, properly planned stand-up meetings, and effective use of tools.

How to explain your tech job to your family?
With new positions popping up all over the place on the IT job market, it might not be a piece of cake to explain what your tech job is about to your parents – people who aren’t necessarily die-hard fans of new technologies. Unless, of course, your mom or dad are avid tech geeks, chances are they have just, much to their excitement, discovered Facebook. Occassionally and unfortunately, they also happily take to social media to comment their children’s pictures.
So how do you explain what you do?
„No one knows what I really do.”, or „It’s actually pretty complicated.” are probably the worst explanations you can come up with. First, by saying that you come across as nonchalant. Second of all, you’re wasting a great chance to practice explainig it to a person that doesn’t have the slightest clue about it.
Try to understand them
If they usually don’t understand what you do, maybe it’s because you expect them to understand too much. Luckily, there is a way to explain almost anything to anyone, but before you do so, make sure to know your listener.
Some people may simply ask about your job to be polite, for example an uncle who’s just trying to break the awkward silence in between meals. However, who also work in IT may be genuinely interested in your position. Treat it as an elevator pitch. Once you know it, you will be able to adapt the pitch to the listener’s level of interest. And before you know it, you will have mastered a 1-minute description of your skills. Whether it’s going to be an extended description of your day at work with all your responsiblities, or a simple, one-sentence explanation of what you do in general.
For instance: I develop software for international companies.
This sentence doesn’t really say it all, but for some it might be just good enough. Good enough for those who want to make sure that you’re clearly doing SOMETHING and making ends meet and footing your bill at the end of the month.
Try not to sound condescending
If you don’t really know how much someone else is into technology and how well-informed they are, it can be easy to cross the line between smart and awfully patronizing. The whole point here is not to make the other person feel any less intelligent.
It’s best to take into consideration your relative’s education and age. A good idea is to start off by sparking an interest in them by asking if they use a certain type of app or be it a website which perfectly relates to your professional field. You can also mention a story that recently went viral. Chances are they have heard of it. Either way, it’s a good starting point.
If by any chance you need to fully explain your field of expertise, try to do it as simple as possible.
Just like that:
You: Think of the news website that you visit every day…
Your relative: What about it?
You: I make sure that every piece of content on it is always up to date.
But don’t narrow it down to only one thing such as:
You: I spend ALL DAY coding like a madman.
Your relative: All day? Every day?
You: Correct.
Reality check – developers don’t spend eight hours a day producing lines of code. They fix bugs, go to meetings, and learn new things too.
Keep it simple and tell stories
The KISS method, also known as Keep It Stupid Simple is all about getting your message across as if you were talking to a five year old. Believe it or not, but some kindergartners are more savvy than adults. I mean, who hasn’t seen a child use an iPad? Let’s say you’re a marketing specialist. Instead of reducing it all to „I do marketing. Global marketing.” like the example above, go for something that’s fully-fledged:
„I am the person responsible for marketing, branding and all activities around it. I write social media posts – on Facebook and Twitter and organize events which my company attends in order to advertise or hire new employees. I also come up with new ideas on how to advertise our services and offer, and make sure that everything is in line with our business goals.”
This is no rocket science!
The key to success is to really just keep it simple. First of, your relatives aren’t your co-workers at your daily stand-ups. Your mom, dad, aunt, grandma… they might still use a flip phone and be strictly against upgrading it and avoid anything that has to do with a smartphone like the plague.
I hope those simple strategies work for you and make conversations with your family a tiny bit less awkward. After all, nobody is an expert on everything and even the most highly analytical minds need something explained if it’s not their cup of tea.
Our way to reactive extensions
In the modern world we are inundated with information - TV, radio, newspapers, internet – to the extent that often we need some kind of filters to get only those pieces of information which we find interesting. That’s why the most recent news app from Google uses artificial intelligence to customize the newsfeed and make sure users receive only the kind of news they want. This also applies to the APIs that we use both for desktop and web development: sometimes the amount of notifications and data sent even by a simple interface may be overwhelming and needs to be managed by means of filtering before it is presented to the end user.
Architectural background
One of the products that we develop is a desktop app based on a complex library that creates abstraction over communication with the servers and different REST APIs. The image below is a part of the class that wraps a piece of the one API which consists of “Description” and “Size”:
public class Class1
{
public void SetDescription(string description, CompletionHandler handler)
{
/* Some logic here */
}
public void SetSize(int size, CompletionHandler handler)
{
/* Some logic here */
}
public string Description { get; private set; }
public int Size { get; private set; }
public event EventHandler DescriptionChanged;
public event EventHandler SizeChanged;
}
- The methods “SetDescription” and “SetSize” accept the value argument and the CompletionHandler object which is called when the operation succeeded or failed. The completion handler provides an information about the operation status (e.g. details about the error that occurred) and an optional result. To make our further work easier we have added some wrappers around those methods that translate completion handlers to .NET Task class [1 - https://msdn.microsoft.com/en-us/library/system.threading.tasks.task(v=vs.110).aspx] (similar to the promises in Java and JavaScript).
- The properties contain information about the last known state of the object.
- The events notify the application about state change: it doesn’t matter if they are caused by calling the method locally or by some activity of other applications or services.
The library processes all requests and responses on its own thread pool. It has its advantages as well as disadvantages. The advantages are: the UI is not affected by processing network traffic. On the other hand, the disadvantages include the following: events and completion handlers are called on non-UI thread, so the application has to use some kind of queue to process them to ensure that the methods are called on UI thread and the library has to properly route them to the provided thread or queue.
Manual threads management – you don’t want to do this
During the development we have figured out that posting each event to UI thread manually causes high volume of long and repeated code which looks like this:
public class SomeOtherClass : IDisposable
{
private readonly SomeClass _someObject;
private readonly DispatcherService _dispatcherService;
public SomeOtherClass(
SomeClass someObject,
DispatcherService dispatcherService)
{
_someObject = someObject;
_dispatcherService = dispatcherService;
_someObject.DescriptionChanged += SomeObjectOnDescriptionChanged;
_someObject.SizeChanged += SomeObjectOnSizeChanged;
}
private void SomeObjectOnDescriptionChanged(object sender, EventArgs e)
{
_dispatcherService.Invoke(LoadState);
}
private void SomeObjectOnSizeChanged(object sender, EventArgs e)
{
_dispatcherService.Invoke(LoadState);
}
private void LoadState()
{
PropertyVisibleOnUI = $"Description: {_someObject.Description} Size: {_someObject.Size}";
}
public string PropertyVisibleOnUI { get; set; }
public void Dispose()
{
_someObject.DescriptionChanged -= SomeObjectOnDescriptionChanged;
_someObject.SizeChanged -= SomeObjectOnSizeChanged;
}
}
The code becomes even more complex if we have to consider multiple nested objects. Just imagine the code required to display a “Your message has been read” notification if you have the following API:
public interface IConversationService
{
event EventHandler ConverstionStarted;
event EventHandler ConversationEnded;
IEnumerable Conversations { get; }
}
public interface IConversation
{
event EventHandler MessageAdded;
void SendMessage(string body, CompletionHandler handler);
IEnumerable Messages { get; }
}
public interface IMessage
{
event EventHandler IsReadChanged;
bool IsMine { get; }
string Body { get; }
bool IsRead { get; }
}
Event aggregator to the rescue
Event aggregator (event bus, mediator) seems to be a pretty good solution to the described problem, especially because we had wrappers around the library’s objects. Our notification area subscribes some message type and displays the notification when the event occurs.

_messageAggregator.Register(MessageHandlingMethod);
It makes cross thread calls much easier. We have written a method that extends the event aggregator object and forced the notification-handler to be invoked on the UI thread:
public static void RegisterOnDispatcher(
this MessageAggregator self,
DispatcherService dispatcherService,
Action handler)
{
self.Register(message => dispatcherService.Invoke(() => handler(message)));
}
It takes a few seconds to understand the method, but it is extremely easy to use later on:
messageAggregator
.RegisterOnDispatcher(
dispatcherService,
MessageHandlingMethod);
Problems with the event aggregator
This pattern was convenient enough to dominate most of our code. At one point, we have realized that we used it even if it was the cause of the problem.
First of all, many classes required 2 dependencies: a class that keeps the state and an event aggregator to subscribe for messages.
Sending a message by means of the aggregator required creating a new class for the message, mainly because developers like to take shortcuts and they tend to skip this step if they can, even if it breaks abstraction. In many cases, we had a service that subscribed to couple other services and computed some value. Then, other services used this value, because the service itself didn’t send any messages, those services subscribed for messages sent by the original service.
In our app, some settings can be changed on the fly, without having to restart the app. When at least one of them were changed, a SettingsChangedMessage is sent.
A lot of classes subscribed to this event and were notified about every setting change even if they weren’t particularly interested in the change. We have also added an additional field to Message that contains values about which setting has been changed. However, it also forced us to add an additional enum value and logic that checks if the setting value has changed every time we add new field in the settings.
There was another performance problem that was non-trivial to fix in this architecture. Dispatching the method invocation to other thread is not very expensive if done rarely, but if there is a lot of thread-hopping, it starts to affect performance. It causes temporary hangs of the UI. There were cases where multiple instances of some class depended on a couple of values from different services. Those instances had to subscribe for all messages that were sent when those values changed. The frequent result was that the sent message didn’t affect the overall state of the subscriber. Despite of the fact that the handler was dispatched, we weren’t able to fix this problem easily in our architecture.
Observer and observable
This design pattern is rarely seen in .NET, mostly because events are sufficient in the common scenarios. Microsoft noticed that there are cases, like ours, that are not so common, but also not that simple and decided to add the IObserver and IObservable interfaces. Those are slightly different to the ones you can find in books about design patterns. First of all, those interfaces contain generic constraints. The Observable contains only one method: Subscribe. That method accepts Observer as an argument. It doesn’t contain the Unsubscribe method. Instead of this, the Subscribe method returns an object that implements IDisposable - disposing this object unregisters the observer. The Observer contains 3 methods: OnNext, OnError and OnCompleted and is focused more on values passed via OnNext than on the Observable.
RX – LINQ for observables
LINQ is a very powerful part of .NET standard library that has been founded on very simple interfaces: IEnumerable and IEnumerator . It made the manipulating of collections easy and became so popular that most of .NET developers would probably rather quit their jobs than resign from using it. It is based on extension methods and a decorator pattern: the extension method creates an object that implements IEnumerable and accepts IEnumerable which represents an object on which it is being called and a Predicate object as parameters. When the GetEnumerator method is called on this object, it calls the same method on the IEnumerable base implementation which yields the object filtered, mapped or merged using specified predicate.
Both interfaces, IObservable and IEnumerable manage and provide a way to access some data. Both are used to deliver object references and provide an information whether or not there are some more items available, but the key difference between them is in the way of delivering items. IEnumerable waits for client code to pull the value, IObservable pushes it.
It seems reasonable to try LINQ approach to extend IObservable and this is how Reactive Extensions were invented. It turns out to be such a good idea that most of modern programming platforms implemented the same paradigm. Since the great platform–independent documentation has been written, we have decided to try it with one of the new features which we were delivering. Surprisingly, despite of the fact that the integration wasn’t included in the estimation we were able to deliver the feature on time.
Delivering property value when event is called
Because of architecture mentioned before, we needed a good way of delivering new property value every time the event was raised. Fortunately, RX contains just right method.
var sizeObservable =
Observable
.FromEventPattern(
handler => someObject.SizeChanged += handler,
handler => someObject.SizeChanged -= handler)
.Select(o => someObject.Size);
Because in most cases our code requires loading current property value initially, we have created our own (FromEventAndProperty) extension method which does just that.
Cross-thread communication
Because a lot of messages have to be passed between threads, a support for multithreading was important. RX contains ObserveOn extension that accepts reference to the dispatcher. Unfortunately, our app used a wrapper around the dispatcher that prevented us from using it directly, so we had to write our own extension. Luckily, it was pretty simple: 1 extension method, 2 classes (observable and observer) less than 100 lines of code.
Combining multiple observables
Many UI components depend on more than one value, so combining multiple observables into one was a must-have. RX contains the method CombineLatest that accepts a couple of Observables and a function that accepts values provided by the combined Observables.
Observable
.CombineLatest(
firstObservable,
secondObservable,
thirdObservable,
(firstValue, secondValue, thirdValue) => firstValue * secondValue * thirdValue);
The result of combining Observables is also an Observable so there is no need for workarounds to use it in place of regular observable.
Reducing workload
Filtering events
Just like LINQ, RX contains a Where extension that filters the items which match the criteria. All other implementations of RX call this method a Filter.
Removing duplicates
Reactive extensions contain the Distinct method that ensures that each value is delivered to the observer only once. From our experience, DistinctUntilChanged was more useful, because it removes consecutive duplicates.
Debouncing
Debounce extension skips the delivery of some values if they are emitted too often. It is useful if the user cannot consume data in rate enforced by the source. Let’s imagine a sensor that checks level of coolant in a car driving on a bumpy road. If coolant level is somewhere around minimum safe level sensor would sent information that changes all the time, without debouncing it would cause indicator flickering which is annoying from the user perspective.
Problems with unit testing
We are trying to constantly increase our unit tests code coverage. We use mock libraries if it speeds up our work and both - Moq and NSubstitute which return null for observable properties. It extends our test setup, but it is not as painful as it looks.
Post-mortem debug
Similarly to the LINQ or async methods, RX makes call-stack extremely long. Sometimes it doesn’t even clearly point to any place in our code where the crash occurred, so we have it in mind.
We did not say good bye to the event aggregator
Event aggregator still has its place in our project. There are even areas in code where we use both: observable property and messages sent via the aggregator.
It was a very instructive journey from directly attaching event handlers to using reactive extensions. We have gathered a lot of knowledge about differences between each approach and we have learned to use the right tool for the job .
3 questions to Adam Kozłowski, Software Engineer at Grape Up
1. Is it enough to know only one programming language?
That’s tricky, because it greatly depends on the goals you set for yourself. We tend to hear from other programmers all the time that you don’t need a college degree - you can learn everything yourself on YouTube and take online courses. Just spend a few months doing courses and tutorials and voila – you’re a self-made programmer!
On the other hand, if you really want to be a programmer or a software engineer, college will not prepare you for this role properly, neither will it teach you how to make the best first impression at work. At university you will learn how to think like an engineer and eventually you will become an engineer with, hopefully, enough knowledge in multiple fields - not only different programming languages, but also statistics, compilers design, AI, digital signal processing and tons of different stuff that you might never even use in the future. However, this kind of knowledge can also make you an invaluable asset in the project.
So if you don’t mind doing the same thing, similiar kinds of projects in repetitive scenarios: one programming language is fine. But if you totally feel like exploring new things and approaches, learning new programming languages and frameworks (of course - learning by doing!) will definitely make you a better programmer and a way better engineer.
2. Is pair programming difficult?
Yes and no. It is definitely more exhausting than programming alone. You need to pay attention all the time and, depending on the knowledge gap between people you pair with at work, sometimes think for the two of you. Also, you should synchronize breaks, lunch time etc. Obviously it is not a problem - just an inconvenience if you’re a lone wolf.
For some people, especially introverts, it may be hard to leave their comfort zone and get comfortable spending the whole day working with just one person. To be honest, I have never seen this kind of problem lasting longer than one day.
However, there is no better way to learn something new than working with a person who has experience in a particular field. The value of this way of transferring knowledge overcomes all disadvantages thay you may encounter working in pairs. Even the partner who is less experienced can have a valuable input thanks to which working in pairs rarely means getting stuck - two heads are better than one, even in googling. ;)
Don’t believe people who say that working in pairs means dividing the team’s velocity in half. Effectively, when properly executed, pair programming may go as fast as doing it by yourself. As a result, code quality is better and it contains less bugs in general. At some point, there is even no need for code review if both partners are experienced enough.
3. What can you learn from working on site with the client?
Humility. Working closely with the client makes you more aware of the caveats of their field of work, competencies, what they actually want and need. Not everything can be easily described in an email and it is definitively easier to directly speak with the person of interest and get all the answers.
Meeting people you work with on a daily basis and learning the specifics of their work is also extremely important and heavily affects the future work. In general, it is also easier to skip the chain of command and force the necessary change, but it has to be done with caution.
Additionally, it’s a great time when you meet new interesting people you can learn from and obviously go out with and see the city, grab a beer or just talk. Working on-site often means working abroad so automatically you get to experience a new country and its culture.
Capturing objects in closures: Why you’re doing it wrong? – Part 2
Choose your closure context wisely
In the first part of this article , we defined several simple principles of capturing objects in Closures. According to these principles, the closure code associated with a particular instance of a certain type should be considered separately from the code, which is associated either with the global scope or with the type itself. We also came to the conclusion that the pattern with “weakifying” self and “strongifying” inside the closure should be limited to the code which really depends on self while the other code should be executed independently. But let’s take a closer look at such instance-dependent code. The following proves that the situation is not so obvious.
func uploadFile(url: URL, completion: @escaping (Error?) -> Void) {
// Getting file content data from URL
//...
// Creating file info
let fileInfoID = self.databaseController.createRecord(data: fileInfo)
self.remoteFileManager.uploadBinaryData(fileContentData) { [weak self] error in
guard let strongSelf = self else {
completion(UploadError.dataError)
return
}
if error != nil {
strongSelf.databaseController.removeRecord(recordID: fileInfoID)
completion(error)
} else {
// Wait while server will make needed changes to file info
strongSelf.startTrackingOnServer(recordID: fileInfoID,
completion: completion)
}
}
}
The code above creates a record in the database that contains the file info and loads the file to the server. If the upload is successful, the method will notify the server that changes to the file info should be made. Otherwise, in case of an error, we should remove the file info from the database. Both actions depend on self , so neither of them can be performed if the object referenced by self had been deallocated before the completion was called. Therefore, calling the completion at the beginning of the closure with the appropriate error in this case seems to be reasonable.
However, such approach breaks the closure logic. If the error occurs, but self was deallocated before the call closure, we would leave the record about the file that hasn’t been uploaded. Hence, capturing a weak reference to self is not completely correct here. However, since it is obvious that we cannot capture self as a strong reference to prevent a retain cycle – what should be done instead in that case?
Let’s try to separate the required actions from the optional ones. An object referenced by self may be deallocated, but we have to remove the record from the database. With that said, we shouldn’t associate the database with the self object, but rather use it separately:
func uploadFile(url: URL, completion: @escaping (Error?) -> Void) {
// Getting file content data from URL
//...
// Creating file info
let fileInfoID = self.databaseController.createRecord(data: fileInfo)
self.databaseController.uploadBinaryData(fileContentData) { [weak self, databaseController] error in
if error != nil {
databaseController.removeRecord(recordID: fileInfoID)
completion(error)
} else if let strongSelf = self {
// Wait while server will make needed changes to file info
strongSelf.startTrackingOnServer(recordID: fileInfoID, completion: completion)
} else {
databaseController.removeRecord(recordID: fileInfoID)
completion(UploadError.dataError)
}
}
}
Pay attention to the closure capture list. It is where we explicitly specify the databaseController property. This will create a separate local variable inside the closure with the same name referencing this property. Since we didn’t add any modifier to it, the databaseController is captured by a strong reference. While self is still a weak reference, there won’t be any retain cycle – which is exactly what we need. As a result, the code is now consistent.
We remove the record from the database in case of an error or in case further action cannot be performed because self got deallocated (also treating this case as an error).
So, what is the key difference between this code and the previous one? Previously, we were treating self as the only source of our actions inside the closure. Because of that, the weak reference semantic of self forced all actions to be optional.
By capturing the object as weak reference we’re saying: “Hey, I don’t need to force this object to live until the closure is executed. It may be deallocated before and that’s fine for me”. However, we forgot about one important thing. Namely, it’s not our real intention to make self optional in the closure. Instead, we had to use weak self reference in order not to produce the retain cycle, while some of our actions are required (removing redundant file info from database in case of an error).
Based on this example, we can draw some important conclusions. Even if the object is associated with self (is its property), we should not treat self as a root object from which we take other objects inside the closure to perform calls on them. Instead, the properties of the self object may be captured independently if needed.
Let’s take a look at a more generic, yet clear example.
func uploadFile(url: URL, completion: @escaping (Error?) -> Void) {
// Some preparations
// ...
self.someAsyncAction(parameter) { [weak self] in
guard let strongSelf = self else {
return
}
// ...
// These calls should be performed
strongSelf.someObject.requiredToBeCalled()
strongSelf.someObject.requiredValue = someValue
// While these ones have sense only if self object still exists
strongSelf.otherObject.mayBeCalled()
strongSelf.otherObject.someOptionalValue = someOtherValue
// currentItem represents selected object that is required to be updated
// on closure call. Selection may be change several times before our
// asynchronous action completion
strongSelf.anotherObject.currentItem.someProperty.requiredUpdate()
}
}
According to what we’ve just learned, self should not be used in such way for all calls. Therefore, let’s make some corrections to our code. In this example some calls are required and some are optional. We can safely use self for all optional calls. For each required one we should determine which object needs to be captured by a strong reference from the call chain like the following: strongSelf.oject0.object1...objectN.action() . For the first two calls such principle object is obviously the someObject property. The first one is a call of requiredToBeCalled() method on it.
The second one assigns value to its requiredValue property. Consequently, instead of getting it as a property of self , we should directly capture someObject in the closure. The next two lines manipulate with the otherObject property.
As seen in our example, these calls are optional. Meaning, they may be omitted if the object pointed by self is deallocated (they don’t make sense without self ). The last line is a bit trickier. It has several properties in a call chain. Since the object on which the call is performed is represented by someProperty , we may want to capture it directly. However, the actual value returned by anotherObject.currentItem may (by definition) change. That is, the call to self.anotherObject.currentItem inside the closure may return a different object from the one it was returning before someAsyncAction() was called.
Thus, in case of capturing someProperty , we may potentially use an object which is out of date and is returned by some old currentItem , while the actual one will remain unchanged. Of course, for the same reason we should not capture the currentItem object itself. So, the right choice here is the anotherObject property which is the source of the actual currentItem object. After rewriting the example according to our corrections, we will receive the following:
func uploadFile(url: URL, completion: @escaping (Error?) -> Void) {
// Some preparations
// ...
self.someAsyncAction(parameter) { [weak self, someObject, anotherObject] in
// ...
// These calls should be performed
someObject.requiredToBeCalled()
someObject.requiredValue = someValue
// While these ones have sense only if self object still exists
if let strongSelf = self {
strongSelf.otherObject.mayBeCalled()
strongSelf.otherObject.someOptionalValue = someOtherValue
}
// currentItem represents selected object that is required to be updated
// on closure call. Selection may be change several times before our
// asynchronous action completion
anotherObject.currentItem.someProperty.requiredUpdate()
}
}
In general, when we have a call chain as follows self.oject0.object1...objectN.action() to determine which object from the chain should be captured, we should find objectK that conforms to the following rule:
There are two ways of calling our action() inside our closure:
1. Capture self and use it as a root (or source) object (full call chain).
2. Using objectK in closure directly (call subchain) should have exactly the same effect.
That is, if we were to substitute the call chain self.oject0.object1...objectK...objectN.action() (capturing self ) in the closure with the subchain objectK...objectN.action() (capturing objects pointed by objectK at the moment of the closure definition) the effect of the call will be the same. In case there are several objects conforming to this rule, it’s better to choose the one that is the closest to the action (method call or property change). This will avoid redundant dependencies in the closure. For example, if in the call chain self.object0.object1.object2.object3.action() we have object0, object1, object2 conforming to the rule, it’s better to use object2.object3.action() in closure rather than object0.object1.object2.object3.action() since the longest chain means more semantic dependencies - the source of our action will be object0 from which we get the next object1 and so on instead of using object2 directly).
Bring it all together
Let’s now summarize our knowledge about the closure context. In cases where retain cycles may occur, we should be very careful with what we capture inside the closure. We should definitely not use the “weakify” - ”strongify” pattern in all cases as a rule of thumb. There is no “golden rule” here. Instead, we have a set of principles for writing the closure code that we should follow not only to resolve a retain cycle problem, but also to keep the closure implementation consistent. These are the following:
1. Determine the instance that can cause a retain cycle ( self or any other object the capturing of which can cause a retain cycle).
2. The code that is not related to this particular instance should be considered. Such code may perform actions on other objects or even types (including the type of our instance ). Therefore, the code should be executed regardless of whether the instance exists inside the closure or not.
3. For the code which relates to the instance we should define which part of it is optional (may be omitted if instance is deallocated) and which part is required (should be called independently of instance existence).
4. For the optional code we may apply the “weakify” - ”strongify” pattern to the instance . That way, we’ll try to obtain a strong reference to that instance inside the closure using captured weak reference. And we’ll perform optional actions only if it still exists.
5. For performing required code we cannot apply reference to the instance . Instead, for each call chain like instance.property0.property1...propertyN.requiredAction() we need to define what property to use for capturing the corresponding object in the closure. In most cases, however, it’s simple. For instance, in the example mentioned earlier for self.someObject.requiredToBeCalled() call we choose someObject to be captured.
Please note that the proposed solution isn’t only limited to capturing self in closures. The principles listed above may be applied to any object that may cause a retain cycle inside the closure.
But let’s point out that we’re not defining strict rules. There are no such rules when it comes to closure context. What we’ve done here is we deduced some principles based on common use cases of closures. There may be other, much more complicated examples in real code. Sometimes it’s really challenging to choose what objects to retain inside the closure, especially when refactoring existing code. The main goal of this article is to give useful tips on how to deal with the closure context, how to have the right mindset when choosing the objects that should be used inside the closure and a correct reference semantic for them.

3 questions to Michał Darkowski, Project Manager at Grape Up
So you’re a new project manager, now what? Michał Darkowski, Project Manager at Grape Up gives some valuable insights that will help you nail it at project management. Since he joined the company in 2013, he has led a variety of projects implemented in multiple technologies, with a team ranging from 1 to more than 15 members in size. In addition to that, Michał has a solid software development background.
1. What are the 3 questions that every project manager should ask their team most often and why?
Michał: The first one would be, "What’s slowing us down?" . You will be surprised how much insight you can get from an answer to this. First of all, you will learn what needs to be changed to make it possible to deliver faster - which is very important in today’s fast-paced IT industry. You will also learn what impacts your team’s productivity and affects their morale. Perhaps something can be automated? Maybe the team is doing something that doesn’t bring any value? Maybe there’s something that you’re doing as the PM, that you shouldn’t do? I think that every project manager should strive to make their team as efficient as possible on a daily basis and this question gives space for that.
The second question is, "What would it look like if it was easy?" . Ever since I read this in a book by Tim Ferriss it became one of my favorite questions. We often think that complicated problems require even more complicated solutions. This question completely changes the perspective and matches perfectly the KISS principle (keep it simple, stupid) which I’m a huge fan of. Whenever someone in your project team is stuck with a challenging problem, asking this can help re-frame their thinking and get the answer they are looking for.
And last but not least, the simple, yet so powerful, "How are you?" . It is important to know the atmosphere in the team and get along well with all members. A little chit-chat in the kitchen can only do good things for your relationship with the team and also have a positive impact on your project.
2. What was the biggest problem you encountered as a PM and how did you overcome it?
Michał: Some time ago my team took over a significant part of an in-development application from an internal team after one of our customers.
The problem was pretty complex. We got a codebase without the documentation and a terribly confusing API. We didn’t know how many of the requirements have already been covered by the existing code. The requirements themselves were poorly defined. In fact, it was more of a bunch of ideas and keywords rather than a list of proper product requirements that developers can follow. To make matters worse - the team which has previously worked on this project was no longer around.
How did I overcome it? Long story short, by problem decomposition and teamwork.
Once we gathered all the questions and unknowns, we were able to clearly understand why our situation is difficult. The next step was to invole the entire team in gathering all the answers.
Which requirements are already covered? Well, let’s try to use the application ourselves and see what happens. Ambiguous acceptance criteria? Let’s properly define it and consult with the customer to ensure that this is indeed what the product should do.
API issues? Let’s successively clean them up, one piece at a time.
Of course, all this was a huge effort for each team member and it took plenty of time, but seeing improvement every single day was very motivating.
Thinking about it today I’m very proud of what we have achieved and how significantly the project changed since day one.
In my opinion, the approach to all problems consists of four simple steps.
- Analyze the current situation. What don’t you like about it? Try to break it down into smaller, preferably independent issues.
- Define the desired situation. Imagine that a year from now all the issues are solved - what does it look like?
- Think of at least one action that will get you closer to the desired situation you have just imagined.
- Execute! Repeat the process if needed.
Keep it in mind the next time you feel overwhelmed and believe that you’re facing a dead-end situation.
3. What’s the most useful tool you have discovered in the last 6 months?
Michał: That would be Evernote. We all take notes, don’t we? Doing it efficiently and keeping all your notes organized is a very important, yet downplayed need. With Evernote, which as you already guessed, is a note taking app, it is fun and very simple. I can for sure say that it took my note-taking to a new level. On a side note, this blog post isn’t sponsored! From rich formatting, to attaching files, and inserting images that can be easily annotated, or saving interesting web pages with just two clicks - it’s all there!
To be honest, I tried Evernote for the first time in 2016 and was a little bit disappointed with the tool and at the same time surprised that so many people recommended it. I have given it a second chance recently and I don’t regret it. Going all-in was the crucial part, I moved there all txt and docx files from my Dropbox, all screenshots with some important information from my phone and also imported pictures of my last paper notebook. Finally, I have everything in one place, and with Evernote’s powerful search tool I can find it in no time. This month I even got to convince a few of my colleagues to use it!

Capturing objects in closures: why you’re doing it wrong? – Part 1
The basics of closures
Many modern programming languages have a closure concept. Closures are self-contained blocks of functionalities which can be passed around and called. Additionally, they can work with environmental data (variables, functions, types etc.) captured from the outer lexical context in which the closure is defined. A closure may be bound to a variable (constant, parameter, etc.) and called through it.
With that said, there are two main aspects: the code of the closure itself and the data captured from the context. When talking about closures, we usually mean the code. However, the context isn’t any less important and, most often, it is the trickiest part of closures.
Retain cycles
Each programming language or runtime environment may determine a different way of handling and storing the closure’s context. Nevertheless, special attention should be paid to languages which use the reference counting semantic to deal with objects. With such languages, we have a retain cycle problem. Let’s quickly refresh and go through what we already know about reference counting as well as retain cycles, and how to deal with them.
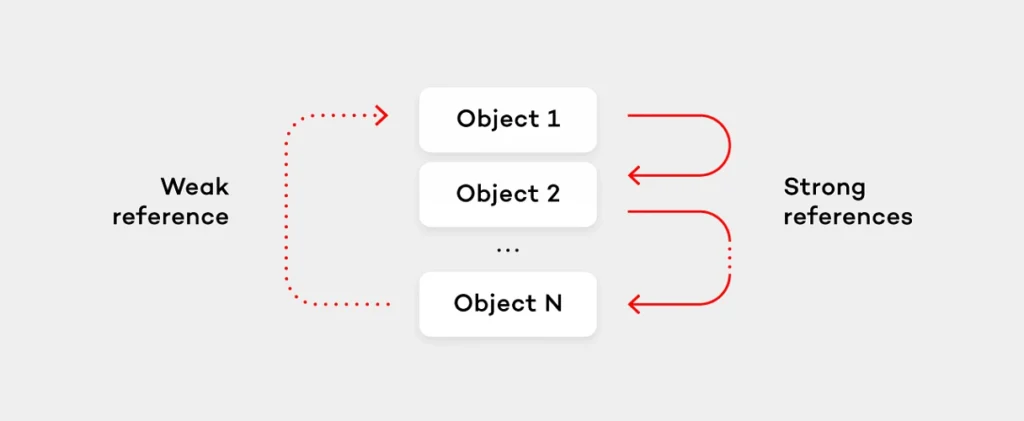
In reference counting environment each object has associated a reference counter which shows how many objects use it by a strong reference. If the object is assigned to a variable representing a strong reference to the object, its reference (retain) count is increased. When such variable goes out of scope, the reference count decreases. As soon as the count comes to a 0, the object is deallocated. Therefore, in case the sequence of the objects cyclically reference each other, all of those objects will never be deallocated. Why? Because even if there will be no references which would point to a chosen object outside the cycle, each of these objects will still have a strong reference from inside the cycle which “retains” them. Such situation is known as “a memory leak” and is called a retain cycle.

Usually, languages in a reference counting environment provide a special type of references called weak references which don’t increase the retain count of the object they point to. Instead, when the object is deallocated, each weak reference is nilled in runtime. The right way to avoid retain cycles is to use weak references. In order to break the retain cycle in the previously mentioned object sequence it would be enough to make one object (for simplicity, let’s assume the last one in sequence) hold the weak reference to the next object (the first one).
However, let’s go back to closures and their context. We will use Swift to show certain examples of the code, but keep in mind that all solutions are applicable to any language that has closures and a reference counting environment. In case a closure uses objects from the closure’s outer context, that closure will capture the reference to those objects. The most common case when a retain cycle happens is when the object stores a closure while the closure (directly or through the reference chain with other objects) references the object itself using a strong reference. Take a look at the following example:
database.observeChanges(recordID) { snapshot in
// Some code...
database.stopObserving(recordID)
// Doing other stuff...
}
In the example above, the closure is retained inside the method which will be called later. On the other hand, the closure retains a database object since the object is used inside it.
Note that in simple situations when the closure is not stored by the object, (like closures passed to forEach() method of Sequences in Swift) or when the closure is removed from the object after the call (like with DispatchQueue.async() method), the retain cycle does not occur. Therefore, we’ll not consider such cases and instead we will focus on situations when the retain cycle takes place. The language/environment should provide a mechanism to deal with retain cycles for objects captured by the closure. That is, we should have a way to specify how the object should be captured – by means of weak or strong reference. In Swift closures, we have a capture list that allows us to specify how each object should be captured. Let’s take a look at the following example.
let completion = { [weak dataBaseAccessor, someController] (error: Error?) -> Void in
otherController.someAction()
// Doing other stuff
}
The capture list allows to explicitly specify what variables are captured and what reference type (weak or strong) should be used to capture them. In the example above, the capture list is defined at the beginning of the closure header: [weak dataBaseAccessor, someController] . In the given code, dataBaseAccessor is captured by weak reference. While someController and otherController (which is not explicitly specified in the capture list) are captured by strong reference. Note that apart from weak and strong references, Swift has a concept of unowned reference for the capture list. But its usage is strictly limited to the case when the captured object’s lifetime is guaranteed not to be shorter than the lifetime of the closure. Otherwise, its usage is unsafe. We won’t consider this type of references here.
Let’s show an example with retain cycles caused by closures. Commonly, in the example below we avoid the retain cycle by specifying that self should be captured as weak reference.
class DatabaseController: DatabaseAccessorDelegate {
// Some code ...
var requestCompletion: (([String : Any]?, Error?) -> Void)?
func requestData(query: Query, completion: @escaping ([String : Any]?, Error?) -> Void) {
requestCompletion = completion
dataBaseAccessor.performQuery(query)
}
// DatabaseAccessorDelegate
func accessor(_ acessor: DatabaseAccessor, didRetrieveData data: [String : Any], error: Error?) {
requestCompletion?(data, error)
}
}
class ViewController {
let databaseController = DatabaseController()
var cachedData: [String : Any]?
// Other code ...
@IBAction func dataRequestButtonAction(_ sender: UIButton) {
databaseController.requestData(query: query) { [weak self] dataSnapshot, error in
guard let strongSelf = self else {
return
}
strongSelf.cachedData = dataSnapshot
strongSelf.updateUI()
}
}
}
When calling a databaseController.requestData() in completion self has weak modifier. To ensure that self won’t be deallocated during the completion execution, we assign it to strong reference strongSelf at the beginning. Otherwise, if self was already deallocated before the completion closure called, we’d simply exit the closure. Why is this trick needed here? Let’s show the relations between our objects in terms of retaining/not retaining. ViewController retains the DatabaseController . In turn, the DatabaseController retains the completion closure in requestData() . If completion retained the ViewController via self variable, we would get the retain cycle here.
Such approach is often described in terms of “weakifying” and ”strongifying”. Suppose you need to use some object inside closure but it can lead to retain cycle. Capture weak reference to the object when defining closure (“weakifying”), then check if it still exists (reference not nil) at the beginning of closure. If it’s still there assign it to a reference with strong semantic (“strongifying”). Otherwise exit the closure. This pattern is what we actually do in 99% of cases when it comes to closures with potential retain cycles.
Well, programmers try to find (and in most cases reasonably) the “golden rule” for almost anything. However, when it comes to closure context it’s not so simple as it seems to be. The pattern is often overestimated and overused. It’s not a silver bullet (as it is considered to be by many programmers). As a matter of fact, it may completely break the logic of your closure when used unwarily.
A Closer Look
Our previous example is a simple case so the pattern described is pretty useful and works well. But let’s go further. As a matter of fact, some areas are more complicated than they look. To demonstrate this, we’ll extend a bit our implementation of the ViewController .
class ViewController {
// Other code ...
@IBAction func dataRequestButtonAction(_ sender: UIButton) {
databaseController.requestData(query: query) { [weak self] dataSnapshot, error in
guard let strongSelf = self else {
return
}
strongSelf.cachedData = dataSnapshot
strongSelf.updateUI()
let snapshot = dataSnapshot ?? [:]
NotificationCenter.default.post(name: kDataWasUpdatedNotification,
object: nil,
userInfo: [kDataSnapshotKey : snapshot])
}
}
}
We are now notifying about the data that is being retrieved using notification mechanism. In this case, if self was deallocated we’re just returning from closure. But this will skip posting the notification. So despite the data was successfully retrieved observers of the notification won’t get it just because the ViewController instance was deallocated. Thus, the approach with exiting from the closure creates an unnecessary and – what is more important – implicit dependency between the presence of the ViewController in memory and sending the notification. In this case, we should try to obtain self and, if it’s there, proceed with calls on it. And then independently of the self object state, post the notification. See improved code below:
@IBAction func dataRequestButtonAction(_ sender: UIButton) {
databaseController.requestData(query: query) { [weak self] dataSnapshot, error in
if let strongSelf = self {
strongSelf.cachedData = dataSnapshot
strongSelf.updateUI()
}
let snapshot = dataSnapshot ?? [:]
NotificationCenter.default.post(name: kDataWasUpdatedNotification,
object: nil,
userInfo: [kDataSnapshotKey : snapshot])
}
}
This allows us to make an important step towards understanding how context in closures is used. We should separate code that depends on self (and may cause the retain cycle) from code that doesn't depend on it.
It’s all about associating
Choosing which part of the closure code really depends on self (or generally on the instance of the type) and which doesn’t, is trickier than it seems to be. Let’s refactor our example a bit. Let’s suppose we have a delegate that should also be notified. Also, assume we need to notify about data changes in several places across our code. The right thing to do is to place the code for notifying clients into a separate method.
@IBAction func dataRequestButtonAction(_ sender: UIButton) {
databaseController.requestData(query: query) { [weak self] dataSnapshot, error in
guard let strongSelf = self else {
return
}
strongSelf.cachedData = dataSnapshot
strongSelf.updateUI()
let snapshot = dataSnapshot ?? [:]
strongSelf.notifyUpdateData(snapshot: snapshot)
}
}
func notifyUpdateData(snapshot: [String : Any]) {
delegate?.controller(self, didUpdateCahcedData: snapshot)
NotificationCenter.default.post(name: kDataWasUpdatedNotification,
object: nil,
userInfo: [kDataSnapshotKey : snapshot])
}
At first glance, in the code above all the calls depend on self (called on it) so the approach to make an exit from the closure if self is nil seems to be applicable. Although, in essence our code after refactoring does exactly the same what it had done before. Therefore, if self is nil a notification will be missed. How to deal with this situation? The problem lies in the wrong criteria which has been chosen to decompose the code. We’ve combined the delegate callback invocation and the posting notification into a single method because these actions are semantically close to each other. However, we didn’t pay attention to the dependency on a particular instance (expressed via the calling method using self ). The delegate has a strict dependency on the instance because it is a property of the ViewController (a part of its state). Sending the notification is not related to any instance of the ViewController , but it rather relates to the type itself. That is, the proper place for the delegate call which is an instance method, while the notification related code should be placed in the class method.
@IBAction func dataRequestButtonAction(_ sender: UIButton) {
databaseController.requestData(query: query) { [weak self] dataSnapshot, error in
let snapshot = dataSnapshot ?? [:]
if let strongSelf = self {
strongSelf.cachedData = dataSnapshot
strongSelf.updateUI()
strongSelf.notifyDelegateDataWasUpdated(snapshot: snapshot)
}
ViewController.notifyDataUpdate(snapshot: snapshot)
}
}
func notifyDelegateDataWasUpdated(snapshot: [String : Any]) {
delegate?.controller(self, didUpdateCahcedData: snapshot)
}
class func notifyDataUpdate(snapshot: [String : Any]) {
NotificationCenter.default.post(name: kDataWasUpdatedNotification,
object: nil,
userInfo: [kDataSnapshotKey : snapshot])
}
The example shows that associating the code with the instance or the type itself plays an important role in the case of using it inside closures.
Generally, when choosing between placing the code to the type method or to the instance one, use the following “rules of thumb”.
1. If the task done by your code is not associated with any particular instance, place your code in the type (class/static) method. Such code does not manipulate (neither accesses nor alters) the state of any particular instance. This means that such task will make sense in case:
- no instance of that type exists;
- the method is dealing with multiple instances of the same type in the same manner.
2. Otherwise, place the code into the instance method.
3. If the code has mixed associations (one part doesn’t depend on any instance while another one does), the task should be decoupled into smaller tasks. This rule should be then applied to each task separately.
In this case, you will be able to decompose the code.
These rules are also helpful when dealing with closures. That is, static functions are not associated with a particular instance, so such code should be called independently on the one that relates to the self object.
Let’s sum up what we have at this point. In general, inside the closure we should distinct the code that does not relate to the self instance (which retains the closure) from the rest, so that when performing, it should not rely on the existence of the object referenced by self . These rules describe how we can determine what should be associated with the particular instance and what should not. Thanks to that, they are helpful even if we’re not going to extract this code to a static method, but rather use it inline inside the closure.
However, it’s only the tip of the iceberg. The true complexity of the proper closure context usage resides in the code that depends on an instance of the particular type. We’ll focus on such code in the second part of our article .
Dojo is the way: DevOps Enterprise Summit 2018 key takeaways
The DevOps Enterprise Summit entered its third year in Europe on June 26-27, 2018 in London. Every year, its goal is to accelerate DevOps adoption in large companies .
In London participants had a chance to network and connect with speakers during and after sessions. These networking opportunities came in various forms such as online discussions, open panels with subject matter experts, or casual lean coffee breaks. All in all, the event gathered leaders from over 500 organizations. Companies that focus on leveraging DevOps to thrive within an increasingly software-driven economy.
Let me now underline five takeaways that I personally consider to be the most important:
Dojo is the fastest and most effective way to drive change
Introducing change to an organization is very challenging, especially when all teams are fully focused on delivering their current targets. Issues vary by department and require different kinds of approach in solving them. In that case, what is the best and ultimate solution for overall improvement? According to CapitalOne – Dojo is the way. If executed properly, Dojo is an immersive learning model that fosters culture and creates an environment for knowledge exchange to give the company a jump-start into the DevOps journey. However, it takes years of hands-on experience and in-depth knowledge for the dojo execution to be effective.
Focus on the outcome, not the function
Nick Funnell, VP of Cloud Technology at Barclays Investment Bank noticed that as a company grows, the people who build it lose their focus on the final outcome. Instead, they pay more attention to new functions that appear along with the bigger size of the company. This is often the key reason why startups fail to maintain their performance acceleration once they enter the stage of a larger enterprise. In the era of very dynamic markets and almost zero time-to-market for new players, this has to be changed by companies that want to move forward. Without a doubt, the DevOps approach is a way for them to bring back the startup spirit and attitude.
Software driven infrastructure is what moves business forward
Over 30% of workers at Barclays are tech people. In the last decade, the ranking of the largest companies in the United States was dominated by technology companies. Software is responsible for a large share of product value of many physical products. On top of that, more developers are hired now in other industries than in IT. Inevitably, software is eating the world and only companies that will structure themselves around software delivery will prevail.
Broken is a normal state
Richard Cook, a professor at The Ohio State University, touched a very sensitive area of the quality of IT systems - as we develop software and infrastructure, we stress about making them fail-proof and stable, and purely perfect. Yet, there are parts of the software that will turn out to be broken. Both apps and systems constantly evolve with features and functionalities that increase their complexity and, along with that, their defectiveness. This is why when developing software or building infrastructure we have to remember that errors may and will occur. The one thing for all of us to keep in mind throughout the creation process is that broken is a perfectly normal state. This approach gives a different perspective that allows us to build things differently and to prepare ourselves and systems to deal with failure in the long run.
The system is defined by how you deal with incidents
System breakdowns are inevitable. If we can’t avoid them, the one thing that we can do is to deal with them and learn. Drawing conclusions from incidents is crucial, but not easy. Since they are an inseparable part of the process, the best approach is to treat them as an investment and try to make the best ROI out of them. If we whitewash and ignore them we will irretrievably lose a chance to learn from our own mistakes. Usually, the human error is just a starting point of a proper investigation which leads to uncovering unknown system flaws.
The love-hate relationship between testers and developers
Admit it. Every time we think of the major forces that shape the world such as tech or science, we think of rocket launches, medicine, or even media that form our perceptions. Not many of us think of the people behind the scenes, the relationships between them, what inspires them and makes them drive it all forward. We just assume that things ”get done”.
Back in the day, people responsible for software development were usually hidden in their garages, they were a bunch of data geeks and brainy visionaries. The division between developers and testers was… non-existent. It truly is mind-blowing how much has changed since then! We literally hold the entire Internet in our palms. Apps and software play key roles in our daily lives. They teach, entertain, inform, and enhance our lives in so many ways. So why is the dependency between testers and developers so essential to that immense progress?
Most testers love their jobs, and they get paid to simply ”break stuff” and be annoying. The pickier you are about those bugs, the better. The problem is that nobody wants to hurt anyone’s feelings and no one wants to be pointed for their mistakes. The whole relationship between QA teams and developers is based on testers trying to spot errors made by developers who take so much pride in their work. So it all boils down to being professional, precise, but still polite. And that’s how the story begins.
No outcome is good enough
Both testers and developers work towards a common goal — to build a high-quality and bug-free product. They are equally responsible for the final outcome. However, since testers are solely responsible for catching bugs and stopping the bug infested code from being released, there are two, very common situations that QA teams find themselves in:
- The tester has found a bug
- The tester hasn't found a bug
Conclusion: neither situation is perfect
In the first case, usually, it goes the same old way. After a bug has been found, developers ask testers whether it really is their problem. Perhaps, they can put the blame on something else and not have to deal with the problem at all ;)? Or they will ask way in advance about the number of bugs they should expect as if testers had superpowers and predicting the future was one of them. And they really DO expect a precise number. The answer is very simple – as many as you have done in the code.
The second scenario creates the perfect opportunity for developers to start an open discussion with testers. If there is a leftover bug that hasn’t been pointed out before, some will say well, this may actually be your fault, this bug was so painfully obvious!
But no hard feelings. Even if such situations take place, it's all for the greater purpose.
It works for me!
There is a certain saying that is often used by some developers. Not all of them, just some. They say it when customers encounter bugs. They say it when QA says that something still doesn’t work.
It works on my machine!
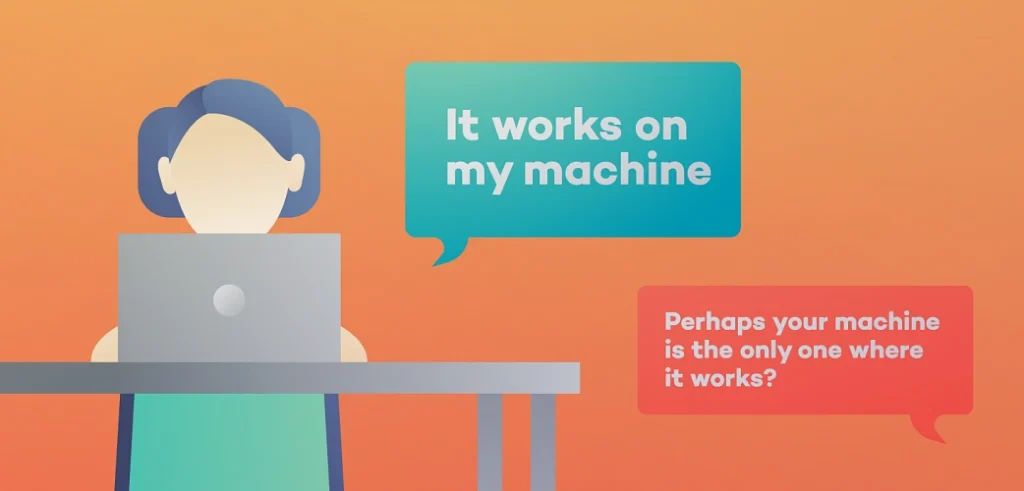
Perhaps everyone has come across it on the Internet, or at work. That’s the all too famous excuse that developers say when confronted with a defect in the production environment. However, anyone who has been in IT for a while or scrolls through memes on a regular basis knows that developers say it as a joke. And that's a fact!
If testers could share one expert tip with all developers, it would be to push all updates before handing over the task to QA. It avoids releasing things that don’t work to production. It saves developers the embarrassment when telling someone they are wrong, while in reality that are actually right.
Let’s go, give it another try to see what you’re doing wrong … Oh, I see!
However, that isn’t something what experienced engineers say. As they progress in their careers, most of them come to realize how valuable QA feedback is. Senior developers know that testers want the best for them and that they’re not a bunch of manipulative liars. They cooperate with QA to iron out any bugs before they get to production. Most often, it is the matter of pride and admitting that no one is perfect, and we all make mistakes – even in the precious code. And it comes with time. At Grape Up, we seek to maintain a healthy cooperation between testers and developers every day.
What does it take to be a good tester?
Not just anyone can be an exceptional tester. QA team members wear many hats: they must have an eye for detail, but also think outside the box like a user. They must know how to prioritize and put on a brave face in all situations. Perfect communication skills are a must while it is highly appreciated that they learn from their own mistakes – and from others too. Being objective and professional is also a nice-to-have. Last but not least, every tester should know how to say “no” to the developer and that something isn’t their job.

This is important as sometimes QA members, after having identified an issue, get asked to fix bugs themselves. This, of course, should always be done by a developer – not a tester. Therefore, assertiveness above all! That’s just the tip of the iceberg of what employees require from testers. But with practice, QA teams learn to harness their inner Sherlock Holmes and hunt down every bug to build an impeccable piece of software.
After all, love is in the air
Putting everything aside, developers and testers do love each other. These two groups come together in symbiosis to create a product that works for the end user . Symbiosis by definition, is a relationship of mutual benefit for both sides. And just like in the case of developers and testers: both groups give and take. Testers give feedback, developers take that feedback, give their time to eradicate bugs and give back a bug-free product. Because after all, we’re all in this together, right?
Top five tips for DevOps in the cloud
At Grape Up, we define DevOps as an engineering culture which unifies software development and operations, from first designs through development to production. If followed correctly, DevOps bridges the gap between these two IT groups. DevOps engineers often work at the crossroads of coding, process re-engineering and communicating with others.
Cloud, without a doubt, is inseparable from the DevOps approach. As a philosophy built on mutual collaboration and streamlined development, DevOps can still pose many challenges to IT experts attempting to apply these practices to the cloud. We’ve put together this ultimate guide to help you avoid the top barriers.
Invest in proper cloud and DevOps training
There are a number of technological obstacles that people new to DevOps must overcome – from fragmented toolsets to neglected test automation while focusing on CI/CD deployment. In addition to these, there are cultural differences specific to every company and challenges all IT teams must face and to which they must adapt. Companies should build a culture that is collaborative and focuses on shared goals. This also means finding team members who are DevOps champions within the organization.
Go cloud-native
If you’ve already decided to go for the cloud, you should be all in! The world’s digital-first companies like Facebook or Amazon already design their applications completely removed from physical resources and moved them to cloud application platforms such as Cloud Foundry. In this way, they are able to abstract away the infrastructure and spend more time innovating. Doesn’t this prove cloud-native is the way to go?
Make containers an option
Containers help make your applications easily transportable and manageable. If applications are split into modules, changes to each of them can be made without the need to touch the entire application. Since a limited number of components require sophisticated adjustments, using Cloud Foundry for a typical application and Cloud Foundry Container Runtime for running customized containers is the most productive way for handling any type of workload.
Make security your priority
Since cloud security constantly changes, you have to make sure that your security doesn’t end where your DevOps tools begin. It should be an essential part of automated testing. Including it in the CI/CD processes is a good idea. Some companies even decide to hire a Chief Security Officer in charge of monitoring DevOps security in the cloud.
Earn support from the Board
Sometimes, all it takes to gain resource and budget support is the encouragement and assistance of the senior executives. Take the time to educate your Board about the benefits of DevOps so you can start putting the DevOps practices into place as soon as possible.
Key takeaways from SpringOne Pivotal in London
SpringOne by Pivotal is one of the most anticipated series of events for developers around the world. The London edition gathered the brightest and boldest minds of the technology industry. It co-located a string of presentations about Application Development, DevOps, CI/CD, Cloud and more.
This event brought together around 60 participants from across the world. We had the chance to attend presentation tracks, network, promote, and showcase our services.
SpringOne Tour in London covered the entire topic about Java Spring in the Cloud-Native world and the subject of focus was Event Driven Architecture which is strongly connected with widely discussed Reactive Spring. Other topics were focused on Cloud technologies, so we saw a demo with Pivotal Cloud Foundry, as well as Serverless implementation by riff. After the whole event, we can confidently say that Reactive Spring is already used in many projects and will be far more frequently used as it ideally suits Cloud-Native technologies.
Alongside other industry-leading speakers from Pivotal, we had the opportunity to listen to Jakub Pilimon, Spring Developer Advocate, Pivotal Trainer and Consultant who addressed the audience on the topic of Event Driven Architecture with Spring Cloud Stream 2.0. He explained the basics of Domain Driven Design and how they connect with Event Driven Architecture.
During the presentation Pilimon created a credit card management system on his own. To do that, he used a very interesting approach of Event Storming, in which all possible events in the current domain were noted on orange notes. Then, direct commands were taken on blue notes (those are the cause of each event).
As the final step, he defined the invariants which were the necessary conditions for the domain event to occur. Based on that, we received a clear view of the business logic and the design of the domain that we want to implement.
Besides architecture and different design approaches, Jakub showed a piece of real code for the purpose of which he used Spring Cloud Stream and tested it with Rabbit MQ. In general, the whole Event Driven Architecture concept for sure will be more popular than ever with the cloud-native distributed architectures.

Oracle shakes the world of Java releases
While Java 10 is said to be the new kid on the block, rumors about 11 are already spreading fast. Now, let’s be honest: how many of you have made the upgrade to J10? I can bet that the majority of us are still sticking with the good old 8. And do you remember the story with Java 9? It became obsolete in just 6 weeks! With the release of Java 10 on March 20, 2018 and Java 11 being already right around the corner, it is safe to say that Oracle is making the move towards faster release cycles which will give us more features and abilities faster than ever. The question is “is it really a change for better?”
Why so often, Oracle?
One may wonder about the reason behind such frequent releases. It is actually because of serious changes about Java as a platform from Oracle. First of all, the new versions are released more frequently, every 6 months, and this is called time-based release model. Before 9 we had a feature-based model and, as a result, a new version every 2-3 years. However, Oracle was facing constant criticism about the slow java evolution. On the other hand, developers had more than enough time to adapt to changes. Right now, we are left with the question „Is six months enough to assume a release is mature and stable?” Maybe instead of resolving the issue, Oracle jumped from one extreme to another?
By all means, in the light of these changes, not all developers are super enthusiastic about that as it requires a persistent migration effort . It raises many questions:
- Will my dependencies work on the next version?
- If my IDE be ready?
- Will my build tool (Maven, Gradle, etc.) be ready?
- If my other tools (spotbugs, checkstyle, PMD etc.) be compatible?
Right now, most of the software mentioned above is available for free. What if their authors decide to charge them? Certainly, they will bear some costs because of faster Java release train. Java, as a platform, had been considered as free and open up till now. And in my opinion that determined the success of Java.
What does the future of Java hold?
Additionally, Oracle itself announces that updates and patches will be published for free only for the latest version of Java (it doesn’t apply to an LTS release, what I described later). If the last version is X, you have X-1 and would like Oracle to provide a security patch to you - you will have to pay. Ok, and what about OpenJDK? Well, theoretically, the OpenJDK community could release security updates, but there is no sign of this yet.
Simon Ritter, Deputy CTO at Azul Systems and Java & JVM technologies enthusiast, has recently made a statement on his blog that right now we can have all three java qualities: stable, secure and free. But things are changing, and there will come a day when we will have to choose only two.
For the purpose of this article let’s assume that Java 9 is stable now. But the last version is 10, and free security updates are available only for Java 10. So if you need to have a stable and secure Java, it’s not going to be free of charges. If you don’t want to spend money at that point, you have to choose between the following two aspects: stability (9) or security (10 with critical security updates provided).
However, every cloud has a silver lining and things do have a way of working out smoothly. For enterprises and organizations that don't necessarily want or need to upgrade at a rapid pace, Oracle says that it will provide a long-term support (LTS) release every three years. Specific JDK versions will be identified as LTS releases, for them publicly available updates will be provided at least for three years. All other, intermediate releases (9, 10) will have updates only for six months. JDK 8 has been classified as an LTS release. The next one will be the JDK 11 to be released in September 2018. So the last free update of Java 8 for business users will be published in January 2019.
Summary
I think this is the main reason, why most of us, as I wrote at the beginning, stayed at Java 8. In a few months a part of enterprises probably will migrate to Java 11, skipping 9 and 10. However Java 11 is going to be significantly expanded comparing to Java 8. It creates a possibility that the migration will be expensive and risky. In summary: do you prefer one big step, from Java 8 to 11, or take it one day at a time with smaller steps without skipping a single version?
5 tips for transferring legacy apps to the cloud
With the growing popularity of cloud computing, legacy apps are driving toward an impending demise, and transferring legacy apps is becoming a must. Gartner forecasts that the worldwide public cloud revenue will grow 21.4 % in 2018 to a total of $186.4 billion, up from $153.5 billion in 2017. These staggering numbers are mainly due to the companies that take advantage of the unbeatable benefits that PaaS, SaaS or IaaS provide on a regular basis for businesses in this crazy world of change.
You may not be fully aware of this yet, but the time will come when your system starts playing tricks on you and you will have to transfer your business to a cloud platform. Are you ready for transferring legacy apps ?
As a company that specializes in cloud consulting, we have led many cloud platform implementation projects from start to finish. Most of them involved migrating data and supporting client teams throughout the entire process. We know how important it is to understand what comes along with such change and how to prepare for it in advance.
Choose the right platform
When shopping for the right solution, keep in mind that there are fake cloud providers that only claim to be „cloud”. This phenomenon is so common that it has its own name: „cloud-washing”. It stands for adding the „cloud” part to a product mainly for marketing reasons. Always make sure to carefully examine the product and see if it really supports cloud computing. Going for a fake provider can backfire and result in:
- Delayed and
painful product upgrades, - Expensive integrations,
- A lot of unplanned downtime,
- Poor security.
At Grape Up, we perform migrations to the Cloud Foundry platform, an open source, multi cloud application PaaS.
Motivate and engage your team
Not 100% of your team members will be super enthusiastic about the change at first. Most of them can perceive it as a challenge of learning a new tool or even fear dropping behind the new technology. Which is why it is crucial to assure them that proper support and traning will be there for them. A good idea is to involve managers to speak with their teams ahead of time. An alternative to this would be to delegate staff members to be project managers during the migration.
Prepare for deployment
There are companies out there that delay the date of going live out of pure fear of doing it. The system might be ready, and so can be 90% of staff, but still. There will always be someone who won’t feel at ease about the change. Keep in mind that it’s a much better idea to go live even if you’re not fully ready than put it off for another month or two.
Teach, explain, mentor
Train your staff and ensure that everyone is familiar with their responsibilities before the big day. Companies like Cloud Foundry or Pivotal offer cloud platform training courses and certification programs. Some of them are self-training programs as well.
Invest carefully
You’ve made the decision that you don’t want to maintain your own infrastructure in-house. Which is great! Just be careful with your expenses. Plan them out over a longer period of time and try to cover necessities first. Then, splurge a little on things that are nice-to-haves, but not must-haves.
Transferring legacy apps - summary
If there’s a will, there’s a way – everyone can find a solution that meets their expectations. Whether you go for a full PaaS implementation or only need post integration assistance, Grape Up offers full support, from platform enablement to the replatforming of exisiting apps, to helping you build your own lab and scale. We will walk you through the steps above and make sure that your journey to the cloud goes nice and smooth.