Android Automotive OS 14 is out – build your own emulator from scratch!

Android Automotive OS 14 has arrived, and it marks a significant evolution in the way users interact with their vehicle’s system. This version brings enhanced user experience, improved Android API, and better OS-level security (as well as non-automotive Android 14). In this short article, we’ll walk you through a tutorial on creating your own emulator from scratch, but first, here are some of the standout features and improvements introduced in Android Automotive OS 14!
Android Automotive 14 Noteworthy New Features
- Enhanced UI: Now with an optional, improved home screen adaptation to the portrait mode for better vehicle compatibility.
- Multi-User Upgrades: Support parallel sessions with custom sound zones and multiple displays.
- Remote Access: Enables system wake-up, executes a task and then shutdown via external requests.
- Extended VHAL: More ADAS and non-ADAS properties included to represent activation status and the system state.
- App Quick Actions: A feature that allows applications to showcase quick actions.
- Infotainment Reference Design: The starting point for developers to create apps for Android Automotive OS.
- New Boot Animation: Well, as usual 😊
To learn about all new features provided in Android Automotive 14, follow this link: https://source.android.com/docs/automotive/start/releases/u_udc_release?hl=en
Steps To Building an Emulator
The best operating system for building an emulator in AAOs is Ubuntu 18.04 or higher. If you use a different operating system, you must follow some extra steps. For instance, you may need to install a repo from https://gerrit.googlesource.com/git-repo instead of using a package manager.
1) You need first to install the required dependencies
sudo apt install git-core gnupg flex bison build-essential zip curl zlib1g-dev libc6-dev-i386 libncurses5 x11proto-core-dev libx11-dev lib32z1-dev libgl1-mesa-dev libxml2-utils xsltproc unzip fontconfig repo2) Then, configure Git, set your name and email address
git config --global user.name "Your name"
git config --global user.email your@email
3) After configuring Git, you can download source code from a Git repository
repo init -u https://android.googlesource.com/platform/manifest -b android-14.0.0_r54 --partial-clone --clone-filter=blob:limit=10M && repo syncYou can skip ‐‐partial-clone and ‐‐clone-filter. However, this will result in longer download times. It’s recommended to check for the latest android-14.0.0_rXX tag before downloading, which can be found on this page: https://android.googlesource.com/platform/manifest/+refs.
Keep in mind that downloading takes a lot of time because the sources take about 150GB even with partial clone and clone-filter enabled.
4) In the next step, set up environment variables using the script provided
. build/envsetup.shThis method replaces your JAVA_HOME and modifies PATH, so be aware that your console may act differently now.
5) Select the system to build
lunch sdk_car_portrait_x86_64-engYou can create a landscape build by removing “portrait”. Also, change x86_64 to arm64 if you want to run the system on Mac. For more details on building on Mac, check out this article.
6) Create the system and the emulator image
m && m emu_img_zipThe first command will take hours to complete. Take a break: go running, biking, hiking, or whatever drives you. You can modify threat pool usage by the build system with -j parameter, like m -j 16 – the default one is the CPU count of your machine.
7) Copy the emulator image to Android Studio emulator directory
mkdir -p /mnt/c/Users/<user>/AppData/Local/Android/Sdk/system-images/android-34/custom_aaos_14/ && unzip -o out/target/product/emulator_x86_64/sdk-repo-Linux-system-images-eng.dape.zip -d /mnt/c/Users/<user>/AppData/Local/Android/Sdk/system-images/android-34/custom_aaos_14/I assume you work on a Windows machine with WSL. Please adapt the above commands with your Android/SDK directory if you are working on native Linux.
Create a package.xml file in /mnt/c/Users/<user>/AppData/Local/Android/Sdk/system-images/android-34/custom_aaos_14/x86_64 directory with the this content. The file provided bases on existing package.xml files in other emulator images.
Adjust “tag”, “vendor”, and “display name” in the upper file if needed. Make sure to match <localPackage obsolete=”false” path=”system-images;android-34;custom_aaos_14;x86_64″> with the path you’d placed the emulator image.
8) Now it’s time to create a new emulator in Android Studio
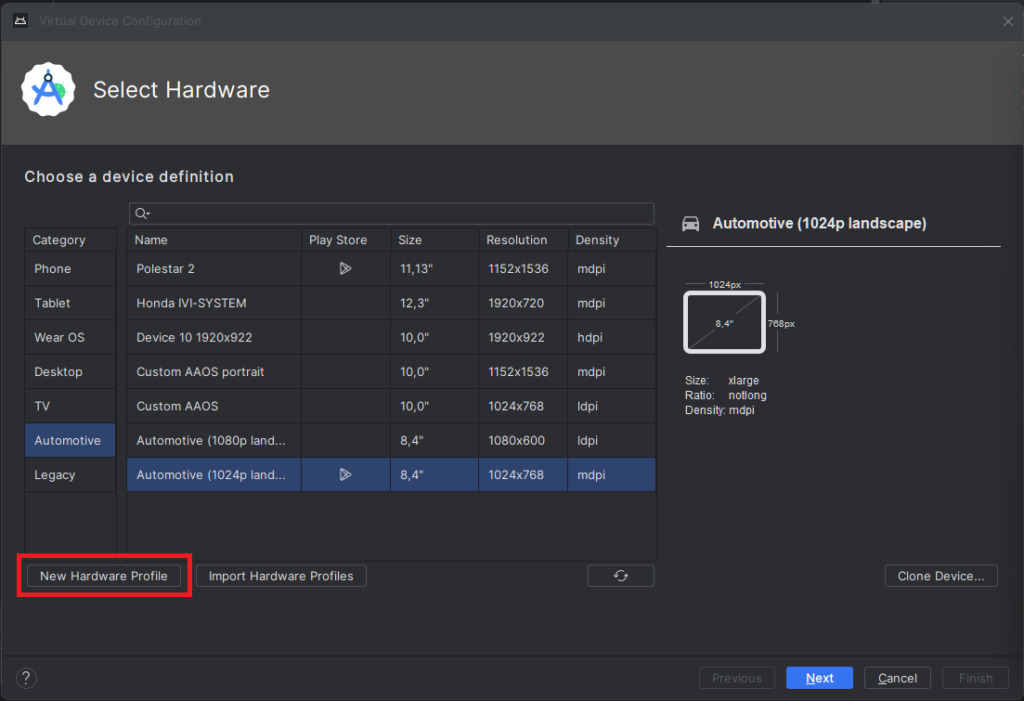
Open “Device Manager” and select “Create Virtual Device”. In the left-hand menu, choose “Automotive” and add a new hardware profile using the button in the lower-left corner of the panel.
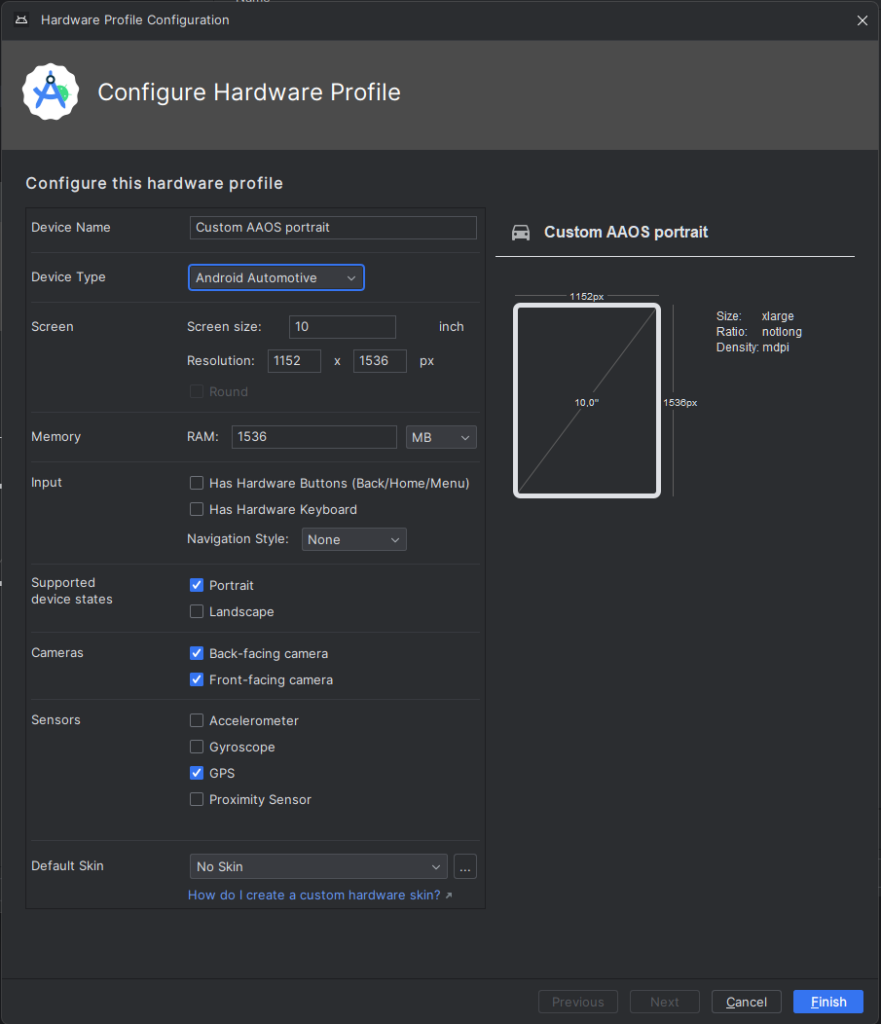
Select “Android Automotive” as a device type. Choose the correct resolution for your build. For example, I selected a resolution of 1152×1536 for a 10-inch device to create a portrait build. Next, allocate at least 1536 MB of RAM to your device. Then, choose only one supported device state – “Portrait” or “Landscape” – according to your build. Finally, disable any unnecessary sensors and skin for AAOS compatibility.
9) Accept and select your new hardware profile. Then, move on to the next step
10) Pick your emulator image (you can find it using the tag and vendor configured in package.xml)
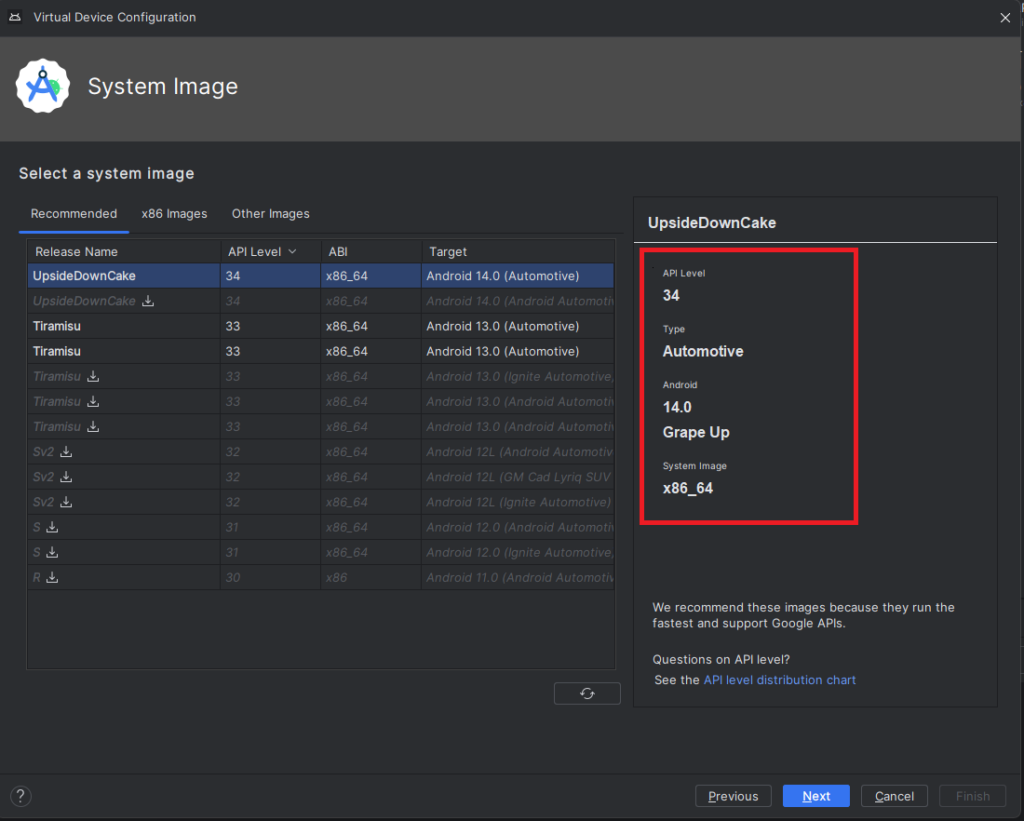
11) On the final screen, enter a name and complete the configuration process
12) To start the emulator, go to the “Device Manager” and launch it from there
13) You’re all set! Enjoy!
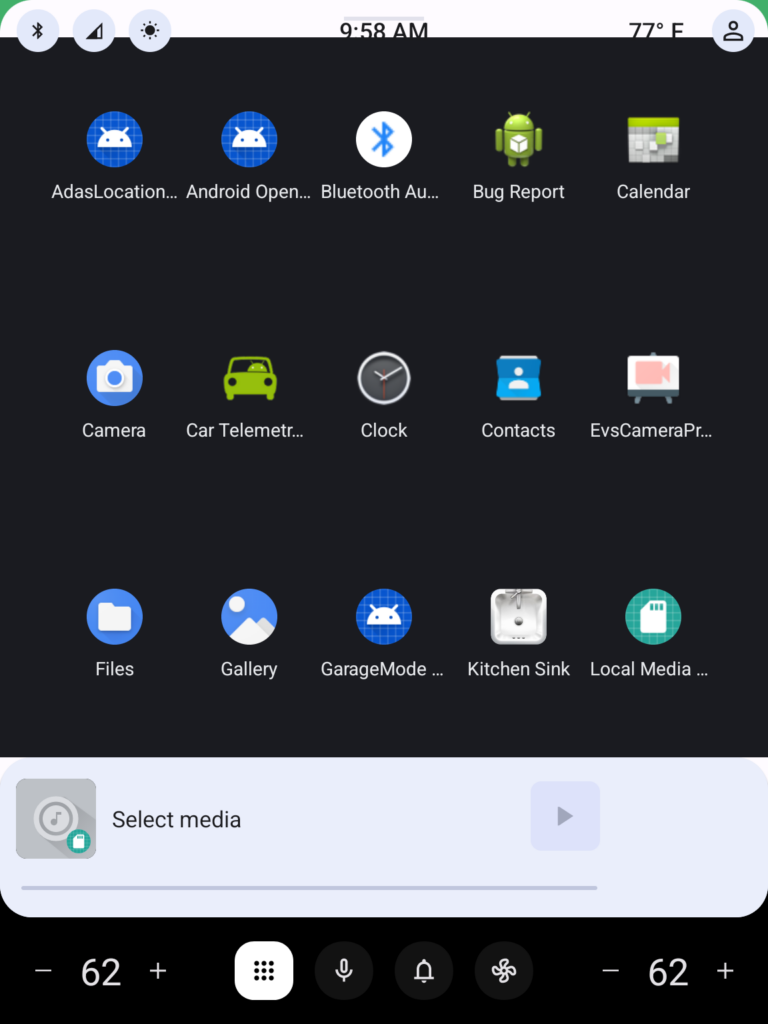
Get started on creating your very own Android Automotive OS 14 emulator by following the steps outlined in this article. Explore the possibilities of car technology and discover what the future has in store. You can find a AAOS “Hello World” example in our article How to Build Your First App for Android Automotive OS. Start building, try out the various features, and have fun with your new setup!
Check related articles
Read our blog and stay informed about the industry's latest trends and solutions.
see all articles


