About us
Our services

Capabilities

Legacy Modernization
Data Platforms
AI & Advanced Analytics

Industries

Automotive
Finance
Manufacturing
Aviation

Solutions

Databoostr

Data Sharing & Monetization Platform

Cloudboostr

Multicloud Enterprise Kubernetes

Looking for something else?

Contact us for tailored solutions and expert guidance.

Contact
Case studies
Resources

Resources

Blog

Read our blog and stay informed about the industry’s latest trends and technology.

Ready to find your breaking point?

Stay updated with our newsletter.

Subscribe

Insights

Ebooks

Explore our resources and learn about building modern software solutions from experts and practitioners.

Read more
Careers
Contact
Blog
Software development

Variable key names for Codable objects: How to make Swift Codable protocol even more useful?

Andrii Biehunov
Expert Software Engineer
July 17, 2020
•
5 min read

Table of contents

Heading 2
Heading 3
Heading 4
Heading 5
Heading 6

Schedule a consultation with software experts

Contact us

 It’s hard to imagine modern     Swift iOS application    that doesn’t work with multiple data sources like servers, local cache DB, etc, or doesn’t parse/convert data between different formats. While Swift Codable protocol is a great solution for this purpose it also has some important drawbacks when developing a complex app that deals with multiple data formats. From this article, you will know how to improve the Swift Codable mechanism and why it’s important.

 Swift has a great feature for encoding/decoding data in key-value formats called Coding protocol. That is, you may choose to store data in e.g. JSON format or plist by at minimum just defining names of the keys for which the corresponding values should be stored.

Advantages and disadvantages of Swift Codable protocol

Here are the advantages of Codable protocol:

1)  Type safety . You don't need typecasting or parsing the strings read from the file. Swift does for you all the low-level reading and parsing only returning you a ready to use object of a concrete type.

2)  The Simplicity of usage . At a minimum, you may just declare that your type that needs to be encodable or decodable confirms to the corresponding protocol (either Codable or it's parts Decodable or Encodable). The compiler will match the keys from your data (e.g., JSON) automatically based on the names of your type's properties. In case you need advanced matching of keys' names with your type's properties (and in most real life cases you need it), you may define an enum CodingKeys that will do the mapping.

3)  Extensibility . When you need some advanced parsing, you may implement initialization and encoding methods to parse/encode the data. This, for example, allows you to decode several fields of JSON combining them into a single value or make some advanced transformation before assigning value to your codable object's property.

Despite its flexibility, the Codable approach has a serious limitation. For real-life tasks, it's often needed to store the same data in several data formats at the same time. For example, data coming from a server may be stored locally as a cache. Info about user account coming from the server is often stored locally to keep user sign in. At first glance, the Swift Codable protocol can be perfectly used in this case. However, the problem is that, as soon as one data source changes names of the keys for the stored values, the data won't be readable anymore by Codable object.

As an example let's imagine a situation when an application gets user info for a user account from the server and stores it locally to be used when the app is relaunched. In this case, the proper solution for parsing JSON data from the server into a model object is to use Codable protocol. The simplest way to store the object locally would be to just use Codable to encode the object (e.g. in plist format) and to store it locally. But codable object will use a certain set of keys that is defined by server JSON field names in our example. So if the server changes names of the JSON fields it returns, we'll have to change Codable implementation to match the new fields' names. So Codable implementation will use new keys to encode/decode data. And since the same implementation is used for local data, as well the user info that was previously saved locally will become unreadable.

To generalize, if we have multiple data sources for the same keyed data, the Codable implementation will stop working as soon as one of the data sources changes the names of the keys.

 Approach with multiple entities

Let's see how to improve the Swift Codable protocol to properly handle such a situation. We need a way to encode/decode from each data source without restriction to have the same key names. To do it, we may write a model object type for each data source.

Back to our example with server and local data, we’ll have the following code:

// Server user info

struct ServerUserInfo: Codable {

 let user_name: String

 let email_address: String

 let user_age: Int

}


// Local user info to store in User Defaults

struct LocalUserInfo: Codable {

 let USER_NAME: String

 let EMAIL: String

 let AGE: Int

}

So we have two different structures: one to encode/decode user info from server and the other to encode/decode data for local usage in User Defaults. But semantically, this is the same entity. So code that works with such object should be able to use any of the structures above interchangeably. For this purpose, we may declare the following protocol:

protocol UserInfo {

 var userName: String { get }

 var email: String { get }

 var age: Int { get }

}

Each user info structure will then conform to the protocol:

extension LocalUserInfo: UserInfo {

 var userName: String {

return USER_NAME

 }


 var email: String {

return EMAIL

 }


 var age: Int {

return AGE

 }

}

extension ServerUserInfo: UserInfo {

 var userName: String {

return user_name

 }


 var email: String {

return email_address

 }


 var age: Int {

return user_age

 }

}

So, code that requires user info will use it via  UserInfo protocol.

Such solution is a very straightforward and easy to read. However, it requires much code. That is, we have to define a separate structure for each format a particular entity can be encoded/decoded from. Additionally, we need to define a protocol describing the entity and make all the structures conform to that protocol.

 Approach with variational keys

Let’s find another approach that will make it possible to use a single structure to do the encoding/decoding from different key sets for different formats. Let’s also make this approach maintain simplicity in its usage. Obviously, we cannot have Coding keys bound to properties’ names as in the previous approach. This means we’ll need to override  init(from:) and  encode(to:) methods from Codable protocol. Below is a  UserInfo structure defined for coding in JSON format from our example.

extension UserInfo: Codable {

 private enum Keys: String, CodingKey {

case userName = "user_name"

case email = "email_address"

case age = "user_age"

 }


init(from decoder: Decoder) throws {

let container = try decoder.container(keyedBy: Keys.self)

self.userName = try container.decode(String.self, forKey: .userName)

self.email = try container.decode(String.self, forKey: .email)

self.age = try container.decode(Int.self, forKey: .age)

 }


func encode(to encoder: Encoder) throws {

var container = encoder.container(keyedBy: Keys.self)

try container.encode(userName, forKey: .userName)

try container.encode(email, forKey: .email)

try container.encode(age, forKey: .age)

 }

}

In fact, to make the code above decode and encode another data format we only need to change the keys themselves. That is, we’ve used simple enum conforming to the  CodingKey protocol to define the keys. However, we may implement arbitrary type conforming to the  CodingKey protocol. For example, we may choose a structure. So, a particular instance of a structure will represent the coding key used in calls to  container.decode() or  container.encode() . While implementation will provide info about the keys of a  particular data format.  The code of such structure is provided below:

struct StringKey: CodingKey {

 let stringValue: String

 let intValue: Int?


 init?(stringValue: String) {

self.intValue = nil

self.stringValue = stringValue

 }


 init?(intValue: Int) {

self.intValue = intValue

self.stringValue = "\(intValue)"

 }

}

So, the  StringKey just wraps a concrete key for a particular data format. For example, to decode userName from JSON, we’ll create the corresponding  StringKey instances specifying JSON  user_name field into  init?(stringValue:) method.

Now we need to find a way to define key sets for each data type. To each property from  UserInfo , we need somehow assign keys that can be used to encode/decode the property’s value. E.g. for property  userName corresponds to  user_name key for JSON and  USER_NAME key for plist format. To represent each property, we may use Swift’s  KeyPath type. Also, we would like to store information about which data format each key is used for. Translating the above into code we’ll have the following:

enum CodingType {

 case local

 case remote

}


extension UserInfo {

 static let keySet: [CodingType: [PartialKeyPath<UserInfo>: String]] = [

// for .plist stored locally

.local: [

  \Self.userName: "USER_NAME",

  \Self.email: "EMAIL",

  \Self.age: "AGE"

],

// for JSON received from server

.remote: [

  \Self.userName: "user_name",

  \Self.email: "email_address",

  \Self.age: "user_age"

]

 ]

}

To let the code inside  init(from:) and  encode(to:) methods aware of the decode/encode  data format we may use user info from  Decoder/Encoder objects:

extension CodingUserInfoKey {

 static var codingTypeKey = CodingUserInfoKey(rawValue: "CodingType")

}


...


let providedType = <either .local or .remote from CodingType enum>

let decoder = JSONDecoder()

if let typeKey = CodingUserInfoKey.codingTypeKey {

 decoder.userInfo[typeKey] = providedType

}

When decoding/encoding, we’ll just read the value from user info for  CodingUserInfoKey.codingTypeKey key and pick the corresponding set of coding keys.

Let’s bring all the above together and see how our code will look like:

enum CodingError: Error {

 case keyNotFound

 case keySetNotFound

}


extension UserInfo: Codable {

 static func codingKey(for keyPath: PartialKeyPath<Self>,

                    in keySet: [PartialKeyPath<Self>: String]) throws -> StringKey {

guard let value = keySet[keyPath],

      let codingKey = StringKey(stringValue: value) else {

throw CodingError.keyNotFound

}


return codingKey

 }


 static func keySet(from userInfo: [CodingUserInfoKey: Any]) throws -> [PartialKeyPath<Self>: String] {

guard let typeKey = CodingUserInfoKey.codingTypeKey,

      let type = userInfo[typeKey] as? CodingType,

      let keySet = Self.keySets[type] else {

  throw CodingError.keySetNotFound

}


return keySet

 }


 init(from decoder: Decoder) throws {

let keySet = try Self.keySet(from: decoder.userInfo)

let container = try decoder.container(keyedBy: StringKey.self)

self.userName = try container.decode(String.self, forKey: try Self.codingKey(for: \Self.userName,

                                                                                in: keySet))

self.email = try container.decode(String.self, forKey: try Self.codingKey(for: \Self.email,

                                                                             in: keySet))

self.age = try container.decode(Int.self, forKey: try Self.codingKey(for: \Self.age,

                                                                        in: keySet))

 }


 func encode(to encoder: Encoder) throws {

let keySet = try Self.keySet(from: encoder.userInfo)

var container = encoder.container(keyedBy: StringKey.self)

try container.encode(userName, forKey: try Self.codingKey(for: \Self.userName,

                                                         in: keySet))

try container.encode(email, forKey: try Self.codingKey(for: \Self.email,

                                                          in: keySet))

try container.encode(age, forKey: try Self.codingKey(for:

\Self.age,

                                                        in: keySet))

 }

}

Note we’ve added two helper static methods:  codingKey(for keyPath ,  in keySet) and  keySet(from userInfo) . Their usage makes code of  init(from:) and  encode(to:) more clear and straightforward.

 Generalizing the solution

Let’s improve the solution with coding key sets we’ve developed to make it easier and faster to apply. The solution has some boilerplate code for transforming KeyPath of the type into a coding key and choosing the particular key set. Also, encoding/ decoding code has a repeating call to  codingKey(for keyPath, in keySet) that complicates the  init(from:) and  encode(to:) implementation and can be reduced.

First, we’ll extract helping code into helper objects. It will be enough to just use structures for this purpose:

private protocol CodingKeyContainable {

 associatedtype Coding

 var keySet: [PartialKeyPath<Coding>: String] { get }

}


private extension CodingKeyContainable {

 func codingKey(for keyPath: PartialKeyPath<Coding>) throws -> StringKey {

guard let value = keySet[keyPath], let codingKey = StringKey(stringValue: value) else {

  throw CodingError.keyNotFound

}


return codingKey

 }

}

struct DecodingContainer<CodingType>: CodingKeyContainable {

 fileprivate let keySet: [PartialKeyPath<CodingType>: String]

 fileprivate let container: KeyedDecodingContainer<StringKey>


 func decodeValue<PropertyType: Decodable>(for keyPath: KeyPath<CodingType, PropertyType>) throws -> PropertyType {

try container.decode(PropertyType.self, forKey: try codingKey(for: keyPath as PartialKeyPath<CodingType>))

 }

}

struct EncodingContainer<CodingType>: CodingKeyContainable {

 fileprivate let keySet: [PartialKeyPath<CodingType>: String]

 fileprivate var container: KeyedEncodingContainer<StringKey>


 mutating func encodeValue<PropertyType: Encodable>(_ value: PropertyType, for keyPath: KeyPath<CodingType, PropertyType>) throws {

try container.encode(value, forKey: try codingKey(for: keyPath as PartialKeyPath<CodingType>))

 }

}

Protocol  CodingKeyContainable just helps us to reuse key set retrieving code in both structures.

Now let’s define our own Decodable/Encodable-like protocols. This will allow us to hide all the boilerplate code for getting the proper key set and creating a decoder/encoder object inside of the default implementation of  init(from:) and  encode(to:) methods. On the other hand, it will allow us to simplify decoding/encoding the concrete values by using  DecodingContainer and  EncodingContainer structures we’ve defined above. Another important thing is that by using the protocols, we’ll also add the requirement of implementing:

 static let keySet: [CodingType: [PartialKeyPath<UserInfo>: String]] by codable types for which we want to use the approach with variational keys.

Here are our protocols:

// MARK: - Key Sets

protocol VariableCodingKeys {

 static var keySets: [CodingType: [PartialKeyPath<Self>: String]] { get }

}


private extension VariableCodingKeys {

 static func keySet(from userInfo: [CodingUserInfoKey: Any]) throws -> [PartialKeyPath<Self>: String] {

guard let typeKey = CodingUserInfoKey.codingTypeKey,

      let type = userInfo[typeKey] as? CodingType,

      let keySet = Self.keySets[type] else {

  throw CodingError.keySetNotFound

}


return keySet

 }

}

// MARK: - VariablyDecodable

protocol VariablyDecodable: VariableCodingKeys, Decodable {

 init(from decodingContainer: DecodingContainer<Self>) throws

}


extension VariablyDecodable {

 init(from decoder: Decoder) throws {

let keySet = try Self.keySet(from: decoder.userInfo)

let container = try decoder.container(keyedBy: StringKey.self)

let decodingContainer = DecodingContainer<Self>(keySet: keySet, container: container)

try self.init(from: decodingContainer)

 }

}

// MARK: - VariablyEncodable

protocol VariablyEncodable: VariableCodingKeys, Encodable {

 func encode(to encodingContainer: inout EncodingContainer<Self>) throws

}


extension VariablyEncodable {

 func encode(to encoder: Encoder) throws {

let keySet = try Self.keySet(from: encoder.userInfo)

let container = encoder.container(keyedBy: StringKey.self)

var encodingContainer = EncodingContainer<Self>(keySet: keySet, container: container)

try self.encode(to: &encodingContainer)

 }

}


typealias VariablyCodable = VariablyDecodable & VariablyEncodable

Let’s now rewrite our  UserInfo structure to make it conform to newly defined  VariablyCodable protocol:

extension UserInfo: VariablyCodable {

 static let keySets: [CodingType: [PartialKeyPath<UserInfo>: String]] = [

// for .plist stored locally

.local: [

  \Self.userName: "USER_NAME",

  \Self.email: "EMAIL",

  \Self.age: "AGE"

],

// for JSON received from server

.remote: [

  \Self.userName: "user_name",

  \Self.email: "email_address",

  \Self.age: "user_age"

]

 ]


init(from decodingContainer: DecodingContainer<UserInfo>) throws {

self.userName = try decodingContainer.decodeValue(for: \.userName)

self.email = try decodingContainer.decodeValue(for: \.email)

self.age = try decodingContainer.decodeValue(for: \.age)

 }


 func encode(to encodingContainer: inout EncodingContainer<UserInfo>) throws {

try encodingContainer.encodeValue(userName, for: \.userName)

try encodingContainer.encodeValue(email, for: \.email)

try encodingContainer.encodeValue(age, for: \.age)

 }

}

This is where a true power of protocols comes. By conforming to  VariablyCodable our type automatically becomes Codable. Moreover, without any boilerplate code, we now have the ability to use different sets of coding keys.

Going back to the advantages of the Codable protocol we outlined at the beginning of the article, let’s check which ones  VariablyCodable has.

1)  Type safety . Nothing changed here comparing to the Codable protocol.  VariablyCodable protocol still uses concrete types without involving any dynamic type casting.

2)  The simplicity of usage . Here we don’t have declarative style option with enum describing keys and values. We always have to implement  init(from:) and  encode(to:) methods. However, since the minimum implementation of the methods is so simple and straightforward (each line just decodes/encodes single property) that it is comparable to defining  CodingKeys enum for the Codable protocol.

3)  Extensibility . Here we have more abilities comparing to the Codable protocol. Additionally to the flexibility that can be achieved by implementing  init(from:) and  encode(to:) methods, we have also  keySets map that provides an additional layer of abstraction of coding keys.

 Summary

We defined two approaches to extend the behavior of the Codable protocol in Swift to be able to use a different set of keys for different data formats. The first approach implying separate types for each data format works well for simple cases when having two data formats and a single data flow direction (e.g. decoding only). However, if your app has multiple data sources and encodes/decodes arbitrarily between those formats you may stick to approach with  VariablyCodable protocol. While it needs more code to be written at the beginning, once implemented, you will  gain great flexibility and extensibility in coding/decoding data for any type you need .

Grape Up guides enterprises on their data-driven transformation journey

Ready to ship? Let's talk.

Check our offer
Blog

Check related articles

Read our blog and stay informed about the industry's latest trends and solutions.

Software development

Server Side Swift – quick start

Building Swift web applications allows you to reuse the skills you already have. However, you can also start from scratch if you are not an ”iPhone mac„ developer. This article shows you the most popular Server-Side Swift frameworks and lets you dive into the world of faster and safer APIs using Swift.

Swift was released in 2014. Ever since then, it has become a popular solution for the iOS and macOS development. Since Swift was the open source and people started playing with it. There were a lot of attempts to find other usages of Swift. They turned out to be perfect for the server-side while being faster and safer than other languages. The next step in the process was to apply Swift to the server-side development. Here, it is important to mention that Swift can be compiled on macOS as well as Linux and even Windows. Moreover, some frameworks allow developers to create cloud applications .

Just after Server-Side Swift has been released I felt the urge to take a quick look on it. It was really hard to tell if it at that point, it was ready for commercial use. Now, as I look at it, I would say it is stable enough. So let’s try to compare the most popular frameworks. Personally, I would recommend trying each framework before you even pick the one that works best for you – there are slight differences between them.

Currently, the most popular Server-Side Swift frameworks are Vapor, Perfect and Kitura. There are also a few other ones such as Zewo and NozelIO, however they’re not as popular, but that doesn’t take away from their value. As a matter of fact, I looked into each framework and my verdict is: Perfect and Vapor.

Why Server-Side Swift?

A few years ago, when Server-Side Swift was still new to me, I wasn’t convinced that it would be the optimal language for backend specific. Why? Because it worked just like every other backend solution and there was nothing particularly specific in it making it special, but still for me as an IOS developer it allowed me to be at a full-stack. I know Java and JS and, in my opinion, the newest technologies are good to get hold of mainly because they let us become better developers. I haven’t found too many tutorials or articles about it. Certainly not as many as there are about Java or JS. Therefore, you have to create lots of things on your own. In my opinion, Swift is also faster than other languages. If you want to compare it with others, here is the benchmark server-side swift frameworks vs nodeJS.

Tools

SPM - Swift Package Manager - manages the distribution Swift code, integrated with the build system to automate downloading, compiling and linking dependencies process runs on Mac and Linux.

XCode – Apple IDE to compile and debug Obj-C and Swift code.

AppCode – Jetbrains IDE for compile and debug Obj-C and Swift code.

Other text editors like Brackets, VS Code, Sublime etc. + SPM

There are also a bunch of very specific tools for the frameworks and I will tell a bit more about that in a quick overview below.

Overview

Vapor

It has a very active community and simple syntax as well. This framework is mostly focused on being written purely in Swift. Just as the Vapor - Swift is a very readable and understandable API, due to the fact that it keeps the naming and conventions.

Data formats:
JSON, XML

Databases:
MySQL, PostgresSQL, SQLite, MongoSB

Cloud:
Heroku, Amazon Web Services and Vapor Cloud

Tools:
Vapor toolbox

Perfect:

The most popular framework for the server-side swift development and as the author claims, it is production ready and can be used with commercial products. This one is highly recommended to use as it’s big, powerful and fast. The framework is updated on a monthly basis.

Data formats:
JSON, XML, native support for direct operations on files, directories and .zip files

Databases:
MySQL, PostgresSQL, SQLite, CouchDB, MongoSB, MariaDB, FileMaker

Cloud:
Heroku, Amazon Web Services

Tools:
Perfect Assistant

Kitura:

This Framework is like a WebFramework. Kitura is unique in its approach to databases. Example SQL DB types Kitura uses abstraction layer called "Kuery" instead of "Query". Kuery supports MySQL, SQLite and PostgreSQL. Kitura also has support for Redis, CouchDB, Apache Cassandra and ScyllaDB, but through native packages these are not related to Kuery.

Supported Data formats:
JSON, Aphid MQTT (IoT/IoT Messaging)

Databases:
MySQL, PostgresSQL, SQLite, CouchDB, Apache Cassandra, ScyllaDB

Cloud:
Heroku, Amazon Web Services, Pivotal Web Services, IBM Bluemix

Tools:
Kitura CLI

Summary

Server-Side Swift is a fast growing solution and can be used commercially with the newest technologies like cloud. After a few years, we have acquired a mature language and amazing frameworks which constantly make Server-Side Swift better. When it comes to the Vapor and Perfect, both of them seems to be in a pretty good shape by now. Vapor, for example, is growing quite fast since its first release in September 2016 and currently there is 3.1 version of it available. Perfect has similar qualities and was first released in November 2015. As I mentioned before, I would personally recommend trying to play a bit with each framework before choosing the right one.

Tutorials and code examples

Perfect

  • Source
  • Slack
  • Tutorials
  • Ray Wenderlich course
  • Sample code
  • Github

Vapor

  • Source
  • Discord
  • Tutorials
  • Ray Wenderlich course
  • Sample code
  • Github

Kitura

  • Source
  • Slack
  • Tutorials
  • Sample code
  • Gith u b

Swift NIO:

Released by Apple on 1st March 2018 – low-level, cross platform, event driven network application framework.

  • Github
  • NIO reference
  • Tutorial

Other frameworks

There are also Zewo and NozelIO but those just based on Swift and Zewo is a Go-Style framework, NozelIO is the node.js style framework.

  • Zewo Github
  • NozelIO Github

Swift for specific OS

  • Linux
  • Windows
Read more
Software development

Server Side Swift with Vapor - end to end application with Heroku cloud

In this tutorial, I want to show you the whole production process of back-end and front-end swift applications and push the backend side to the heroku cloud.

First, please make sure that you have installed at least Xcode 10. Let’s start from the backend side:

Open a terminal and check your Swift version and make sure that your swift version is 4.2.

swift –-version

Time to install Vapor CLI, for this one we should use homebrew.

brew install vapor/tap/vapor

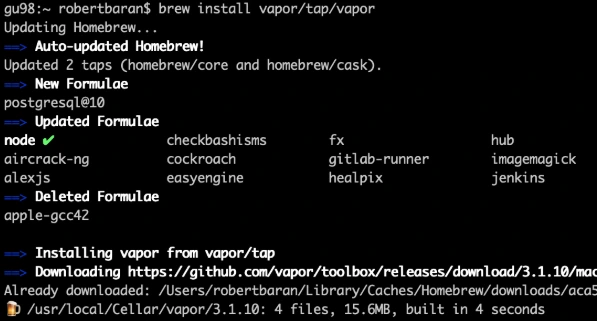
Vapor CLI is already installed.

Let’s create a new project. Vapor CLI have simple commands for lots of things. Most of them you will learn in this tutorial later.

Vapor new {your-project-name}

Go into the project directory and build it using "vapor build" command:

vapor build

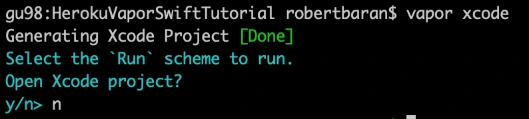
Let’s create xcode project using vapor xcode which will be needed later.

And verify if your backend works fine locally:

vapor run

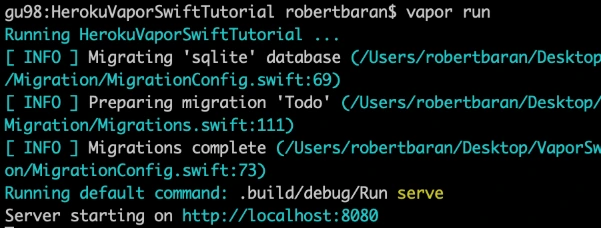
As we can see the server is starting on our machine to be sure if that works fine, go to the web browser and check the localhost:8080.

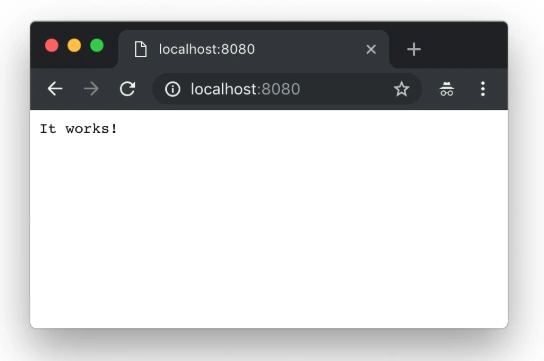
Yupi! Here is your first application running with Perfect Swift. Let's try to deploy it to the cloud, but first, we need to install heroku cli.

brew install heroku/brew/ heroku

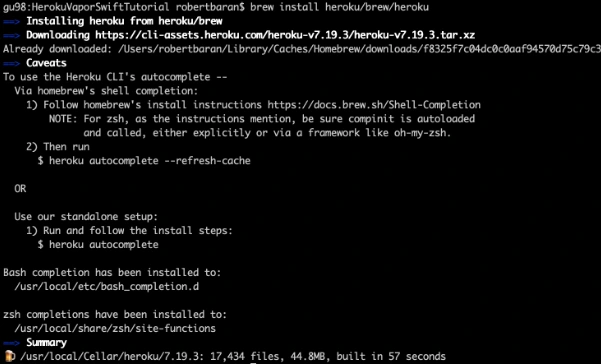
Now, deploy your first application to the cloud, but first you need to create free Heroku account. I will skip this process in tutorial. When the account was created go to the terminal install Heroku CLI and try to deploy.

vapor heroku init

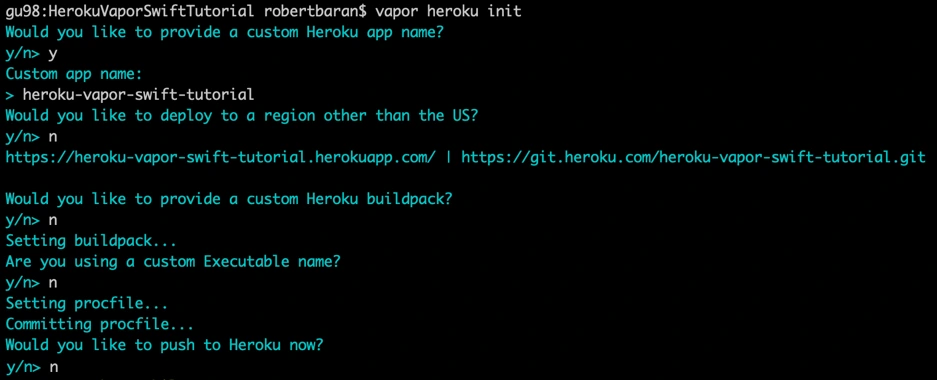
Before we push to Heroku we have to change Heroku stack from 18 to 16 as 18 is in the beta stage and doesn’t support vapor yet.

Let’s deploy: git push Heroku master.

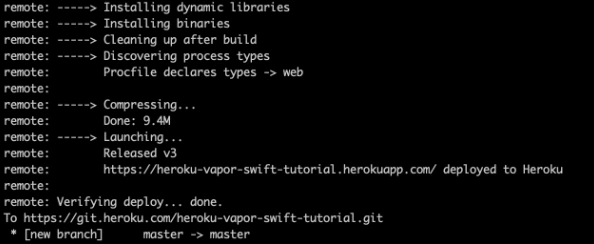
The app is already deployed. You can log in via a web browser to your Heroku account and see if it is running and if it works!
Now we need to configure the project. Go to Xcode or other source editor and install PostgreSQL framework. In Package.swift we need to add the FluentPostreSQL. In Package.swift we need to add the FluentPostreSQL.

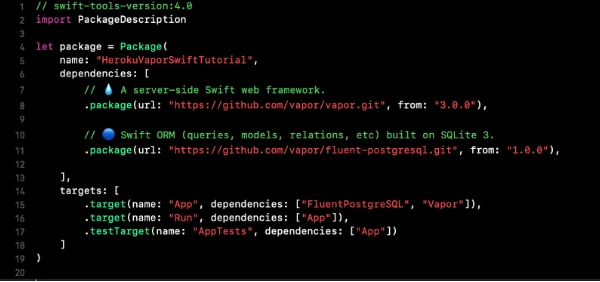
Run vapor clean, vapor build and then vapor Xcode.

It's time to configure the database and clean up the project. First of all, go to configure.swift file and remove FluentSQL and remove related functions related to it. Then we need to configure the PostgreSQL database in our project. We need to remember that few things need to be done like at the beginning import the FluentPostgreSQL and register provider into services.

try services.register(FluentPostgreSQLProvider())

Then we need to create a database config and register the database.

// Configure a database

var databases = DatabasesConfig()

let databaseConfig: PostgreSQLDatabaseConfig

if let url = Environment.get("DATABASE_URL") {

guard let urlConfig = PostgreSQLDatabaseConfig(url: url) else {

fatalError("Failed to create PostgresConfig")

}

print(urlConfig)

databaseConfig = urlConfig

} else {

let databaseName: String

let databasePort: Int

if (env == .testing) {

databaseName = "vapor-test"

if let testPort = Environment.get("DATABASE_PORT") {

databasePort = Int(testPort) ?? 5433

} else {

databasePort = 5433

}

}

else {

databaseName = Environment.get("DATABASE_DB") ?? "vapor"

databasePort = 5432

}

let hostname = Environment.get("DATABASE_HOSTNAME") ?? "localhost"

let username = Environment.get("DATABASE_USER") ?? "robertbaran"

databaseConfig = PostgreSQLDatabaseConfig(hostname: hostname, port: databasePort, username: username, database: databaseName, password: nil)

}

let database = PostgreSQLDatabase(config: databaseConfig)

databases.add(database: database, as: .psql)

services.register(databases)

Once the database is registered we need to create our model and controller. In the example project, we have todo model and controller you could remove that as we will create a new model and controller. The idea for the app is creating a shopping list, so we need to think about what we need for that. So we have already database registered so we have to create a model which will contain our productName and id. Create ShoppingList.swift file which will be our PostgreSQL model.

import FluentPostgreSQL

import Vapor


final class ShoppingList: PostgreSQLModel {

var id: Int?

var productName: String


init(id: Int? = nil, productName: String) {

print("Shopping List Model was sucesfully created")

self.id = id

self.productName = productName

}

}


extension ShoppingList: Migration { }

extension ShoppingList: Content { }

extension ShoppingList: Parameter { }

Go back to the configuration file and register database migration for that model.

var migrations = MigrationConfig()

migrations.add(model: ShoppingList.self, database: .psql)

services.register(migrations)>

The model is already done, the database is registered so it’s time to create a controller which we gonna use for getting, creating and deleting data from our database. We have provided functions for that:

import Vapor


final class ShoppingListController {

func index(_ req: Request) throws -> Future<[ShoppingList]> {

return ShoppingList.query(on: req).all()

}


func create(_ req: Request) throws -> Future {

return try req.content.decode(ShoppingList.self).flatMap { item in

return item.create(on: req)

}

}


func delete(_ req: Request) throws -> Future {

return try req.parameters.next(ShoppingList.self).flatMap { item in

return item.delete(on: req)

}.transform(to: .ok)

}

}

Also, we need to configure the routes. Go to routes.swift and initialize ShoppingListController and create routes for the functions which we already created in the controller:

let shoppingListController = ShoppingListController()

router.get("shoppingList", use: shoppingListController.index)

router.post("shoppingList", use: shoppingListController.create)

router.delete("shoppingList", ShoppingList.parameter, use: shoppingListController.delete)

Try to build the project. Once the project is built successfully you can test that locally but first, you need to setup PostgreSQL locally. I would recommend you to configure Postgres on Heroku and push it directly. First, add Heroku add-ons. I’m using the free hobby-dev database for this project:

heroku addons:create heroku-postgresql:hobby-dev

Then:

heroku config

Edit procfile web: Run serve --env production --port $PORT --hostname 0.0.0.0

Commit the changes and push to Heroku .

gu98:VaporSwiftTutorial robertbaran$ cd HerokuVaporSwiftTutorial/

gu98:HerokuVaporSwiftTutorial robertbaran$ clear

gu98:HerokuVaporSwiftTutorial robertbaran$ heroku addons:create heroku-postgresql:shoppingList-dev

Creating heroku-postgresql:shoppingList-dev on ⬢ heroku-vapor-swift-tutorial... !

▸ Couldn't find either the add-on service or the add-on plan of "heroku-postgresql:shoppingList-dev".

gu98:HerokuVaporSwiftTutorial robertbaran$ clear

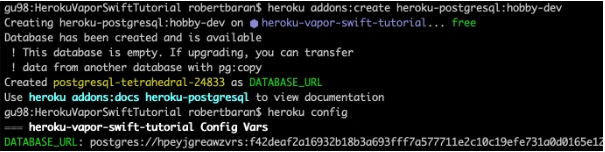
gu98:HerokuVaporSwiftTutorial robertbaran$ heroku addons:create heroku-postgresql:hobby-dev

Creating heroku-postgresql:hobby-dev on ⬢ heroku-vapor-swift-tutorial... free

Database has been created and is available

! This database is empty. If upgrading, you can transfer

! data from another database with pg:copy

Created postgresql-tetrahedral-24833 as DATABASE_URL

Use heroku addons:docs heroku-postgresql to view documentation

gu98:HerokuVaporSwiftTutorial robertbaran$ heroku config

=== heroku-vapor-swift-tutorial Config Vars

DATABASE_URL: postgres://hpeyjgreawzvrs:f42deaf2a16932b18b3a693fff7a577711e2c10c19efe731a0d0165e12d5a6c4@ec2-23-21-188-236.compute-1.amazonaws.com:5432/dab0tadl6uco6a

gu98:HerokuVaporSwiftTutorial robertbaran$

Verify the Heroku build, you can use it for that Postman or any other tool for API Development. Make post/get/delete and verify if that works. If you followed this tutorial everything should work fine.

Now let's begin work on the iOS app for creating a shopping list. Usually, I create a workspace and new project for iOS, but you can do it whatever you like. There are a few options. You can have 2 separate projects for frontend and backend, you can group everything in one project and use different targets for it or you can have a workspace with 2 projects. In this tutorial, I will be working with the workspace and 2 separates projects.

Save your backend project as a workspace from Xcode -> File menu now close the current project and open the workspace. Create SingleViewApplication for frontend application select shared scheme for it and drag n drop your project file to the workspace. Now you have to close Xcode and open again your workspace. All projects should appear properly.

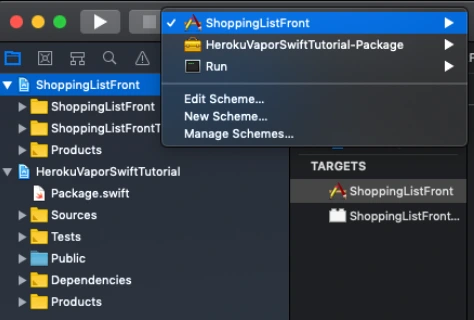
Make sure that you have all schemes here and also your projects appear properly.

Let’s start working on the iOS app. This will be just quick as we need just add a button text field and table view with the list. I’m not gonna create MVVM but it’s recommended also will use just NSURLSession for it as this tutorial it’s not about it. I just want to show you how quick and easy the whole application can be created.

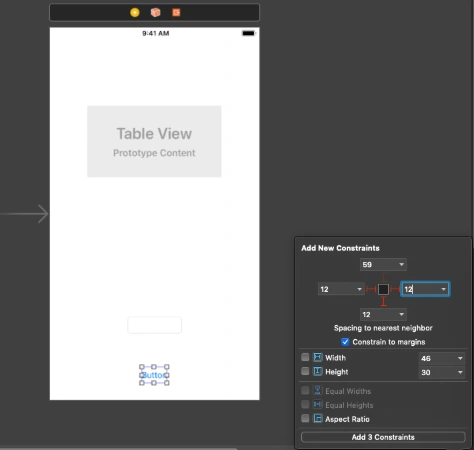
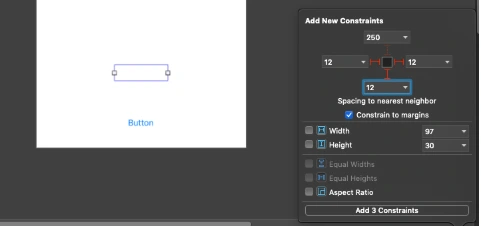
Go to Main.storyboard and create UI for this app first. Add tableView, button, and textField into you view Controller and setup constraints.

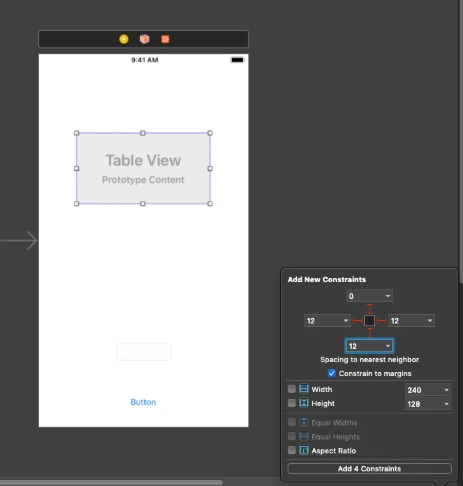
Create outlets for button, textField and connect delegate and dataSource for the tableView. Create an action for the button, create an extension for tableView delegate and data source. Create CellView. In your storyboard, you could create a prototype cell and use it in the data source. You could also create some labels and loading indicator to make that application a nice look. This tutorial is not about swift – iOS so I just give you an example of usage APIs here. You can find the whole project here. This for both frontend and backend with the workspace created. To be able to run it first you need to follow all the changes related to backend specific and Heroku as URL needs to be changed here for Heroku deployed an app or if you want to run it locally you need to configure PostgreSQL database on your machine and change database configuration in the configure.swift file.

Conclusion

Vapor is the best choice until you don’t need to use a non-SQL database like Kassandra as there is no easy way to configure that and make it work. As for me, this is no issue at all. This tutorial is easy but this is just to show you how that simple is writing backend in Swift. It’s the most important thing for the ios developers and also for every other delveloper as in my opinion this language is becoming to be the most popular language in a few years. I’m not a backend developer just enthusiast of server-side swift but thinking about change my frontend role to become a full stack.

Read more
Software development

Painless view controller configuration in Swift

Back in the pre-storyboard era of iOS development, developers had to write hundreds of lines of boilerplate code that served to manage UIViewController object hierarchies. Back then, some were inventing generic approaches to the configuring of controllers and transitions between them. Others were just satisfied with the ad-hoc view controller creation and presented them directly from other code controllers. But things changed when Apple introduced storyboards in iOS 5. It was a huge step forward in the UI design for iOS. Storyboards introduced an ability to visually define app screens and - what is the most important - transitions between them (called segues) in a single file. Storyboard segues allow to discard all the boilerplate code related to transitions between view controllers.

Of course, every solution has its advantages and disadvantages. When it comes to storyboards, some may note issues such as hard to resolve merge conflicts, coupling of view controllers, poor reusability etc. Some developers don’t even use storyboards because of such disadvantages. For others the advantages play a more important role. However, the real bottleneck of the storyboards is the initialization of view controllers. In fact, there is no true initialization for the view controllers presented by storyboard segues.

Problems with the view controller configuration

Let’s start from some basics. In Objective-C/Swift, in order to give an object an initial state, the initializer (  init() ) is called. This call assigns values to properties of the class. It always happens at the point where the object is created. When subclassing any class, we may provide the initializer and this is the only proper way. We may also provide such initializer for the  UIViewController subclass. However, in case such controller is created/presented using the storyboard, the segue creation takes place through a particular initializer –  init(coder:) . Overriding it in subclass may give us the ability to initialize properties added by the subclass. However, we don’t have the ability to pass additional arguments to the overridden method. Moreover, even if we had such an ability, it would make no sense. This is because for storyboard-driven view controllers there is no particular point in code which allows them to pass data to the initializer. That is, we cannot catch the moment of creation of such controller. The creation of view controllers managed by storyboard segues is hidden from the programmer. It happens when segue to the controller is triggered – either entirely handled by the system (when triggering action is set up in the storyboard file) or using  performSegue() method.

Apple, however, provides a place where we can pass some data to an already created view controller after the segue is triggered. It’s a  prepare(for : sender:) method. From its first parameter (of  UIStoryboardSegue type), we can get the segue’s destination view controller. Because the controller has already been created (initialization is already performed when triggering segue) the only option for passing the required data is to configure it. This means that after the initialization, but before the  prepare(for : sender:) is called, the properties of the controller that hold such data should not have initial value or should have fake ones. While the second option is meaningless in most cases, the first one is widely used. Such absence of data means that the corresponding controller’s properties should be of an optional type(s). Let’s take a look on the following sample:

override func prepare(for segue: UIStoryboardSegue, sender: Any?) {

 if segue.identifier == "ToSomeViewControllerSegueID",

    let controller = segue.destination as? SomeViewController {

     controller.someValue = 12345

   }

 }

}

This is how the view controller configuring is implemented in most cases when dealing with segues:

  •  check segue id;
  •  get the destination view controller from the segue object;
  •  try to cast it to the type of the expected view controller subclass.

In case all conditions are satisfied we can set values to the properties of the controller that need to be configured. The problem with the approach is that it has too much service code related to verification and data extraction. It may not be visible in simple cases like the one shown above. However, taking into account the fact that each view controller in application often has transitions to several other view controllers such service code becomes a real boilerplate code we’d like to avoid. Take a look at the following example that generalizes the problem with  prepare(for : sender:) implementation.

override func prepare(for segue: UIStoryboardSegue, sender: Any?) {

 if segue.identifier == "ToViewControllerA",

    let controller = segue.destination as? ViewControllerA {

     // configure  View Controller A

   }

 } else if segue.identifier == "ToViewControllerB",

    let controller = segue.destination as? ViewControllerB {

     // configure  View Controller B

   }

 } else if segue.identifier == "ToViewControllerC",

    let controller = segue.destination as? ViewControllerC {

     // configure  View Controller C

   }

 } else ...

   ...

 } else if segue.identifier == "ToViewControllerZ",

    let controller = segue.destination as? ViewControllerZ {

     // configure  View Controller Z

   }

 }

}

All those  if… else if… blocks are making code hard to read. Moreover, each block is for the a different view controller that has to be configured. That is, the more view controllers are going to be present by this one, the more  if… else if… will be added. This, in turn, reveals another problem with such configuration. There is a single method for a particular controller that does all configurations for every controller we’re going to present.

Solution

Let’s try to find the approach to the view controller configuration that may eliminate the outlined problems. We’re limited to the usage of  prepare(for : sender:) since it’s the only point where the configuration can be done. So we cannot do anything with the type of the destination view controller and with the check of segue identifier. Instead we’d like to generalize the process of configuration in a way that allows us to have a single type check and single verification for identifier. That is, check with some generalized type of destination view controller and variable segue identifier rather than enumerating all the possible concrete types/identifiers. For this, we need to pass somehow the information about the type and the segue identifier to the  prepare(for : sender:) method. We would like to have something like the following:

override func prepare(for segue: UIStoryboardSegue, sender: Any?) {

 if segue.identifier == ,

    let viewerController = segue.destination as?  {

   // configure viewerController

 }

}

In order to have a single configuration code for all the controllers we need two things: unified interface to configure the controller, and a way to get the configuration data for the particular destination controller and segue identifier. Let’s define each part of the solution.

1. Unified interface for view configuration

As defined previously, configuration means setting values to one or more properties of destination view controller. So it’s natural to associate the configuration interface with the destination controller rather than with the one that triggers the segue. Obviously, each destination view controller has a different number of properties of different types to configure.

In order to provide a unified configuration interface we may implement a method for configuring each controller. We should pass there the values that will be assigned to the corresponding controller properties. To unify such method, every configured controller should have the same signature. To achieve this, we should wrap a set of passed configuring values into a single object. Then such method will always have one argument – no matter how many properties should be set. The type of the argument is a type of the wrapping object and is different for each view controller. This means that the view controller should implement a method for configuring and somehow define a type of the argument of the method. This is a perfect task for protocols with associated types. Let’s define the following protocol:

protocol Configurable {

 associatedtype ConfigurationType

 func configure(with configuration: ConfigurationType)

}

Each view controller that is going to be configured (is configurable) should conform to this protocol by implementing the  configure(with:) method and defining a concrete type for  ConfigurationType . In the easiest case where we only have one property that needs to be configured, the ConfigurationType is the type of that property. Otherwise, the  ConfigurationType may be defined as a structure or tuple to represent several values. Consider the following examples:

class SomeViewController: UIViewController, Configurable {

 var someValue: Int?

 var someObject: MyModelType?

 …

 func configure(with configuration: (value: Int, object: MyModelType)) {

   value = configuration.value

   someObject = configuration.object

   }

}

class OtherViewController: UIViewController, Configurable {

 var underlyingObject: MyObjectType?

 …

 func configure(with object: MyObjectType) {

   underlyingObject = object

   }

}

2. Defining the configuration data for view controller

Now, let’s go back to the controller that is triggering a segue. We’re going to use the configuration protocol we’ve defined. For this, we need to have data for passing it to the  configure(with:) method. This should be something as follows:

override func prepare(for segue: UIStoryboardSegue, sender: Any?) {

 if let segueIdentifier = segue.identifier {

   // 1. Get configuration object

   // for segue.destination and segueIdentifier

   // 2. Pass configuration object to the destination controller

 }

}

Let's focus on how should we obtain the configuration object. Each segue is unique within a controller that triggers those segues. For each segue we have a single destination controller that has its own type of configuration. This means that segue id unambiguously defines a configuration type that should be used for configuring the destination view controller.

On the other hand, just returning the configuration of a concrete type per each segue id is not enough. If we did so, we would need to pass it somehow to a destination controller that has a type UIViewCotroller. It has nothing to do with the configuration. On the other hand, we cannot use the  Configurable protocol as a type of an object directly because it has an associated type constraint. That is, we cannot cast the destination view controller to the  Configurable type like as follows:
 (segue.destination as? Configurable)?.configure(with: data) . Instead, we need to use some proxy generic type that is constrained to being a Configurable.

Also, creating all the configuration objects for the controllers in a single method has no sense since it brings the same issue as the one with  prepare(for ) . That is, in this case we have a concentration of code intended to configuring different objects in a single method. Instead, the better solution is to group the code for creating the particular configuration and the type of the controller which is configured into a separate object. Consider the following example:

class Configurator {

 let configurationProvider: () -> ConfigurableType.ConfigurationType


 init(configuringCode: @escaping () -> ConfigurableType.ConfigurationType) {

   self.configurationProvider = configuringCode

 }


 func performConfiguration(of object: ConfigurableType) {

   let configuration = configurationProvider()

   object.configure(with: configuration)

 }

}

In the code above, a single  Configurator<T> instance is responsible for configuring the controller of a particular type. The code that creates the configuration is injected to the configurator in the  init() method during creation.

According with the reasoning given above, we should associate a segue ID with the particular configuration and type. Considering the approach with the  Configurator<T> , the easiest way to do it is to create a mapping object where the key is a segue ID and a value is the corresponding  Configurator<T> instance. We may also create those  Configurator<T> objects in place of the map definition. This will make the code more clear and readable. The following example demonstrates such map:

var segueIDToConfigurator: [String : Any] {

 return [

   "ToSomeViewControllerSegueID": Configurator {

     return (value: 123, object: MyModelType())

   },

   "ToOtherViewControllerSegueID": Configurator {

     return MyObjectType()

   }

 ]

}

Let’s now try to use the configuration from the dictionary above in  prepare(for ) method. Let’s take a look at the following example

override func prepare(for segue: UIStoryboardSegue, sender: Any?) {

 if let segueIdentifier = segue.identifier,

    let configuring = segueIDToConfigurator[segueIdentifier] as? Configurator {

     configuring.performConfiguration(of: segue.destination)

 }

}

The problem is that the value type of the dictionary  segueIDToConfigurator is  Any . We cannot call on it any method directly. Instead, we need to cast it to the type that contains the  performConfiguration(of:) method. On the other hand, the only type in our implementation that contains the  performConfiguration(of:) method is the generic type  Configurator<T> . And to use it we should pass a certain type of the destination view controller in place of the generic type placeholder. At this point, the problem is in  prepare(for ) method. In this method we don’t have the information about that view controller type. Let’s try to resolve the problem. We need  Configurator<T> only to call the  performConfiguration(of:) method. Instead of having the whole interface of  Configurator<T> type inside the  prepare(for ) method we may use some intermediate interface that does not depend on a generic type and allows us to call  performConfiguration(of:) .

var segueIDToConfigurator: [String : Configuring] {

 return [

   "ToSomeViewControllerSegueID": Configurator {

     return (value: 123, object: MyModelType())

   },

   "ToOtherViewControllerSegueID": Configurator {

     return MyObjectType()

   }

 ]

}

For this, let’s create a protocol  Configuring and modify the  Configurator<T> type to make it conform to it. The example below demonstrates the refined approach.

protocol Configuring {

 func performConfiguration(of object: SomeType) throws

}


class Configurator: Configuring {

 let configurationProvider: () -> ConfigurableType.ConfigurationType


 init(configuringCode: @escaping () -> ConfigurableType.ConfigurationType) {

   self.configurationProvider = configuringCode

 }


 func performConfiguration(of object: SomeType) throws {

   if let configurableObject = object as? ConfigurableType {

     let configuration = configurationProvider()

     configurableObject.configure(with: configuration)

   } else {

     throw ConfigurationError()

   }

 }

}

Now, the  performConfiguration(of:) is a generic method. This allows us to call it without knowing the exact type of the object which is configured. The method however became throwable. This is because the type of its argument is widened so that the arbitrary type can be passed. But the method can still handle only the objects that conform to the  Configurable protocol. And if the passed object is not  Configurable we don’t have anything to do with it. In this case we throw an error.

We may now use the newly defined  Configuring protocol to define the dictionary for segue-to-configurator mapping:

This allows us to use the  Configuring objects inside the  prepare(for ) method as shown below:

override func prepare(for segue: UIStoryboardSegue, sender: Any?) {

 if let segueIdentifier = segue.identifier,

    let configuring = segueIDToConfigurator[segueIdentifier] {

   do {

     try configuring.performConfiguration(of: segue.destination)

   } catch let configurationError {        

     fatalError("Cannot configure (segue.destination). " +

                "Error: (configurationError)")

   }

 }

}

Refining the solution

The above  prepare(for ) implementation is the same for any controller that is going to use the described approach. There are several ways to avoid such code duplication. But you must keep in mind that each has its downsides.
The first and the most obvious way is to use some base view controller across the project that will implement the method  prepare(for ) and the  segueIDToConfigurator property for holding configurations:

class BaseViewController {


 var segueIDToConfigurator: [String: Configuring] {

   return [String: Configuring]()

 }


 override func prepare(for segue: UIStoryboardSegue, sender: Any?) {

   if let segueIdentifier = segue.identifier,

      let configuring = segueIDToConfigurator[segueIdentifier] {

     do {

       try configuring.performConfiguration(of: segue.destination)

     } catch let configurationError {

       // throw an error or just write to log

       // if you just want to silently it ignore      

       fatalError("Cannot configure (segue.destination). " +

                  "Error: (configurationError)")

     }

   }

 }


}


class MyViewController: BaseViewController {


 // Define needed configurators

 override var segueIDToConfigurator: [String: Configuring]{

   ...

 }


}

The advantage of the first way is that any controller that subclasses  BaseViewController needs to define strictly the data that is needed for the configuration. That is, override the  segueIDToConfigurator property. However, it forces all the view controllers to subclass  BaseViewController . This makes it impossible to use the system  UIViewController subclasses like  UITableViewViewController , etc.

The second way is to use a special protocol that defines the interface of the controller that can configure other controllers. Consider the following example:

protocol ViewControllerConfiguring {

 var segueIDToConfigurator: [String: Configuring] { get }

}


extension ViewControllerConfiguring {


 func configure(segue: UIStoryboardSegue) {

   if let segueIdentifier = segue.identifier,

      let configuring = segueIDToConfigurator[segueIdentifier] {

     do {

       try configuring.performConfiguration(of: segue.destination)

     } catch let configurationError {        

       fatalError("Cannot configure (segue.destination). " +

                  "Error: (configurationError)")

     }

   }

 }


}


class MyViewController: UIViewController, ViewControllerConfiguring {


 // Define needed configurators

 var segueIDToConfigurator = ...


 // Each view controller still have to implement this method

 override func prepare(for segue: UIStoryboardSegue, sender: Any?) {

   configure(segue: segue)

 }


}

This way is more flexible in comparison to the first one. The protocol can be implemented by any object that is going to configure the segue destination controller. It means that not only  UIViewController subclass can use it. Moreover, it doesn’t limit us to use only the  BaseViewController as a superclass. On the other hand, each view controller still needs to override  prepare(for ) and call  configure(segue:) method in its implementation.

Summary

In this article, I described the approach to configuring destination view controllers with clean and straightforward code when using storyboard segues. The approach is possible thanks to useful Swift concepts, such as Generics and Protocols with associated types. The code is also safe as it uses static typing wherever possible and handles errors. Meanwhile the dynamic types are concentrated in single place and the possible errors are handled only there. This approach allows us to avoid unnecessary boilerplate code in the  prepare(for ) methods. On the other hand, it makes configuring particular view controllers clearer and more robust by using a specific  Configurable protocol.

Read more
View all
Connect

Interested in our services?

Reach out for tailored solutions and expert guidance.

Stay updated with our newsletter

Subscribe for fresh insights and industry analysis.

About UsCase studiesContactCareers
Capabilities:
Legacy ModernizationData PlatformsArtificial Intelligence
Industries:
AutomotiveFinanceManufacturingAviation
Solutions:
DataboostrCloudboostr
Resources
BlogInsights
© Grape Up 2025
Cookies PolicyPrivacy PolicyTerms of use
Grape Up uses cookies

This website uses cookies to improve its user experience and provide personalized content for you. We use cookies for web analytics and advertising. You can accept these cookies by clicking "OK" or go to Details in order to manage your cookies preferences more precisely. To learn more, check out our Privacy and Cookies Policy

Accept allDetails
Grape Up uses cookies

Essential website cookies are necessary to provide you with services available through the website, autosave your settings and preferences, and to enhance the performance and security of the website - you have the right not to accept them through your web browser's settings, but your access to some functionality and areas of our website may be restricted.

Analytics cookies: (our own and third-party : Google, HotJar) – you can accept these cookies below:

Marketing cookies (third-party cookies: Hubspot, Facebook, LinkedIn) – you can accept these cookies below:

Ok