Integrating HVAC control in Android with DDS
As modern vehicles become more connected and feature-rich, the need for efficient and reliable communication protocols has grown. One of the critical aspects of automotive systems is the HVAC (Heating, Ventilation, and Air Conditioning) system , which enhances passenger comfort. This article explores how to integrate HVAC control in Android with the DDS (Data Distribution Service) protocol, enabling robust and scalable communication within automotive systems.
This article builds upon the concepts discussed in our previous article, "Controlling HVAC Module in Cars Using Android: A Dive into SOME/IP Integration." It is recommended to read that article first, as it covers the integration of HVAC with SOME/IP, providing foundational knowledge that will be beneficial for understanding the DDS integration described here.
What is HVAC?
HVAC systems in vehicles are responsible for maintaining a comfortable cabin environment. These systems regulate temperature, airflow, and air quality within the vehicle. Key components include:
- Heaters : Warm the cabin using heat from the engine or an electric heater.
- Air Conditioners : Cool the cabin by compressing and expanding refrigerant.
- Ventilation : Ensures fresh air circulation within the vehicle.
- Air Filters : Remove dust and pollutants from incoming air.
Effective HVAC control is crucial for passenger comfort, and integrating this control with an Android device allows for a more intuitive user experience.
Detailed overview of the DDS protocol
Introduction to DDS
Data Distribution Service (DDS) is a middleware protocol and API standard for data-centric connectivity . It enables scalable, real-time, dependable, high-performance, and interoperable data exchanges between publishers and subscribers. DDS is especially popular in mission-critical applications like aerospace, defense, automotive, telecommunications, and healthcare due to its robustness and flexibility.
Key functionalities of DDS
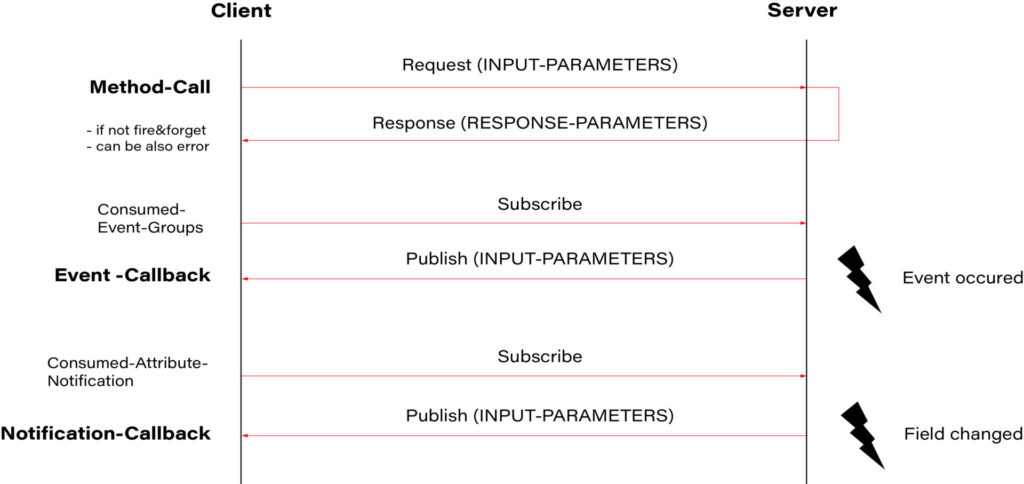
- Data-Centric Publish-Subscribe (DCPS) : DDS operates on the publish-subscribe model where data producers (publishers) and data consumers (subscribers) communicate through topics. This model decouples the communication participants in both time and space, enhancing scalability and flexibility.
- Quality of Service (QoS) : DDS provides extensive QoS policies that can be configured to meet specific application requirements. These policies control various aspects of data delivery, such as reliability, durability, latency, and resource usage.
- Automatic Discovery : DDS includes built-in mechanisms for the automatic discovery of participants, topics, and data readers/writers. This feature simplifies the setup and maintenance of communication systems, as entities can join and leave the network dynamically without manual configuration.
- Real-Time Capabilities : DDS is designed for real-time applications, offering low latency and high throughput. It supports real-time data distribution, ensuring timely delivery and processing of information.
- Interoperability and Portability : DDS is standardized by the Object Management Group (OMG), which ensures interoperability between different DDS implementations and portability across various platforms.
Structure of DDS
Domain Participant : The central entity in a DDS system is the domain participant. It acts as the container for publishers, subscribers, topics, and QoS settings. A participant joins a domain identified by a unique ID, allowing different sets of participants to communicate within isolated domains.
Publisher and Subscriber :
- Publisher : A publisher manages data writers and handles the dissemination of data to subscribers.
- Subscriber : A subscriber manages data readers and processes incoming data from publishers.
Topic : Topics are named entities representing a data type and the QoS settings. They are the points of connection between publishers and subscribers. Topics define the structure and semantics of the data exchanged.
Data Writer and Data Reader :
- Data Writer : Data writers are responsible for publishing data on a topic.
- Data Reader : Data readers subscribe to a topic and receive data from corresponding data writers.
Quality of Service (QoS) Policies : QoS policies define the contract between data writers and data readers. They include settings such as:
- Reliability : Controls whether data is delivered reliably (with acknowledgment) or best-effort.
- Durability : Determines how long data should be retained by the middleware.
- Deadline : Specifies the maximum time allowed between consecutive data samples.
- Latency Budget : Sets the acceptable delay from data writing to reading.
Ensuring communication correctness
DDS ensures correct communication through various mechanisms:
- Reliable Communication : Using QoS policies, DDS can guarantee reliable data delivery. For example, the Reliability QoS can be set to "RELIABLE," ensuring that the subscriber acknowledges all data samples.
- Data Consistency : DDS maintains data consistency using mechanisms like coherent access, which ensures that a group of data changes is applied atomically.
- Deadline and Liveliness : These QoS policies ensure that data is delivered within specified time constraints. The Deadline policy ensures that data is updated at expected intervals, while the Liveliness policy verifies that participants are still active.
- Durability : DDS supports various durability levels to ensure data persistence. This ensures that late-joining subscribers can still access historical data.
- Ownership Strength : In scenarios where multiple publishers can publish on the same topic, the Ownership Strength QoS policy determines which publisher's data should be used when conflicts occur.
Building the CycloneDDS Library for Android
To integrate HVAC control in Android with the DDS protocol, we will use the CycloneDDS library. CycloneDDS is an open-source implementation of the DDS protocol, providing robust and efficient data distribution. The source code for CycloneDDS is available at Eclipse CycloneDDS GitHub , and the instructions for building it for Android are detailed at CycloneDDS Android Port .
Prerequisites
Before starting the build process, ensure you have the following prerequisites installed:
- Android NDK: Download and install the latest version from the Android NDK website .
- CMake: Download and install CMake from the CMake website.
- A suitable build environment (e.g., Linux or macOS).
Step-by-step build instructions
1. Clone the CycloneDDS Repository : First, clone the CycloneDDS repository to your local machine:
git clone https://github.com/eclipse-cyclonedds/cyclonedds.git
cd cyclonedds
2. Set Up the Android NDK : Ensure that the Android NDK is properly installed and its path is added to your environment variables.
export ANDROID_NDK_HOME=/path/to/your/android-ndk
export PATH=$ANDROID_NDK_HOME/toolchains/llvm/prebuilt/linux-x86_64/bin:$PATH
3. Create a Build Directory : Create a separate build directory to keep the build files organized:
mkdir build-android
cd build-android
4. Configure the Build with CMake : Use CMake to configure the build for the Android platform. Adjust the ANDROID_ABI parameter based on your target architecture (e.g., armeabi-v7a , arm64-v8a , x86 , x86_64 ):
cmake -DCMAKE_TOOLCHAIN_FILE=$ANDROID_NDK_HOME/build/cmake/android.toolchain.cmake \
      -DANDROID_ABI=arm64-v8a \
      -DANDROID_PLATFORM=android-21 \
      -DCMAKE_BUILD_TYPE=Release \
      -DBUILD_SHARED_LIBS=OFF \
      -DCYCLONEDDS_ENABLE_SSL=NO \
      ..
5. Build the CycloneDDS Library : Run the build process using CMake. This step compiles the CycloneDDS library for the specified Android architecture:
cmake --build .
Integrating CycloneDDS with VHAL
After building the CycloneDDS library, the next step is to integrate it with the VHAL (Vehicle Hardware Abstraction Layer) application.
1. Copy the Built Library : Copy the libddsc.a file from the build output to the VHAL application directory:
cp path/to/build-android/libddsc.a path/to/your/android/source/hardware/interfaces/automotive/vehicle/2.0/default/
2. Modify the Android.bp File : Add the CycloneDDS library to the Android.bp file located in the hardware/interfaces/automotive/vehicle/2.0/default/ directory:
cc_prebuilt_library_static {
    name: "libdds",
    vendor: true,
    srcs: ["libddsc.a"],
    strip: {
        none: true,
    },
}
3. Update the VHAL Service Target : In the same Android.bp file, add the libdds library to the static_libs section of the android.hardware.automotive.vehicle@2.0-default-service target:
cc_binary {
    name: "android.hardware.automotive.vehicle@2.0-default-service",
    srcs: ["VehicleService.cpp"],
    shared_libs: [
        "liblog",
        "libutils",
        "libbinder",
        "libhidlbase",
        "libhidltransport",
        "android.hardware.automotive.vehicle@2.0-manager-lib",
    ],
    static_libs: [
        "android.hardware.automotive.vehicle@2.0-manager-lib",
        "android.hardware.automotive.vehicle@2.0-libproto-native",
        "android.hardware.automotive.vehicle@2.0-default-impl-lib",
        "libdds",
    ],
    vendor: true,
}
Defining the Data Model with IDL
To enable DDS-based communication for HVAC control in our Android application, we need to define a data model using the Interface Definition Language (IDL). In this example, we will create a simple IDL file named hvacDriver.idl that describes the structures used for HVAC control, such as fan speed, temperature, and air distribution.
hvacDriver.idl
Create a file named hvacDriver.idl with the following content:
module HVACDriver
{
    struct FanSpeed
    {
        octet value;
    };

    struct Temperature
    {
        float value;
    };

    struct AirDistribution
    {
        octet value;
    };
};
Generating C Code from IDL
Once the IDL file is created, we can use the idlc (IDL compiler) tool provided by CycloneDDS to generate the corresponding C code. The generated files will include hvacDriver.h and hvacDriver.c , which contain the data structures and serialization/deserialization code needed for DDS communication.
Run the following command to generate the C code:
idlc hvacDriver.idl
This command will produce two files:
- hvacDriver.h
- hvacDriver.c
Integrating the generated code with VHAL
After generating the C code, the next step is to integrate these files into the VHAL (Vehicle Hardware Abstraction Layer) application.
Copy the Generated Files : Copy the generated hvacDriver.h and hvacDriver.c files to the VHAL application directory:
cp hvacDriver.h path/to/your/android/source/hardware/interfaces/automotive/vehicle/2.0/default/
cp hvacDriver.c path/to/your/android/source/hardware/interfaces/automotive/vehicle/2.0/default/
Include the Generated Header : In the VHAL source files where you intend to use the HVAC data structures, include the generated header file. For instance, in VehicleService.cpp , you might add:
#include "hvacDriver.h"
Modify the Android.bp File : Update the Android.bp file in the hardware/interfaces/automotive/vehicle/2.0/default/ directory to compile the generated C files and link them with your application:
cc_library_static {
    name: "hvacDriver",
    vendor: true,
    srcs: ["hvacDriver.c"],
}

cc_binary {
    name: "android.hardware.automotive.vehicle@2.0-default-service",
    srcs: ["VehicleService.cpp"],
    shared_libs: [
        "liblog",
        "libutils",
        "libbinder",
        "libhidlbase",
        "libhidltransport",
        "android.hardware.automotive.vehicle@2.0-manager-lib",
    ],
    static_libs: [
        "android.hardware.automotive.vehicle@2.0-manager-lib",
        "android.hardware.automotive.vehicle@2.0-libproto-native",
        "android.hardware.automotive.vehicle@2.0-default-impl-lib",
        "libdds",
"hvacDriver",
    ],
    vendor: true,
}
Implementing DDS in the VHAL Application
To enable DDS-based communication within the VHAL (Vehicle Hardware Abstraction Layer) application, we need to implement a service that handles DDS operations. This service will be encapsulated in the HVACDDSService class, which will include methods for initialization and running the service.
Step-by-step implementation
1. Create the HVACDDSService Class : First, we will define the HVACDDSService class with methods for initializing the DDS entities and running the service to handle communication.
2. Initialization : The init method will create a DDS participant, and for each structure (FanSpeed, Temperature, AirDistribution), it will create a topic, reader, and writer.
3. Running the Service : The run method will continuously read messages from the DDS readers and trigger a callback function to handle data changes.
void HVACDDSService::init()
{

    /* Create a Participant. */
    participant = dds_create_participant (DDS_DOMAIN_DEFAULT, NULL, NULL);
    if(participant < 0)
    {
        LOG(ERROR) << "[DDS] " << __func__ << " dds_create_participant: " << dds_strretcode(-participant);
    }

    /* Create a Topic. */
    qos = dds_create_qos();
    dds_qset_reliability(qos, DDS_RELIABILITY_RELIABLE, DDS_SECS(10));
    dds_qset_durability(qos, DDS_DURABILITY_TRANSIENT_LOCAL);


    topic_temperature = dds_create_topic(participant, &Driver_Temperature_desc, "HVACDriver_Temperature", qos, NULL);
    if(topic_temperature < 0)
    {
        LOG(ERROR) << "[DDS] " << __func__ << " dds_create_topic(temperature): "<< dds_strretcode(-topic_temperature);
    }

    reader_temperature = dds_create_reader(participant, topic_temperature, NULL, NULL);
    if(reader_temperature < 0)
    {
        LOG(ERROR) << "[DDS] " << __func__ << " dds_create_reader(temperature): " << dds_strretcode(-reader_temperature);
    }

    writer_temperature = dds_create_writer(participant, topic_temperature, NULL, NULL);
    if(writer_temperature < 0)
    {
        LOG(ERROR) << "[DDS] " << __func__ << " dds_create_writer(temperature): " << dds_strretcode(-writer_temperature);
    }

    .....
}

void HVACDDSService::run()
{
    samples_temperature[0] = Driver_Temperature__alloc();
    samples_fanspeed[0] = Driver_FanSpeed__alloc();
    samples_airdistribution[0] = Driver_AirDistribution__alloc();


    while (true)
    {
        bool no_data = true;

        rc = dds_take(reader_temperature, samples_temperature, infos, MAX_SAMPLES, MAX_SAMPLES);
        if (rc < 0)
        {
            LOG(ERROR) << "[DDS] " << __func__ << " temperature dds_take: " << dds_strretcode(-rc);
        }

        /* Check if we read some data and it is valid. */
        if ((rc > 0) && (infos[0].valid_data))
        {
            no_data = false;

            Driver_Temperature *msg = (Driver_Temperature *) samples_temperature[0];
            LOG(INFO) << "[DDS] " << __func__ << " === [Subscriber] Message temperature(" << (float)msg->value << ")";
            if (tempChanged_)
            {
                std::stringstream ss;
                ss << std::fixed << std::setprecision(2) << msg->value;
                tempChanged_(ss.str());
            }
        }


        ......


        if(no_data)
        {
            /* Polling sleep. */
            dds_sleepfor (DDS_MSECS (20));
        }
    }
}
Building and deploying the application
After implementing the HVACDDSService class and integrating it into your VHAL application, the next steps involve building the application and deploying it to your Android device.
Building the application
1. Build the VHAL Application : Ensure that your Android build environment is set up correctly and that all necessary dependencies are in place. Then, navigate to the root of your Android source tree and run the build command:
source build/envsetup.sh
lunch <target>
m -j android.hardware.automotive.vehicle@2.0-service
2. Verify the Build : Check that the build completes successfully and that the binary for your VHAL service is created. The output binary should be located in the out/target/product/<device>/system/vendor/bin/ directory.
Deploying the application
1. Push the Binary to the Device : Connect your Android device to your development machine via USB, and use adb to push the built binary to the device:
adb push out/target/product/<device>/system/vendor/bin/android.hardware.automotive.vehicle@2.0-service /vendor/bin/
2. Restart device
Conclusion
In this article, we have covered the steps to integrate DDS (Data Distribution Service) communication for HVAC control in an Android Automotive environment using the CycloneDDS library. Here's a summary of the key points:
1. CycloneDDS Library Setup :
- Cloned and built CycloneDDS for Android.
- Integrated the built library into the VHAL application.
2. Data Model Definition :
- Defined a simple data model for HVAC control using IDL.
- Generated the necessary C code from the IDL definitions.
3. HVACDDSService Implementation :
- Created the HVACDDSService class to manage DDS operations .
- Implemented methods for initialization ( init ) and runtime processing ( run ).
- Set up DDS entities such as participants, topics, readers, and writers.
- Integrated DDS service into the VHAL application's main loop.
4. Building and Deploying the Application
- Built the VHAL application and deployed it to the Android device.
- Ensured correct permissions and successfully started the VHAL service.
By following these steps, you can leverage DDS for efficient, scalable, and reliable communication in automotive systems, enhancing HVAC systems' control and monitoring capabilities in Android Automotive environments. This integration showcases the potential of DDS in automotive applications, providing a robust framework for data exchange across different components and services.

Data powertrain in automotive: Complete end-to-end solution
We power your entire data journey, from signals to solutions
Check related articles
Read our blog and stay informed about the industry's latest trends and solutions.
Interested in our services?
Reach out for tailored solutions and expert guidance.

