Should UI testing and API testing go together?

If you have ever worked on writing UI automation tests, you probably came to the point when your test suite is so extensive that it takes a long time to run all the cases. And if the suite keeps on expanding, the situation won't look better. Applications are growing and the number of tests will constantly increase. Luckily, there is a solution to speed up test runs. In this article, we present the advantages of using some help in the form of API testing in the UI test suite, focusing on the aspect of test execution time.
How can API Requests help you?
- Tests will be easier to maintain - UI is constantly changing when API requests are persistent (for the most part)
- You will get immediate tests result from the business logic side
- You can find bugs and solve problems faster and in a more effective way
- You will see a significant improvement in the test execution time
If there are some unwanted issues in the application, we want to be able to discover them as fast as possible. That’s why test execution time is significant in the development cycle. Before we focus on the API requests, first let’s take a small step back and take a look at the test from the UI side only.
Customer path
UI testing is literally the path that the customer is taking through the app, and it is crucial to write automation tests for these workflows. Sometimes we need to repeat the same steps in many feature files (especially if we are taking care of data independence ) and it is not necessary to go over them again on UI side in each test.
Imagine that as a customer you can configure your car through the app. You can start with choosing a basic model and then add some extra equipment for your vehicle. Let’s take a look at this example written in Gherkin:
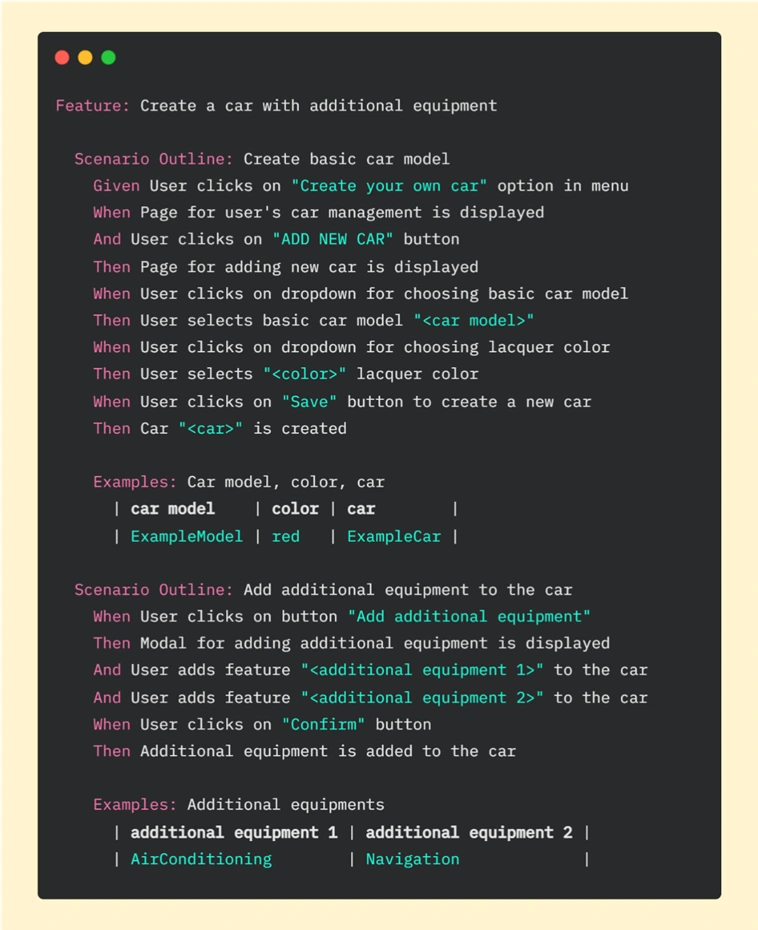
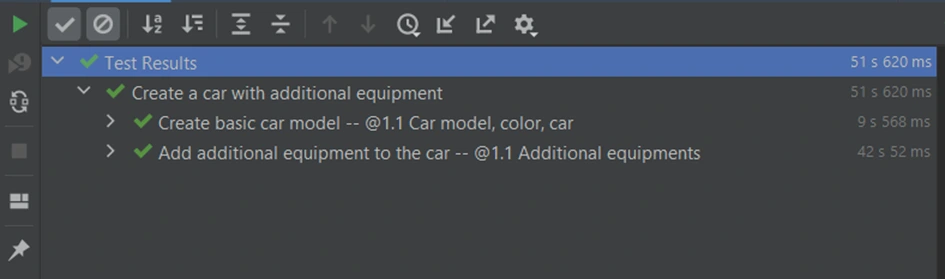
It is basic functionality, so we went through this workflow step by step on the UI side. In this test, we have many components that need to be fully loaded - pages, buttons, modals, and dropdowns. Every action takes some time - loading individual elements and clicking on them. It takes 51.63s. in total to run this scenario in PyCharm:
API enters the stage
Let’s now consider another case. What if customers change their minds about the color of the vehicle or they want to add or delete extra equipment? We need to be able to edit the order. Let's create an additional test for this workflow.
If we want to edit the vehicle, first we need to have one. We can start the Edit car test by creating a new vehicle using all the steps from the previous feature file, but we can also use API help here. Replacing repeatable steps with API requests will allow us to focus on the new functionality on the UI side. Let’s look at the Gherkin file for editing a car:

In the first scenario of this feature, we are creating a car (via API) and in the second one editing the vehicle (through UI). In scenario “Create test car via API” we created the same car as in the previous feature “Create a car with additional equipment” , where everything was done on the UI side. If we look at the result now, we can see that the whole test (creating and editing a car) took less than 17 seconds:

Part for creating a vehicle by API took 11.107 seconds. To run these steps on the UI side we needed more than 50 seconds. To be precise we’ve just saved 40.513 seconds in one test! Imagine that we have another 10 or more tests that need that functionality - it can be a big time saver.
A request for help
Key for benefit from API in UI test suite is to use popular Python library called Requests – it allows us to easily send HTTP requests. Basic POST requests can take the following form:
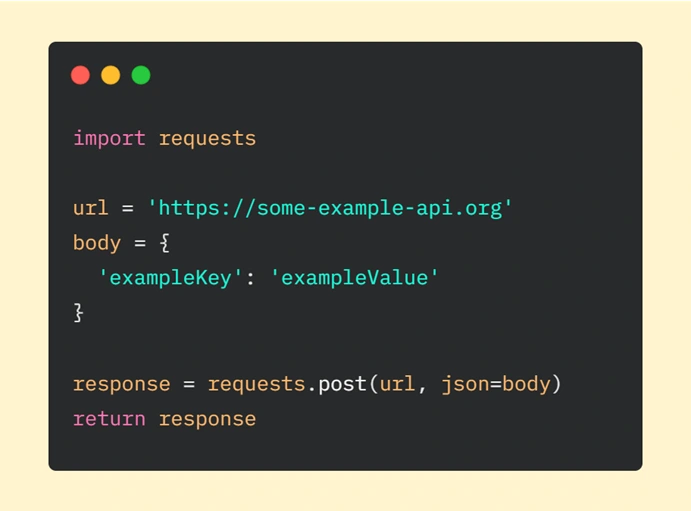
We have to start with importing the ‘requests’ module. Then we are declaring the URL of the request and data we want to send (provided as a dictionary). The next step is to make an HTTP request where we are passing our parameters (url is required, json – optional - it’s a JSON object which will be sent to the mentioned URL). In the end, we are returning the response from the server.
In our car application, this example will be a little expanded. What exactly is hidden behind lines of code responsible for creating a vehicle via API requests? I will focus on the first step of this scenario: 'Car “<car> from the model “<model>” and lacquer color “<color>” is created via API request’ . If we look deeper, we can see step implementation:
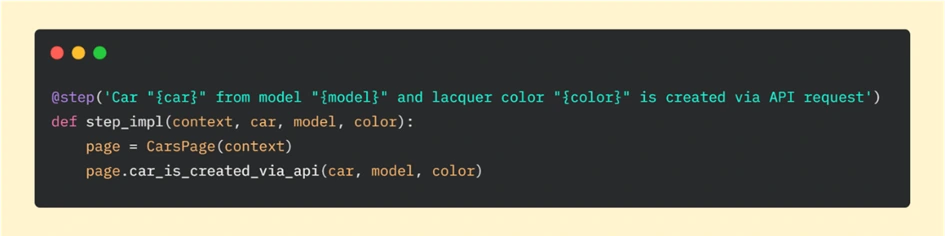
And then if we go further to the car_is_created_via_api function, we can analyze requests sent to API:
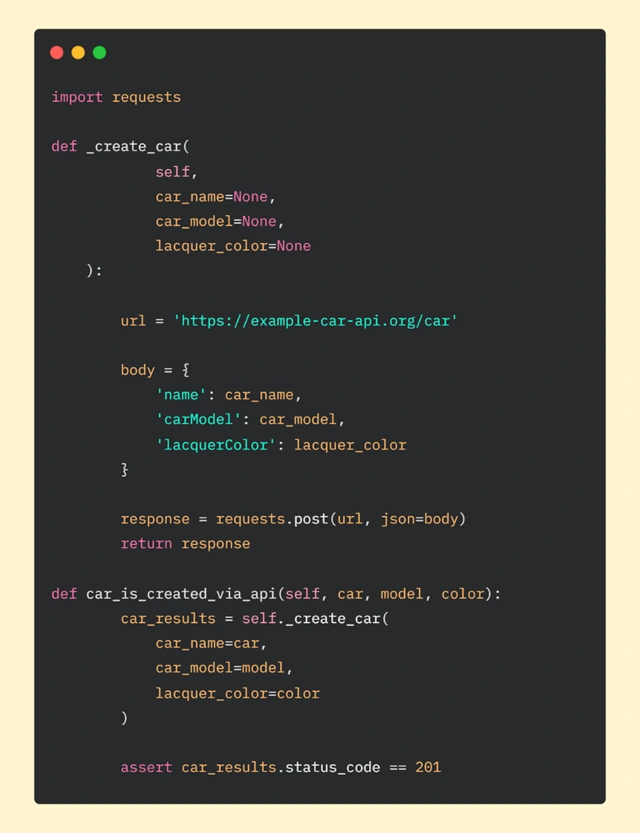
In car_is_created_via_api method, we are calling function _create_car which is responsible for requesting API. We are also passing parameters: car, model, and color. They will be used in the body of our request.
As in the basic example, in _create_car function we are declaring URL (our car API) and body. Then we are making a POST request and in the final step, we are returning the response.
After getting the response from the server, at the end of the car_is_created_function , we want to use assertion to check if we got the correct status code. Getting code 201 means that everything went as we hoped. Another result will tell us that something is wrong and we will be able to quickly (hopefully) find the gap in the code.
Good Team
We went together through the advantages of using API help in the UI automation tests suite and a comparison of two approaches to testing. We also focused on speeding up tests suite execution time using Python library Requests . We believe that after reading this article you can see that API requests can be great companions and you are encouraged to start using this concept in your test automation projects.

Grape Up guides enterprises on their data-driven transformation journey
Ready to ship? Let's talk.
Check related articles
Read our blog and stay informed about the industry's latest trends and solutions.
Automated E2E testing with Gauge and Selenium
Everyone knows how important testing is in modern software development. In today's CI/CD world tests are even more crucial, often playing the role of software acceptance criteria. With this in mind, it is clear that modern software needs good, fast, reliable and automated tests to help deliver high-quality software quickly and without major bugs.
In this article, we will focus on how to create E2E/Acceptance tests for an application with a micro-frontend using Gauge and Selenium framework. We will check how to test both parts of our application - API and frontend within one process that could be easily integrated into a CD/CD.
What is an Automated End-To-End (E2E) testing?
Automated end-to-end testing is one of the testing techniques that aims to test the functionality of the whole application (microservice in our case) and its interactions with other microservices, databases, etc. We can say that thanks to automated E2E testing, we are able to simulate real-world scenarios and test our application from the ‘user’ perspective. In our case, we can think of a ‘user’ not only as a person who will use our application but also as our API consumers - other microservices. Thanks to such a testing approach, we can be sure that our application interacts well with the surrounding world and that all components are working as designed.
What is an application with a micro-frontend?
We can say that a micro-frontend concept is a kind of an extension of the microservice approach that covers also a frontend part. So, instead of having one big frontend application and a dedicated team of frontend specialists, we can split it into smaller parts and integrate it with backend microservices and teams. Thanks to this fronted application is ‘closer’ to the backend.
The expertise is concentrated in one team that knows its domain very well. This means that the team can implement software in a more agile way, adapt to the changing requirements, and deliver the product much faster - you may also know such concept as a team/software verticalization.

Acceptance testing in practice
Let’s take a look at a real-life example of how we can implement acceptance tests in our application.
Use case
Our team is responsible for developing API (backend microservices) in a large e-commerce application. We have API automated tests integrated into our CI/CD pipeline - we use the Gauge framework to develop automated acceptance tests for our backend APIs. We execute our E2E tests against the PreProd environment every time we deploy a new version of a microservice. If the tests are successful, we can deploy the new version to the production environment.

Due to organizational changes and team verticalization, we have to assume responsibility and ownership of several micro-frontends. Unfortunately, these micro-frontend applications do not have automated tests.
We decided to solve this problem as soon as possible, with as little effort as possible. To achieve this goal, we decided to extend our automated Gauge tests to cover the frontend part as well.
As a result of investigating how to integrate frontend automated tests into our existing solution, we concluded that the easiest way to do this is to use Selenium WebDriver. Thanks to that, we can still use the Gauge framework as a base – test case definition, providing test data, etc. – and test our frontend part.
In this article, we will take a look at how we integrate Selenium WebDriver with Gauge tests for one of our micro-frontend pages– “order overview.”
Gauge framework
Gauge framework is a free and open-source framework for creating and running E2E/acceptance tests. It supports different languages like Java, JavaScript, C#, Python, and Golang so we can choose our preferred language to implement test steps.
Each test scenario consists of steps, each independent so we can reuse it across many test scenarios. Scenarios can be grouped into specifications. To create a scenario, all we have to do is call proper steps with desired arguments in a proper order. So, having proper steps makes scenario creation quite easy, even for a non-technical person.
Gauge specification is a set of test cases (scenarios) that describe the application feature that needs to be tested. Each specification is written using a Markdown-like syntax.
Visit store and search for the products
=======================================

Tags: preprod
table:testData.csv

Running before each scenario
* Login as a user <user> with password <password>

Search for products
-------------------------------------
* Goto store home page
* Search for <product>

Tear down steps for this specification
---------------------------------------
* Logout user <user>
In this Specification Visit store and search for the products is the specification heading, Search for products is a single scenario which consists of two steps Goto store home page and Search for <product> .
Login as a user is a step that will be performed before every scenario in this specification. The same applies to the Logout user step, which will be performed after each scenario.
Gauge support Specification tagging and data-driven testing.
The tag feature allows us to tag Specification or scenarios and then execute tests only for specific tags
Data-driven testing allows us to provide test data in table form. Thanks to that, the scenario will be executed for all table rows. In our example, Search for products scenario will be executed for all products listed in the testData.csv file. Gauge supports data-driven testing using external CSV files and Markdown tables defined in the Specification.
For more information about writing Gauge specifications, please visit: https://docs.gauge.org/writing-specifications?os=windows&language=java&ide=vscode#specifications-spec . Gauge framework also provides us with a test report in the form of an HTML document in which we can find detailed information about test execution.

Test reports can be also extended with screenshots of failure or custom messages
For more information about framework, and how to install and use it, please visit the official page: https://gauge.org/ .
Selenium WebDriver
Gauge itself doesn’t have a capability for automating browsers, so if we want to use it to cover frontend testing, then we need to use some web driver for that. In our example, we will use the Selenium WebDriver.
Selenium WebDriver is a part of a well-known Selenium Framework. It uses browser APIs provided by different vendors to control the browsers. This allows us to use different WebDriver implementations and run our tests using almost any popular browser. Thanks to that, we can easily test our UI on different browsers within a single test execution
For more information, please visit: https://www.selenium.dev/ .
To achieve our goal of testing both parts of our application—frontend and API endpoints—in the scope of one process, we can combine these two solutions, so we use Selenium WebDriver while implementing Gauge test steps.
Example
If we already know what kind of tools we would like to use to implement our tests so, let’s take a look at how we can do this.
First of all, let’s take a look at our project POM file.
Pom.xml
<?xml version="1.0" encoding="UTF-8"?>
<project xmlns="http://maven.apache.org/POM/4.0.0"
         xmlns:xsi="http://www.w3.org/2001/XMLSchema-instance"
         xsi:schemaLocation="http://maven.apache.org/POM/4.0.0 http://maven.apache.org/xsd/maven-4.0.0.xsd">
    <modelVersion>4.0.0</modelVersion>

    <parent>
        <groupId>org.springframework.boot</groupId>
        <artifactId>spring-boot-starter-parent</artifactId>
        <version>3.1.4</version>
        <relativePath/>
    </parent>

    <groupId>com.gauge.automated</groupId>
    <artifactId>testautomation-gauge</artifactId>
    <version>1.0.0-SNAPSHOT</version>
    <name>testautomation-gauge</name>
    <description>testautomation - user acceptance tests using gauge framework</description>

    <properties>
        <java.version>17</java.version>
        <gauge-java.version>0.10.2</gauge-java.version>
        <selenium.version>4.14.1</selenium.version>
    </properties>

    <dependencies>
        <dependency>
            <groupId>org.springframework.boot</groupId>
            <artifactId>spring-boot-starter</artifactId>
        </dependency>
        <dependency>
            <groupId>org.springframework.boot</groupId>
            <artifactId>spring-boot-starter-web</artifactId>
        </dependency>
        <dependency>
            <groupId>org.springframework.boot</groupId>
            <artifactId>spring-boot-starter-webflux</artifactId>
        </dependency>
        <dependency>
            <groupId>com.thoughtworks.gauge</groupId>
            <artifactId>gauge-java</artifactId>
            <version>${gauge-java.version}</version>
            <scope>test</scope>
        </dependency>
        <dependency>
            <groupId>org.junit.jupiter</groupId>
            <artifactId>junit-jupiter-engine</artifactId>
            <version>5.9.3</version>
            <scope>test</scope>
        </dependency>
        <dependency>
            <groupId>org.projectlombok</groupId>
            <artifactId>lombok</artifactId>
            <optional>true</optional>
            <scope>provided</scope>
        </dependency>
        <dependency>
            <groupId>org.seleniumhq.selenium</groupId>
            <artifactId>selenium-java</artifactId>
            <version>${selenium.version}</version>
        </dependency>
        <dependency>
            <groupId>org.seleniumhq.selenium</groupId>
            <artifactId>selenium-api</artifactId>
            <version>${selenium.version}</version>
        </dependency>
        <dependency>
            <groupId>org.seleniumhq.selenium</groupId>
            <artifactId>selenium-chrome-driver</artifactId>
            <version>${selenium.version}</version>
        </dependency>
        <dependency>
            <groupId>org.seleniumhq.selenium</groupId>
            <artifactId>selenium-chromium-driver</artifactId>
            <version>${selenium.version}</version>
        </dependency>
        <dependency>
            <groupId>org.seleniumhq.selenium</groupId>
            <artifactId>selenium-json</artifactId>
            <version>${selenium.version}</version>
        </dependency>
        <dependency>
            <groupId>org.seleniumhq.selenium</groupId>
            <artifactId>selenium-remote-driver</artifactId>
            <version>${selenium.version}</version>
        </dependency>
        <dependency>
            <groupId>org.seleniumhq.selenium</groupId>
            <artifactId>selenium-http</artifactId>
            <version>${selenium.version}</version>
        </dependency>
        <dependency>
            <groupId>org.seleniumhq.selenium</groupId>
            <artifactId>selenium-support</artifactId>
            <version>${selenium.version}</version>
        </dependency>
        <dependency>
            <groupId>org.seleniumhq.selenium</groupId>
            <artifactId>selenium-manager</artifactId>
            <version>${selenium.version}</version>
        </dependency>
    </dependencies>

    <build>
        <plugins>
            <plugin>
                <groupId>org.springframework.boot</groupId>
                <artifactId>spring-boot-maven-plugin</artifactId>
                <executions>
                    <execution>
                        <goals>
                            <goal>build-info</goal>
                        </goals>
                    </execution>
                </executions>
            </plugin>
            <plugin>
                <groupId>com.thoughtworks.gauge.maven</groupId>
                <artifactId>gauge-maven-plugin</artifactId>
                <version>1.6.1</version>
                <executions>
                    <execution>
                        <phase>test</phase>
                        <configuration>
                            <specsDir>specs</specsDir>
                        </configuration>
                        <goals>
                            <goal>execute</goal>
                        </goals>
                    </execution>
                </executions>
            </plugin>
        </plugins>
    </build>

</project>
As we can see, all we need to do to use the Selenium WebDriver together with Gauge is add proper dependencies to our POM file. In this example, we focus on a Chrome WebDriver implementation, but if you want to use another browser—Firefox, Edge, or Safari—all you need to do is add the proper Selenium dependency and configure the driver.
Next, what we need to do to enable Chrome Selenium WebDriver is to configure it:
protected ChromeDriver setupChromeDriver()
{
    ChromeOptions chromeOptions = new ChromeOptions();
    // we should configure our environment to run chrome as non-root user instead
    chromeOptions.addArguments("--no-sandbox");
    chromeOptions.addArguments("--remote-allow-origins=*");
    // to run chrome in a headless mode
    chromeOptions.addArguments("--headless=new");
    // to avoid Chrome crashes in certain VMs
    chromeOptions.addArguments("--disable-dev-shm-usage");
    chromeOptions.addArguments("--ignore-certificate-errors");
    return new ChromeDriver(chromeOptions);
And that’s all, now we can use Selenium WebDriver in the Gauge step implementation. If you want to use a different WebDriver implementation, you have to configure it properly, but all other steps will remain the same. Now let’s take a look at some implementation details.
Sample Specification
Create order for a login user with default payment and shipping address
============================================================================================================

Tags: test,preprod, prod
table:testData.csv

Running before each scenario
* Login as a user <user> with password <password>


Case-1: Successfully create new order
----------------------------------------------------------------------------------
* Create order draft with item "TestItem"
* Create new order for a user
* Verify order details
* Get all orders for a user <user>
* Change status <status> for order <orderId>
* Fetch and verify order <orderId>
* Remove order <orderId>


Tear down steps for this specification
---------------------------------------------------------------------------------------------------------------------------------------------------
* Delete orders for a user <user>
In our example, we use just a few simple steps, but you can use as many steps as you wish, and they can be much more complicated with more arguments and so on.
Steps implementation
Here is an implementation for some of the test steps. We use Java to implement the steps, but Gauge supports many other languages to do this so feel free to use your favorite.
import org.openqa.selenium.By;
import org.openqa.selenium.WebDriver;
import org.openqa.selenium.WebElement;
import org.openqa.selenium.chrome.ChromeDriver;
import org.springframework.http.HttpHeaders;
import org.springframework.http.ResponseEntity;
import org.springframework.web.reactive.function.client.WebClientResponseException;
import com.thoughtworks.gauge.Step;

import static org.junit.jupiter.api.Assertions.assertEquals;
import static org.junit.jupiter.api.Assertions.assertNotNull;


public class ExampleSpec extends BasicSpec
{
    @Step("Login as a user <user> with password <password>")
    public void logInAsAUser(final String login, final String password)
    {
       final ChromeDriver driver = setupChromeDriver();
       login(driver, login, password);
    }

    @Step("Create order draft with item <itemName>")
    public void createOrderDraft(final String itemName)
    {
       OrderDraftRequest request = buildDraftRequest(itemName);
       ResponseEntity<String> response = callOrderDraftEndpoint(request);

       assertNotNull(response);
       assertEquals(201, response.getStatusCodeValue());
    }

    @Step("Create new order for a user")
    public void createOrder(final String itemName)
    {
       final ChromeDriver driver = setupChromeDriver();
       createOrder(driver);
    }

    @Step("Verify order details")
    public void verifyOrderDetails()
    {
    final WebDriver driver = (WebDriver) ScenarioDataStore.get
    (SCENARIO_DATA_STORE_WEB_DRIVER);
    final WebElement orderId = driver.findElement(By.tagName("order-id"));
    validateWebElement(orderId);
    final WebElement orderDate = popLinkHeader.findElement(By.className("order-date"));
    validateWebElement(orderId);
   }
    private ResponseEntity<String> callOrderDraftEndpoint(final OrderDraftRequest request)
    {
       ResponseEntity<String> response;
       final String traceId = generateXTraceId();
       log.info("addToCart x-trace-id {}", traceId);
       try
       {
          response = webClient.post()
             .uri(uriBuilder -> uriBuilder.path(appConfiguration.getOrderDraftEndpoint())
             .header(HttpHeaders.AUTHORIZATION, "Bearer " + appConfiguration.getToken())
             .header("Accept-Language", "de")
             .bodyValue(request)
             .retrieve()
             .toEntity(String.class)
             .block(Duration.ofSeconds(100));
       }
       catch (final WebClientResponseException webClientResponseException)
       {
          response = new ResponseEntity<>(webClientResponseException.getStatusCode());
       }
       return response;
    }

    private void login(final WebDriver driver, final String login, final String password)
    {
       driver.get(getLoginUrl().toString());
       // find email input
       WebElement emailInput = driver.findElement(By.xpath("//*[@id=\"email\"]"));
       // find password input
       WebElement passwordInput = driver.findElement(By.xpath("//*[@id=\"password\"]"));
       // find login button
       WebElement loginButton = driver.findElement(By.xpath("//*[@id=\"btn-login\"]"));
       // type user email into email input
       emailInput.sendKeys(login);
       // type user password into password input
       passwordInput.sendKeys(password);
       // click on login button
       loginButton.click();
    }

    private void createOrder(WebDriver driver) {
       driver.get(getCheckoutUrl().toString());
       WebElement createOrderButton = driver.findElement(By.xpath("//*[@id=\"create-
       order\"]"));
       createOrderButton.click();

}
    private void validateWebElement(final WebElement webElement)
    {
      assertNotNull(webElement);
      assertTrue(webElement.isDisplayed());
    }
As we can see, it is fairly simple to use Selenium WebDriver within Gauge tests. WebDriver plugins provide a powerful extension to our tests and allow us to create Gauge scenarios that also test the frontend part of our application. You can use multiple WebDriver implementations to cover different web browsers, ensuring that your UI looks and behaves the same in different environments.
The presented example can be easily integrated into your CI/CD process. Thanks to this, it can be a part of the acceptance tests of our application. This will allow you to deliver your software even faster with the confidence that our changes are well-tested.
How to run Selenium BDD tests in parallel with AWS Lambda
Have you ever felt annoyed because of the long waiting time for receiving test results? Maybe after a few hours, you’ve figured out that there had been a network connection issue in the middle of testing, and half of the results can go to the trash? That may happen when your tests are dependent on each other or when you have plenty of them and execution lasts forever. It's quite a common issue. But there’s actually a solution that can not only save your time but also your money - parallelization in the Cloud.
How it started
Developing UI tests for a few months, starting from scratch, and maintaining existing tests, I found out that it has become something huge that will be difficult to take care of very soon. An increasing number of test scenarios made every day led to bottlenecks. One day when I got to the office, it turned out that the nightly tests were not over yet. Since then, I have tried to find a way to avoid such situations.
A breakthrough was the presentation of Tomasz Konieczny during the Testwarez conference in 2019. He proved that it’s possible to run Selenium tests in parallel using AWS Lambda. There’s actually one blog that helped me with basic Selenium and Headless Chrome configuration on AWS. The Headless Chrome is a light-weighted browser that has no user interface. I went a step forward and created a solution that allows designing tests in the Behavior-Driven Development process and using the Page Object Model pattern approach, run them in parallel, and finally - build a summary report.
Setting up the project
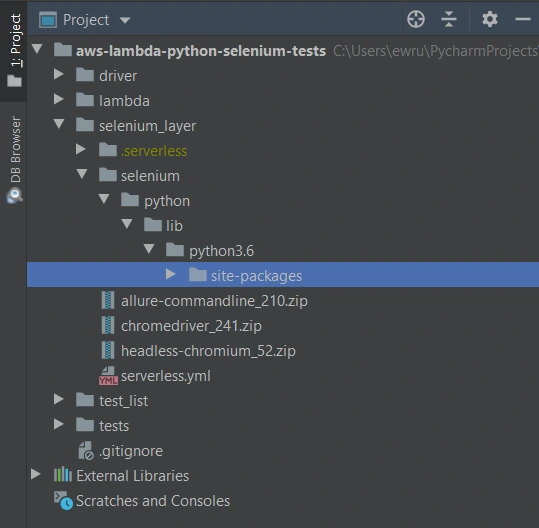
The first thing we need to do is signing up for Amazon Web Services. Once we have an account and set proper values in credentials and config files (.aws directory), we can create a new project in PyCharm, Visual Studio Code, or in any other IDE supporting Python. We’ll need at least four directories here. We called them ‘lambda’, ‘selenium_layer’, ‘test_list’, ‘tests’ and there’s also one additional - ‘driver’, where we keep a chromedriver file, which is used when running tests locally in a sequential way.
In the beginning, we’re going to install the required libraries. Those versions work fine on AWS, but you can check newer if you want.
requirements.txt
allure_behave==2.8.6
behave==1.2.6
boto3==1.10.23
botocore==1.13.23
selenium==2.37.0
What’s important, we should install them in the proper directory - ‘site-packages’.
We’ll need also some additional packages:
Allure Commandline ( download )
Chromedriver ( download )
Headless Chromium ( download )
All those things will be deployed to AWS using Serverless Framework, which you need to install following the docs . The Serverless Framework was designed to provision the AWS Lambda Functions, Events, and infrastructure Resources safely and quickly. It translates all syntax in serverless.yml to a single AWS CloudFormation template which is used for deployments.
Architecture - Lambda Layers
Now we can create a serverless.yml file in the ‘selenium-layer’ directory and define Lambda Layers we want to create. Make sure that your .zip files have the same names as in this file. Here we can also set the AWS region in which we want to create our Lambda functions and layers.
serverless.yml
service: lambda-selenium-layer
provider:
name: aws
runtime: python3.6
region: eu-central-1
timeout: 30
layers:
selenium:
path: selenium
CompatibleRuntimes: [
"python3.6"
]
chromedriver:
package:
artifact: chromedriver_241.zip
chrome:
package:
artifact: headless-chromium_52.zip
allure:
package:
artifact: allure-commandline_210.zip
resources:
Outputs:
SeleniumLayerExport:
Value:
Ref: SeleniumLambdaLayer
Export:
Name: SeleniumLambdaLayer
ChromedriverLayerExport:
Value:
Ref: ChromedriverLambdaLayer
Export:
Name: ChromedriverLambdaLayer
ChromeLayerExport:
Value:
Ref: ChromeLambdaLayer
Export:
Name: ChromeLambdaLayer
AllureLayerExport:
Value:
Ref: AllureLambdaLayer
Export:
Name: AllureLambdaLayer
Within this file, we’re going to deploy a service consisting of four layers. Each of them plays an important role in the whole testing process.
Creating test set
What would the tests be without the scenarios? Our main assumption is to create test files running independently. This means we can run any test without others and it works. If you're following clean code, you'll probably like using the Gherkin syntax and the POM approach. Behave Framework supports both.
What gives us Gherkin? For sure, better readability and understanding. Even if you haven't had the opportunity to write tests before, you will understand the purpose of this scenario.
01.OpenLoginPage.feature
@smoke
@login
Feature: Login to service
Scenario: Login
Given Home page is opened
And User opens Login page
When User enters credentials
And User clicks Login button
Then User account page is opened
Scenario: Logout
When User clicks Logout button
Then Home page is opened
And User is not authenticated
In the beginning, we have two tags. We add them in order to run only chosen tests in different situations. For example, you can name a tag @smoke and run it as a smoke test, so that you can test very fundamental app functions. You may want to test only a part of the system like end-to-end order placing in the online store - just add the same tag for several tests.
Then we have the feature name and two scenarios. Those are quite obvious, but sometimes it’s good to name them with more details. Following steps starting with Given, When, Then and And can be reused many times. That’s the Behavior-Driven Development in practice. We’ll come back to this topic later.
Meantime, let’s check the proper configuration of the Behave project.

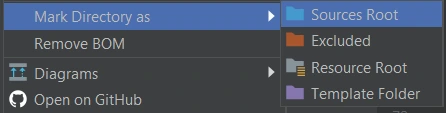
We definitely need a ‘feature’ directory with ‘pages’ and ‘steps’. Make the ‘feature’ folder as Sources Root. Just right-click on it and select the proper option. This is the place for our test scenario files with .feature extension.
It’s good to have some constant values in a separate file so that it will change only here when needed. Let’s call it config.json and put the URL of the tested web application.
config.json
{
"url": "http://drabinajakuba.atthost24.pl/"
}
One more thing we need is a file where we set webdriver options.
Those are required imports and some global values like, e.g. a name of AWS S3 bucket in which we want to have screenshots or local directory to store them in. As far as we know, bucket names should be unique in whole AWS S3, so you should probably change them but keep the meaning.
environment.py
import os
import platform
from datetime import date, datetime
import json
import boto3
from selenium import webdriver
from selenium.webdriver.chrome.options import Options
REPORTS_BUCKET = 'aws-selenium-test-reports'
SCREENSHOTS_FOLDER = 'failed_scenarios_screenshots/'
CURRENT_DATE = str(date.today())
DATETIME_FORMAT = '%H_%M_%S'
Then we have a function for getting given value from our config.json file. The path of this file depends on the system platform - Windows or Darwin (Mac) would be local, Linux in this case is in AWS. If you need to run these tests locally on Linux, you should probably add some environment variables and check them here.
def get_from_config(what):
if 'Linux' in platform.system():
with open('/opt/config.json') as json_file:
data = json.load(json_file)
return data[what]
elif 'Darwin' in platform.system():
with open(os.getcwd() + '/features/config.json') as json_file:
data = json.load(json_file)
return data[what]
else:
with open(os.getcwd() + '\\features\\config.json') as json_file:
data = json.load(json_file)
return data[what]
Now we can finally specify paths to chromedriver and set browser options which also depend on the system platform. There’re a few more options required on AWS.
def set_linux_driver(context):
"""
Run on AWS
"""
print("Running on AWS (Linux)")
options = Options()
options.binary_location = '/opt/headless-chromium'
options.add_argument('--allow-running-insecure-content')
options.add_argument('--ignore-certificate-errors')
options.add_argument('--disable-gpu')
options.add_argument('--headless')
options.add_argument('--window-size=1280,1000')
options.add_argument('--single-process')
options.add_argument('--no-sandbox')
options.add_argument('--disable-dev-shm-usage')
capabilities = webdriver.DesiredCapabilities().CHROME
capabilities['acceptSslCerts'] = True
capabilities['acceptInsecureCerts'] = True
context.browser = webdriver.Chrome(
'/opt/chromedriver', chrome_options=options, desired_capabilities=capabilities
)
def set_windows_driver(context):
"""
Run locally on Windows
"""
print('Running on Windows')
options = Options()
options.add_argument('--no-sandbox')
options.add_argument('--window-size=1280,1000')
options.add_argument('--headless')
context.browser = webdriver.Chrome(
os.path.dirname(os.getcwd()) + '\\driver\\chromedriver.exe', chrome_options=options
)
def set_mac_driver(context):
"""
Run locally on Mac
"""
print("Running on Mac")
options = Options()
options.add_argument('--no-sandbox')
options.add_argument('--window-size=1280,1000')
options.add_argument('--headless')
context.browser = webdriver.Chrome(
os.path.dirname(os.getcwd()) + '/driver/chromedriver', chrome_options=options
)
def set_driver(context):
if 'Linux' in platform.system():
set_linux_driver(context)
elif 'Darwin' in platform.system():
set_mac_driver(context)
else:
set_windows_driver(context)
Webdriver needs to be set before all tests, and in the end, our browser should be closed.
def before_all(context):
set_driver(context)
def after_all(context):
context.browser.quit()
Last but not least, taking screenshots of test failure. Local storage differs from the AWS bucket, so this needs to be set correctly.
def after_scenario(context, scenario):
if scenario.status == 'failed':
print('Scenario failed!')
current_time = datetime.now().strftime(DATETIME_FORMAT)
file_name = f'{scenario.name.replace(" ", "_")}-{current_time}.png'
if 'Linux' in platform.system():
context.browser.save_screenshot(f'/tmp/{file_name}')
boto3.resource('s3').Bucket(REPORTS_BUCKET).upload_file(
f'/tmp/{file_name}', f'{SCREENSHOTS_FOLDER}{CURRENT_DATE}/{file_name}'
)
else:
if not os.path.exists(SCREENSHOTS_FOLDER):
os.makedirs(SCREENSHOTS_FOLDER)
context.browser.save_screenshot(f'{SCREENSHOTS_FOLDER}/{file_name}')
Once we have almost everything set, let’s dive into single test creation. Page Object Model pattern is about what exactly hides behind Gherkin’s steps. In this approach, we treat each application view as a separate page and define its elements we want to test. First, we need a base page implementation. Those methods will be inherited by all specific pages. You should put this file in the ‘pages’ directory.
base_page_object.py
from selenium.webdriver.common.action_chains import ActionChains
from selenium.webdriver.support.ui import WebDriverWait
from selenium.webdriver.support import expected_conditions as EC
from selenium.common.exceptions import *
import traceback
import time
from environment import get_from_config
class BasePage(object):
def __init__(self, browser, base_url=get_from_config('url')):
self.base_url = base_url
self.browser = browser
self.timeout = 10
def find_element(self, *loc):
try:
WebDriverWait(self.browser, self.timeout).until(EC.presence_of_element_located(loc))
except Exception as e:
print("Element not found", e)
return self.browser.find_element(*loc)
def find_elements(self, *loc):
try:
WebDriverWait(self.browser, self.timeout).until(EC.presence_of_element_located(loc))
except Exception as e:
print("Element not found", e)
return self.browser.find_elements(*loc)
def visit(self, url):
self.browser.get(url)
def hover(self, element):
ActionChains(self.browser).move_to_element(element).perform()
time.sleep(5)
def __getattr__(self, what):
try:
if what in self.locator_dictionary.keys():
try:
WebDriverWait(self.browser, self.timeout).until(
EC.presence_of_element_located(self.locator_dictionary[what])
)
except(TimeoutException, StaleElementReferenceException):
traceback.print_exc()
return self.find_element(*self.locator_dictionary[what])
except AttributeError:
super(BasePage, self).__getattribute__("method_missing")(what)
def method_missing(self, what):
print("No %s here!", what)
That’s a simple login page class. There’re some web elements defined in locator_dictionary and methods using those elements to e.g., enter text in the input, click a button, or read current values. Put this file in the ‘pages’ directory.
login.py
from selenium.webdriver.common.by import By
from .base_page_object import *
class LoginPage(BasePage):
def __init__(self, context):
BasePage.__init__(
self,
context.browser,
base_url=get_from_config('url'))
locator_dictionary = {
'username_input': (By.XPATH, '//input[@name="username"]'),
'password_input': (By.XPATH, '//input[@name="password"]'),
'login_button': (By.ID, 'login_btn'),
}
def enter_username(self, username):
self.username_input.send_keys(username)
def enter_password(self, password):
self.password_input.send_keys(password)
def click_login_button(self):
self.login_button.click()
What we need now is a glue that will connect page methods with Gherkin steps. In each step, we use a particular page that handles the functionality we want to simulate. Put this file in the ‘steps’ directory.
login.py
from behave import step
from environment import get_from_config
from pages import LoginPage, HomePage, NavigationPage
@step('User enters credentials')
def step_impl(context):
page = LoginPage(context)
page.enter_username('test_user')
page.enter_password('test_password')
@step('User clicks Login button')
def step_impl(context):
page = LoginPage(context)
page.click_login_button()
It seems that we have all we need to run tests locally. Of course, not every step implementation was shown above, but it should be easy to add missing ones.
If you want to read more about BDD and POM, take a look at Adrian’s article
All files in the ‘features’ directory will also be on a separate Lambda Layer. You can create a serverless.yml file with the content presented below.
serverless.yml
service: lambda-tests-layer
provider:
name: aws
runtime: python3.6
region: eu-central-1
timeout: 30
layers:
features:
path: features
CompatibleRuntimes: [
"python3.6"
]
resources:
Outputs:
FeaturesLayerExport:
Value:
Ref: FeaturesLambdaLayer
Export:
Name: FeaturesLambdaLayer
This is the first part of the series covering running Parallel Selenium tests on AWS Lambda. More here !
Automation testing: Making tests independent from existing data
Each test automation project is different. The apps are different, the approach is different, even though the tools and frameworks used might seem to be the same. Each project brings different challenges and requirements, resulting in a need to adapt to solutions being delivered - although all of it is covered by the term "software testing". This time we want to tackle the issue of test data being used in automation testing.
Setting up the automation testing project
Let's consider the following scenario: as usual, our project implements the Page Object Pattern approach with the use of Cucumber .). This part is no novelty - tidy project structure and test scenarios written in Gherkin, which is easily understandable by non-technical team members. However, the application being tested required total independence from data existing in the database, even in Development and QA environments.
The solution implemented by our team had to ensure that every Test Scenario - laid out in each Feature File, which contains steps for testing particular functionalities, was completely independent from data existing on the environment and did not interfere with other Test Cases. What was also important, the tests were also meant to run simultaneously on Selenium Grid. In a nutshell, Feature Files couldn't rely on any data (apart from login credentials) and had to create all of the test data each time they were run.
To simplify the example we are going to discuss, we will describe an approach where only one user will be used to log in to the app. Its credentials remain unchanged so there are two things to do here to meet the project criteria: the login credentials have to be passed to the login scenario and said scenario has to be triggered before each Feature File since they are run simultaneously by a runner.
Independent logging in
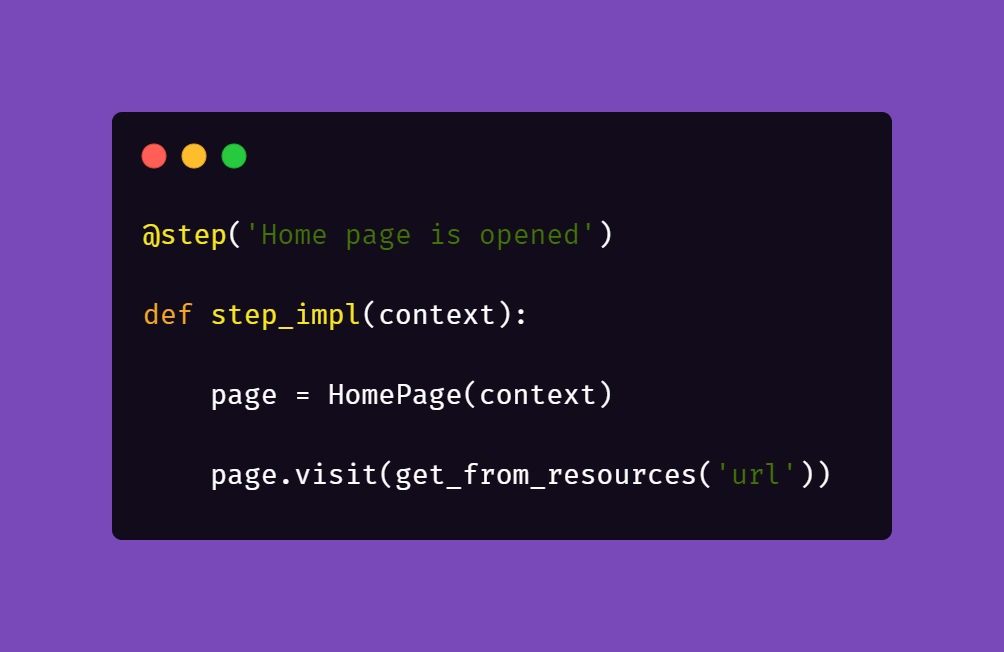
The first part is really straightforward; in your environment file you need to include a similar block of code:
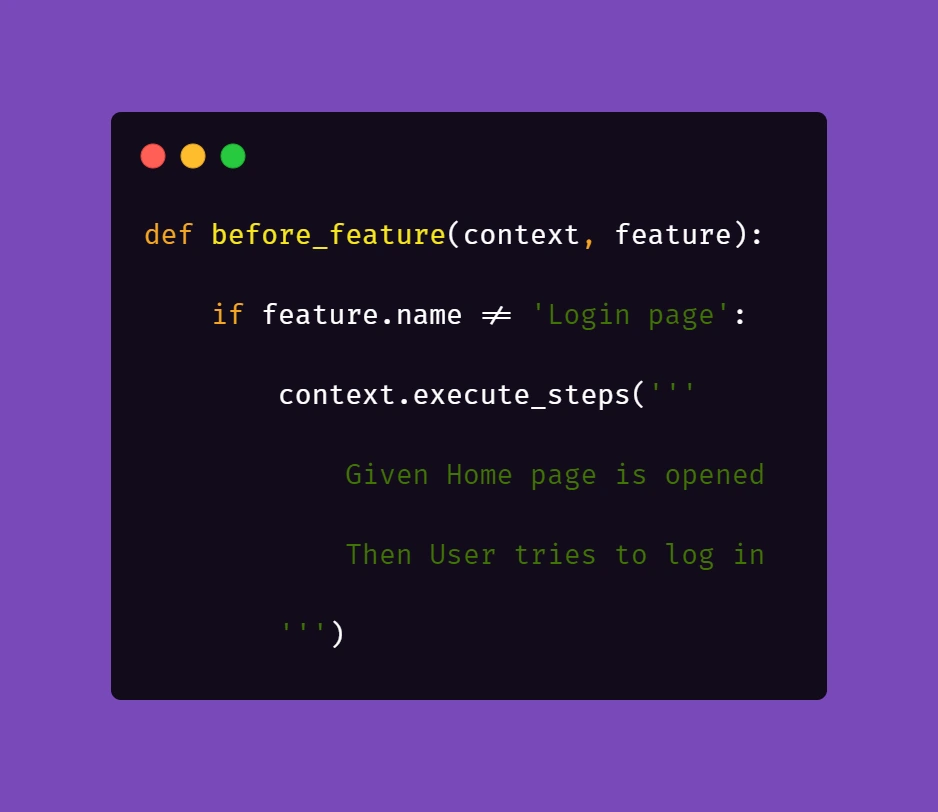
What this does is, before each feature file, which is not a Login scenario, Selenium will attempt to open the homepage of the project and attempt to log in.
Then, we need to ensure that if a session is active, logging in should be skipped.

Therefore, in the second step 'User tries to log in' we verify if within the instance of running a particular feature file, the user's session is still active. In our case, when the homepage is opened and a logged user's session is active, the app's landing page is opened. Otherwise, the user is redirected to the login page. So in the above block of code we simply verify whether the login page is opened and if login_prompt_is_displayed method returns True , login steps are executed.
Once we dealt with logging in during simultaneous test runs, we need to handle the data being used during the tests. Again, let us simplify the example: let's assume that our hypothetical application allows its users - store staff - to add and review products the company has to offer. The system allows manipulating many data fields that affect other factors in workflows, e.g. product bundles, discounts, and suppliers. On top of that, the stock constantly grows and changes, thus even in test environments we shouldn't just run tests against migrated data to ensure consistency in test results.
As a result of that, our automation tests will have to cover the whole flow, adding all the necessary elements to the system to test against later on. In short: if we want to cover a scenario for editing certain data in a product, the tests will need to create that specific product, save it, search for it, manipulate the data, save changes and verify the results.
Create and manipulate
Below are the test steps to the above scenario laid out in Gherkin to illustrate what will it look like:

While the basic premise of the above scenarios may seem straightforward, the tricky part may be ensuring consistency during test runs. Of course, scripting a single scenario of adding an item in the app sounds simple, but what if we would have to do that a couple dozens of time during the regression suite run?
We want to have consistent, trackable test data while avoiding multiplying lines of code. To achieve that, we introduced another file to the project structure called 'globals' and placed it in the directory of feature files. Please note that in the above snippet, we extensively use "Examples" sections along with the "Scenario Outline" approach in Gherkin. We do that to pass parameters into test step definitions and methods that create and manipulate the actions we want to test in the application. That first stage of parametrization of a test scenario works in conjunction with the aforementioned 'globals' file. Let's consider the following contents of such file:
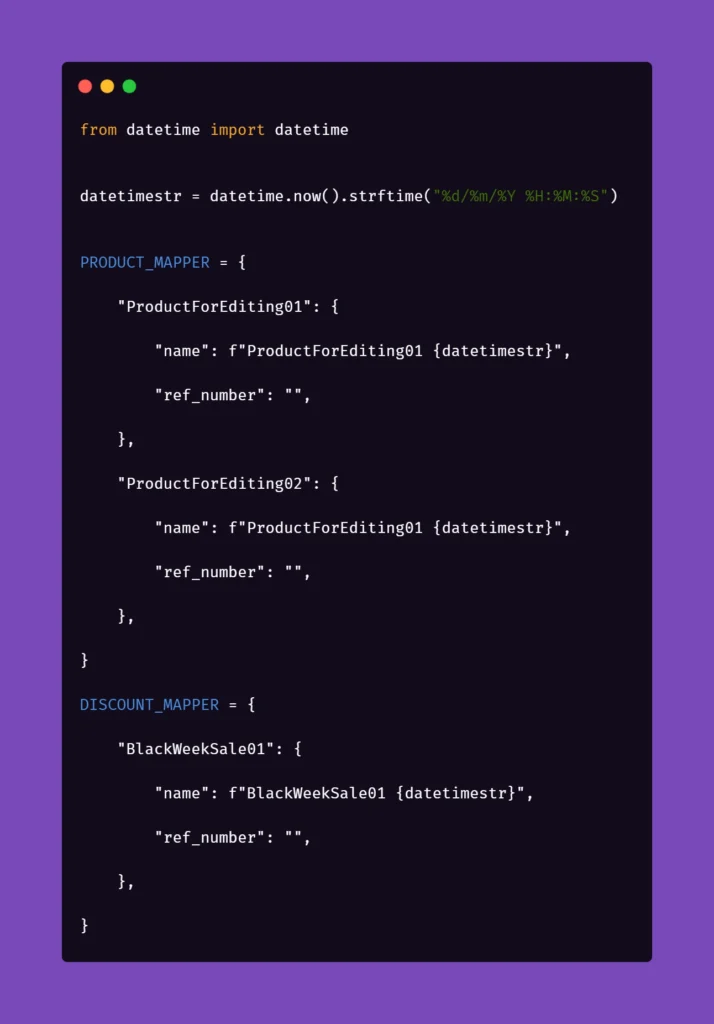
Inside the ‘globals’ file, you can find mappers for each type of object that the application can create and manipulate, for now including only a name and a reference number as an empty string. As you can see, each element will receive a datetime stamp right after its core name, each time the object in the mapper is called for. That will ensure the data created will always be unique. But what is the empty string for, you may ask?
The answer is as simple as its usage: we can store different parameters of objects inside the app that we test. For example, if a certain object can be found only by its reference number, which is unique and assigned by the system after creating, e.g., a product, we might want to store that in the mapper to use it later. But why stop there? The possibilities go pretty much as far as your imagination and patience go. You can use mappers to pass on various parameters to test steps if you need:

As you can see, the formula of mappers can really come in handy when your test suite needs to create somewhat repeatable, custom data for tests. The above snippet includes parameters for the creation of an item in the app which is a promotional campaign including certain types of products. Above that, you can see a mapping for a product that falls into one of the categories qualifying it for the promotional campaign. So hypothetically, if you want to test a scenario where enabling a promotional campaign will automatically discount certain products in the app, the mapping could help with that. But let's stick to basic examples to illustrate how to pass these parameters into the methods behind test steps.
Let us begin with the concept of creating products mentioned in the Gherkin snippet. Below is the excerpt from /steps file for step "User typed in "<product name>"":
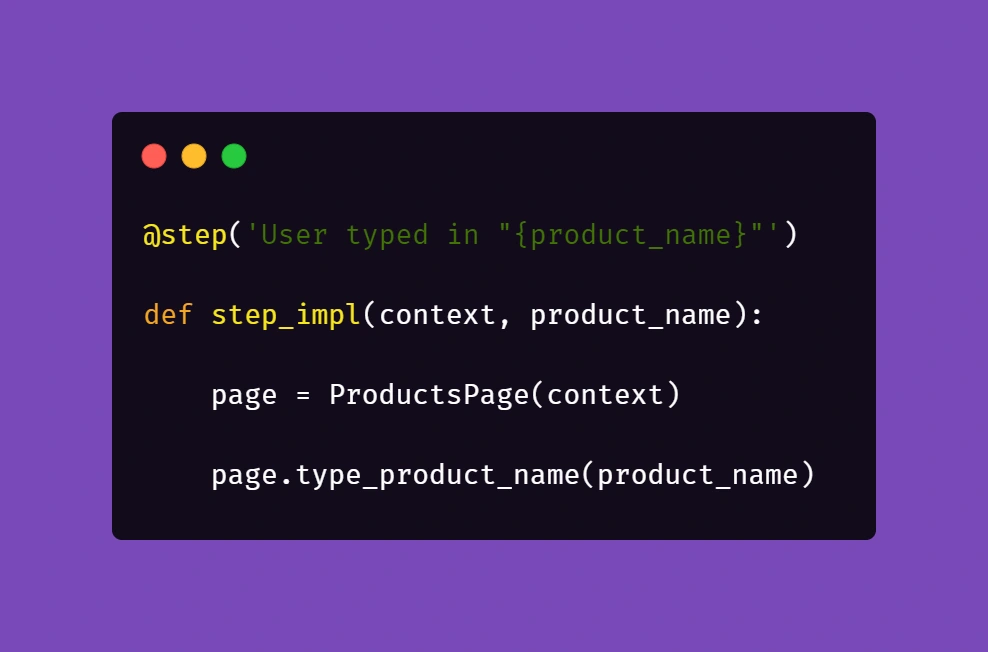
Above, we just simply pass the parameter from Gherkin to the method. Nothing fancy here. But it gets more interesting in /pages file:
First, you'll need to import a globals file to get to the data mapped out there:
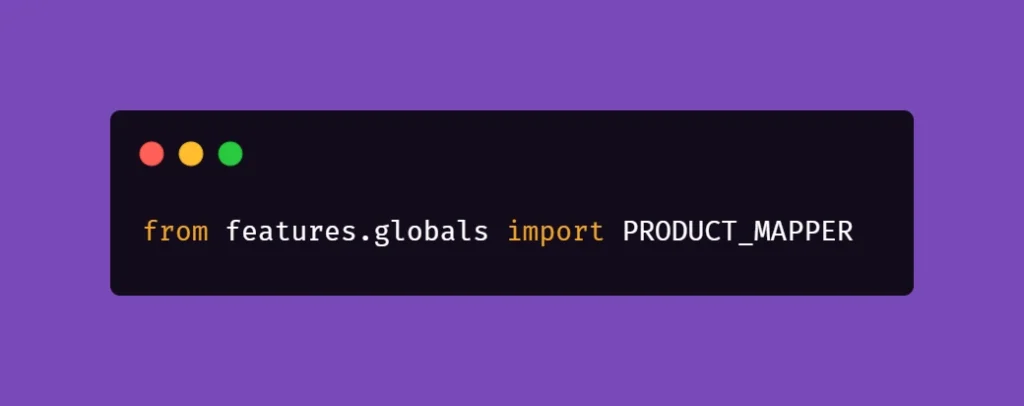
Next, we want to extract the data from mapper:
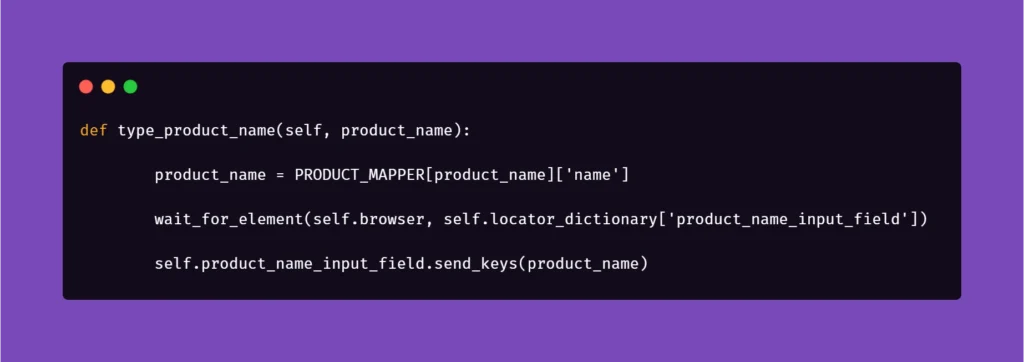
Basically, the name for the product inputted in the Examples section in Scenario Outline matches the name in PRODUCT_MAPPER . Used as a variable, it allows Selenium to input the same name with a timestamp each time the scenario asks for the creation of a certain object. This concept can be used quite extensively in the test code, parameterizing anything you need.
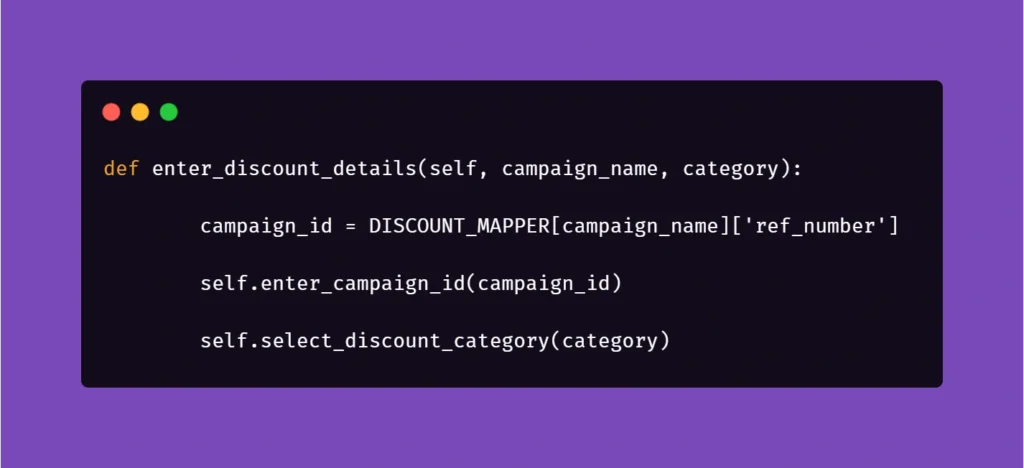
And another example:

Here, we get the data from mapper to create a specific locator to use in a specific context. This way, if the app supports it, test code can be reduced due to parametrization.
We hope that the concepts presented in this article will help you get on with your work on test automation suites. These ideas should help you automate tests faster, more clever, and much more efficiently, resulting in maximum consistency and stable results.
Interested in our services?
Reach out for tailored solutions and expert guidance.