Practical Tips to Testing React Apps with Selenium


If you ever had to write some automation scripts for an app with the frontend part done in React and you used Selenium Webdriver to get it to work, you’ve probably noticed that those two do not always get along very well. Perhaps you had to ‘hack’ your way through the task, and you were desperately searching for solutions to help you finish the job. I’ve been there and done that – so now you don’t have to. If you’re looking for a bunch of tricks which you can learn and expand your automation testing skillset, you’ve definitely come to the right place. Below I’ll share with you several solutions to problems I’ve encountered in my experience with testing against React with Selenium. Code examples will be presented for Python binding.
They see me scrolling
First, let’s take a look at scrolling pages. To do that, the solution that often comes to mind in automation testing is using JavaScript. Since we’re using Python here, the first search result would probably suggest using something like this:
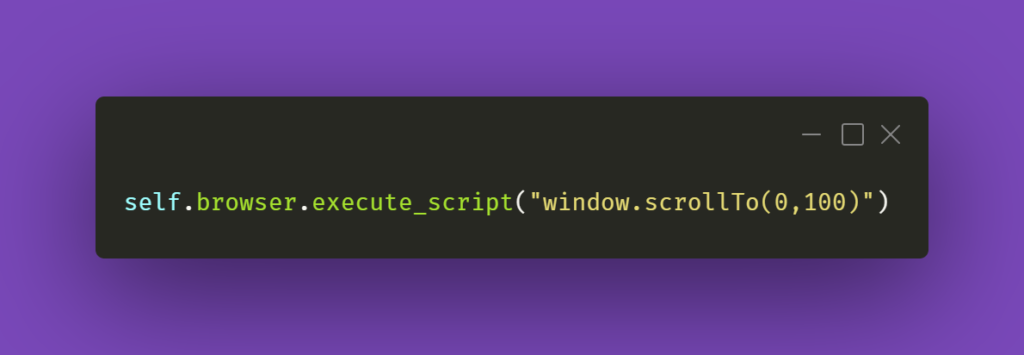
The first argument in the JS part is the number of pixels horizontally, and the second one is the number of pixels vertically. If we just paste window.scrollTo(0,100) into browsers’ console with some webpage opened, the result of the action will be scrolling the view vertically to the pixel position provided.
You could also try the below line of code:

And again, you can see how it works by pasting window.scrollBy(0,100) into browsers’ console – the page will scroll down by the number of pixels provided. If you do this repeatedly, you’ll eventually reach the bottom of the page.
However, that might not always work wonders for you. Perhaps you do not want to scroll the whole page, but just a part of it – the scrollbars might be confusing, and when you think it’s the whole page you need to scroll, it might be just a portion of it. In that case, here’s what you need to do. First, locate the React element you want to scroll. Then, make sure it has an ID assigned to it. If not, do it yourself or ask your friendly neighborhood developer to do it for you. Then, all you have to do is write the following line of code:
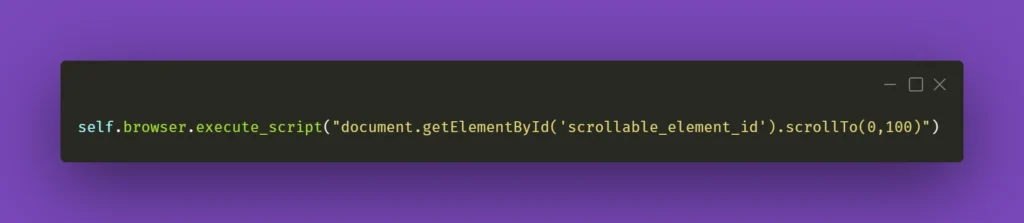
Obviously, don’t forget to change ‘scrollable_element_id’ to an ID of your element. That will perform a scroll action within the selected element to the position provided in arguments. Or, if needed, you can try .scrollBy instead of .scrollTo to get a consistent, repeatable scrolling action.
To finish off, you could also make a helper method out of it and call it whenever you need it:
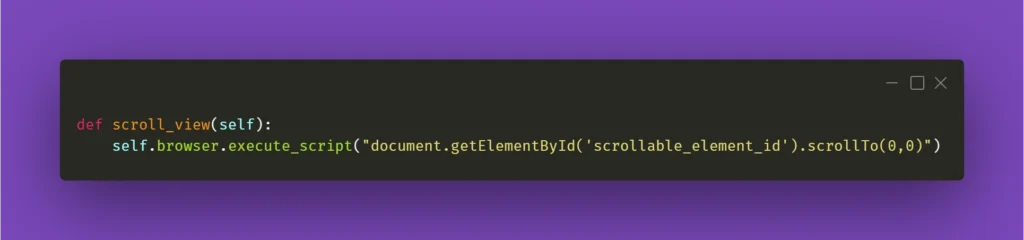
I’ll be mentioning the above method in the following paragraph, so please keep in mind what scroll_view is about.
Still haven’t found what you were looking for
Now that you have moved scrolling problems out of the way, locating elements and interacting with them on massive React pages should not bother you anymore, right? Well, not exactly. If you need to perform some action on an element that exists within a page, it has to be scrolled into view so you can work with it. And Selenium does not automatically do that. Let’s assume that you’re working on a web app that has various sub-pages, or tabs. Each of those tabs contains elements of a different sort but arranged in similar tables with search bars on top of each table at the beginning of the tab. Imagine the following scenario: you navigate to the first tab, scroll the view down, then navigate to the second tab, and you want to use the search bar at the top of the page. Sounds easy, doesn’t it?
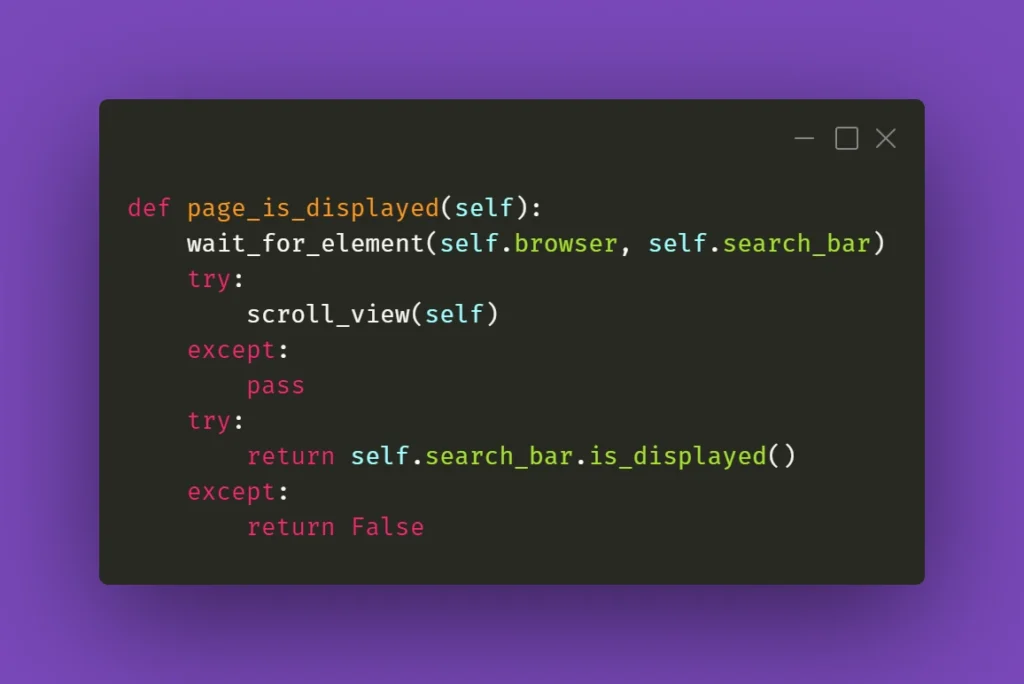
What you need to be aware of is the React’s feature which does not always move the view to the top of the page after switching subpages of the app. In this case, to interact with the aforementioned search box you need to scroll the view to the starting position. That’s why scroll_view method in previous paragraph took (0,0) as .scrollTo arguments. You could use it before interacting with an element just to make sure it’s in the view and can be found by Selenium. Here’s an example:
When it doesn’t click
Seems like a basic action like clicking on an element should be bulletproof and never fail. Yet again, miracles happen and if you’re losing your mind trying to find out what’s going on, remember that Selenium doesn’t always work great with React. If you have to deal with some stubborn element, such as a checkbox, for example, you could just simply make the code attempt the action several times:
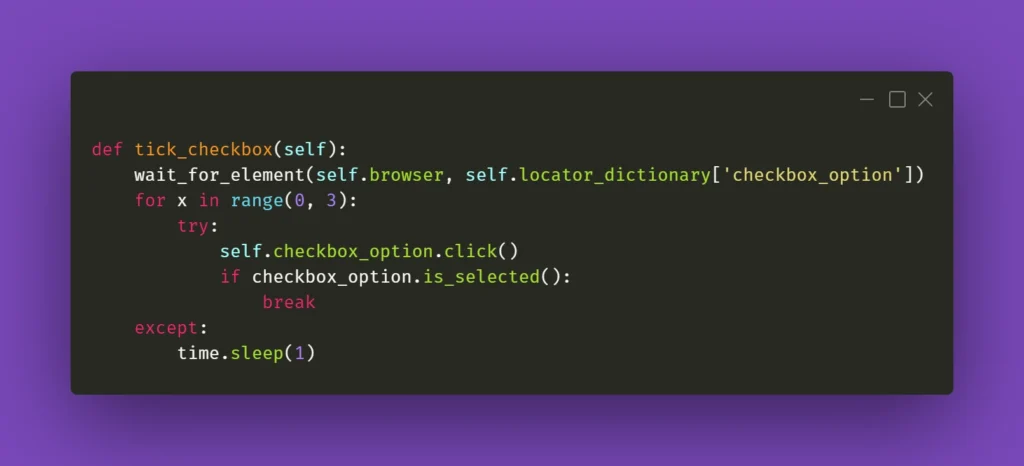
The key here is the if statement; it has to verify whether the requested action had actually taken place. In the above case, a checkbox is selected, and Selenium has a method for verifying that. In other situations, you could just provide a specific selector which applies to a particular element when it changes its state, eg., an Xpath similar to this:

In the above example, Xpath contains generic Material-UI classes, but it could be anything as long as it points out the exact element you needed when it changed its state to whichever you wanted.
Clear situation
Testing often includes dealing with various forms that we need to fill and verify. Fortunately, Selenium’s send_keys() method usually does the job. But when it doesn’t, you could try clicking the text field before inputting the value:
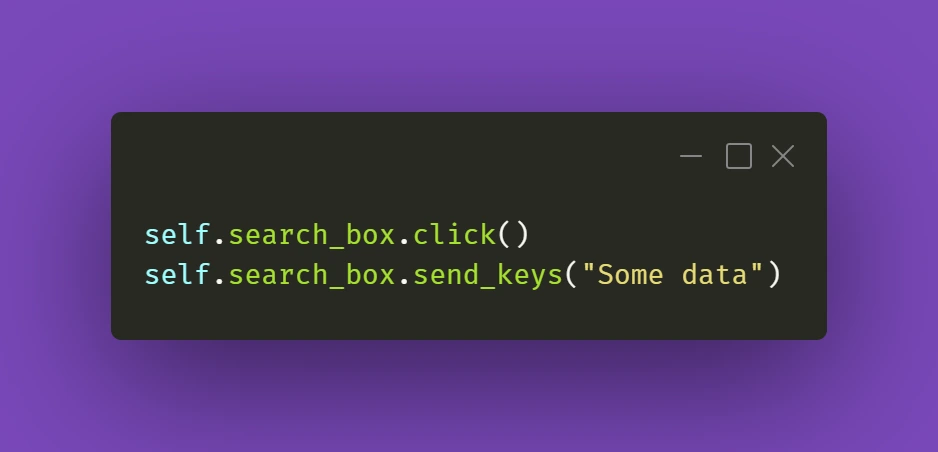
It’s a simple thing to do, but we might sometimes have the tendency to forget about such trivial solutions. Anyway, it gets the job done.
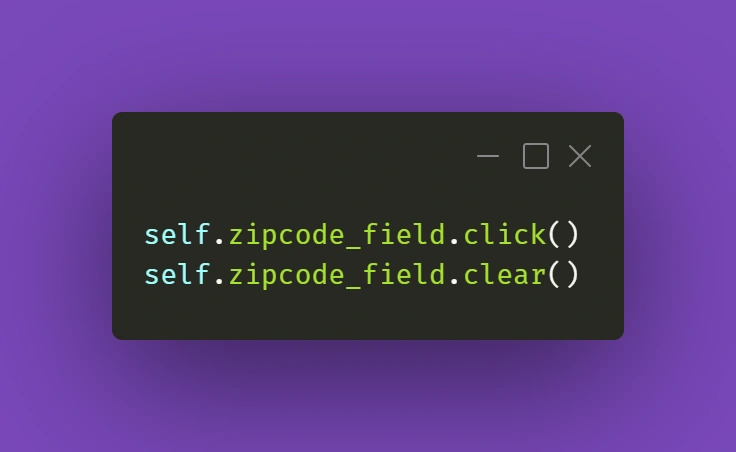
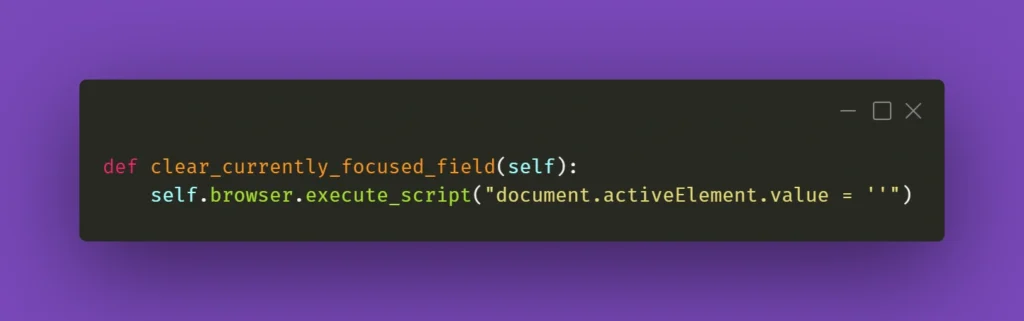
The trickier part might actually be getting rid of data in already filled out forms. And Selenium’s .clear() method doesn’t cooperate as you would expect it to do. If getting the field into focus just like in the above example doesn’t work out for you:
there is a solution that uses some JavaScript (again!). Just make sure your cursor is focused on the field you want to clear and use the following line:

You can also wrap it into a nifty little helper as I did:
While this should work fine 99% of the time, there might be a situation with a stubborn text field where React quickly restores the previous value. What you can do in such a situation is experiment with sending an empty string to that field right after clearing it or sending some whitespace to it:
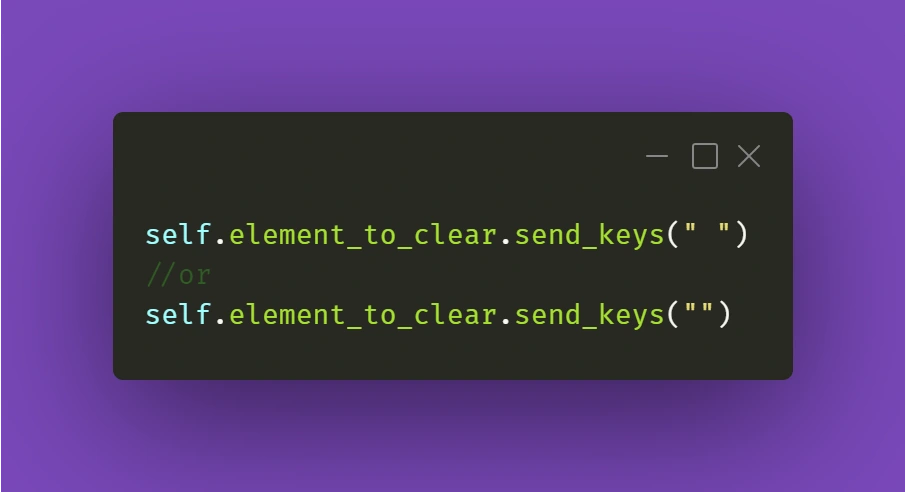
Just make sure it works for you!
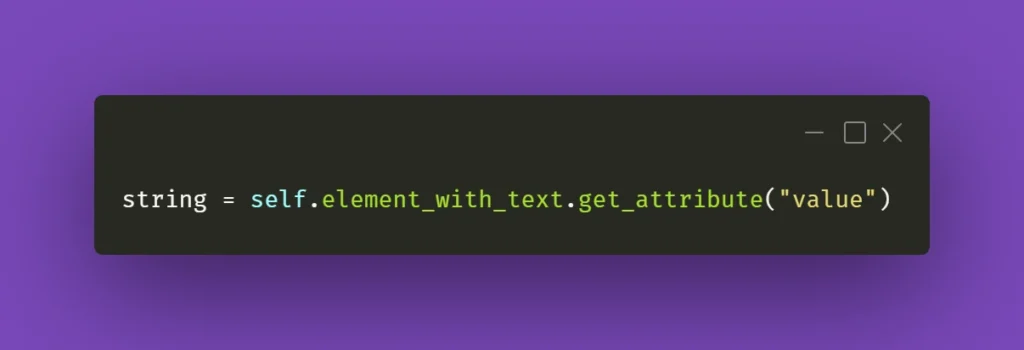
Continuing the topic of the text in various fields, which sometimes have to be verified or checked after particular conditions are met, sometimes you need to make sure you’re using the right method to extract the text value of an element. They might come in different forms, but the ones below are used quite often. Text in element could be extracted by Selenium with .get_attribute() method:
Or sometimes it’s just enough to use .text() method:
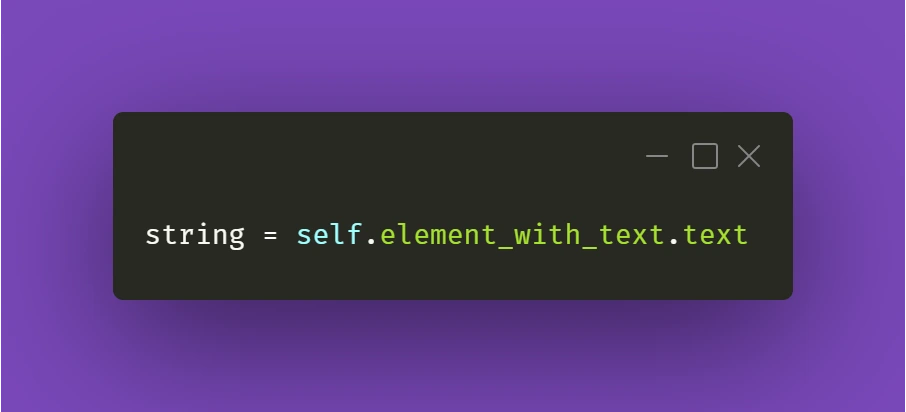
It all depends on the context and the element you’re working with. So don’t fall into the trap of assuming that all forms and elements in the app are exactly the same. Always check twice, you’ll thank yourself for that, and in the end, you’ll save tons of time!
React Apps – Keep on testing!
Hopefully, the tips and tricks I presented above will prove most useful for you in your testing projects. There’s definitely more to share within the testing field, so make sure you stay tuned in for other articles on our blog!
Is it insightful?
Share the article!
Check related articles
Read our blog and stay informed about the industry's latest trends and solutions.
see all articles

Testing iOS Applications Using Appium, Cucumber, And Serenity – A Recipe For Quality
Read the article